Installing System Components 91
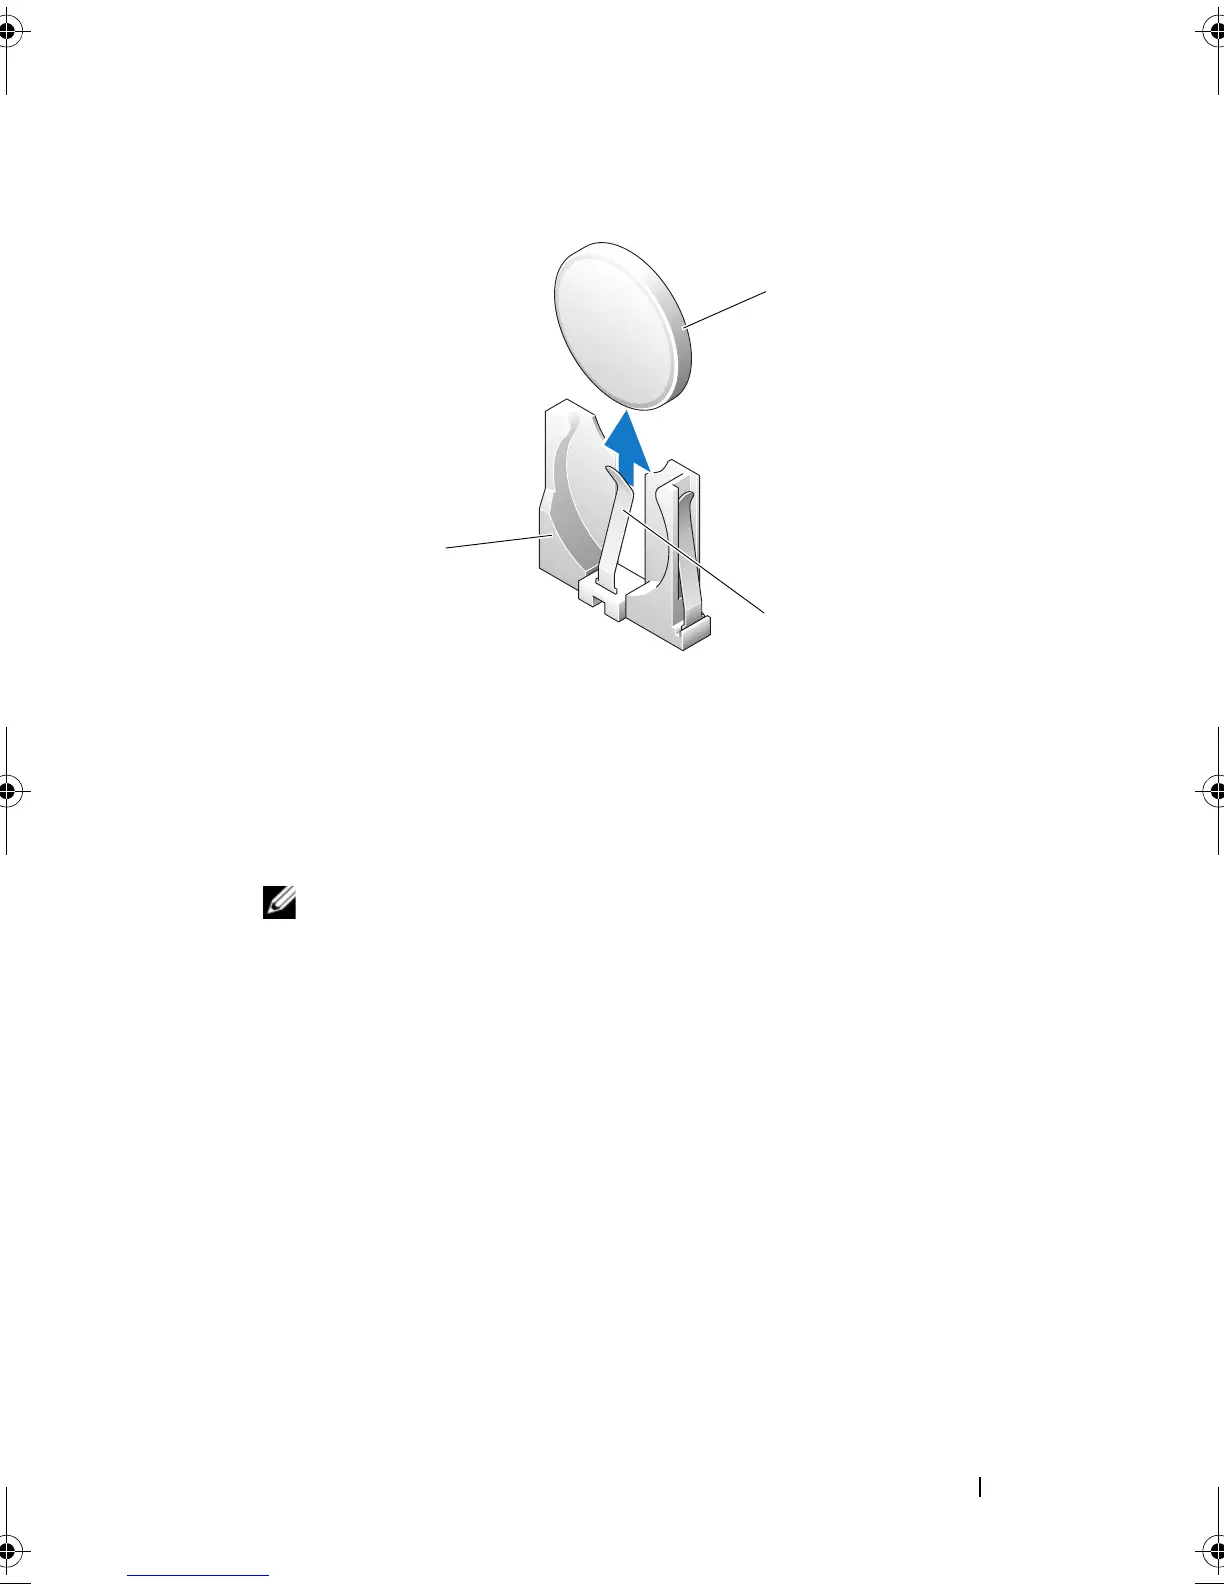
Figure 3-26. Removing and Installing the System Battery
Installing the System Battery
1
Push the new battery into the battery socket as shown in Figure 3-26
.
NOTE: The side of the battery labeled "+" (plus sign) must face toward the
open side of the battery socket.
2 Close the system. See
"Closing the System" on page 47
.
3
Reconnect the system to the electrical outlet and turn on the system and
attached peripherals.
4
Enter the System Setup program to confirm that the battery operates
properly.
See
"Using the System Setup Program" on page 29
.
5
From the main screen, select
System Time
to enter the correct time and
date.
6
Re-enter any system configuration information that is no longer displayed
on the System Setup screens, and then exit the System Setup program.
7 To test the newly installed battery, see
"Troubleshooting the System
Battery" on page 114
.
8
After an hour, reconnect the system to a power source and turn it on.
1 battery socket 2 system battery
3tab
book.book Page 91 Wednesday, June 24, 2009 8:21 AM
 Loading...