Installing System Components 93
5
Tilt the heat sink and shroud assembly away from the fan housing and lift
it out.
6
Remove the I/O panel and SATA cables (if present) attached to the routing
clips on the side of the power supply.
7
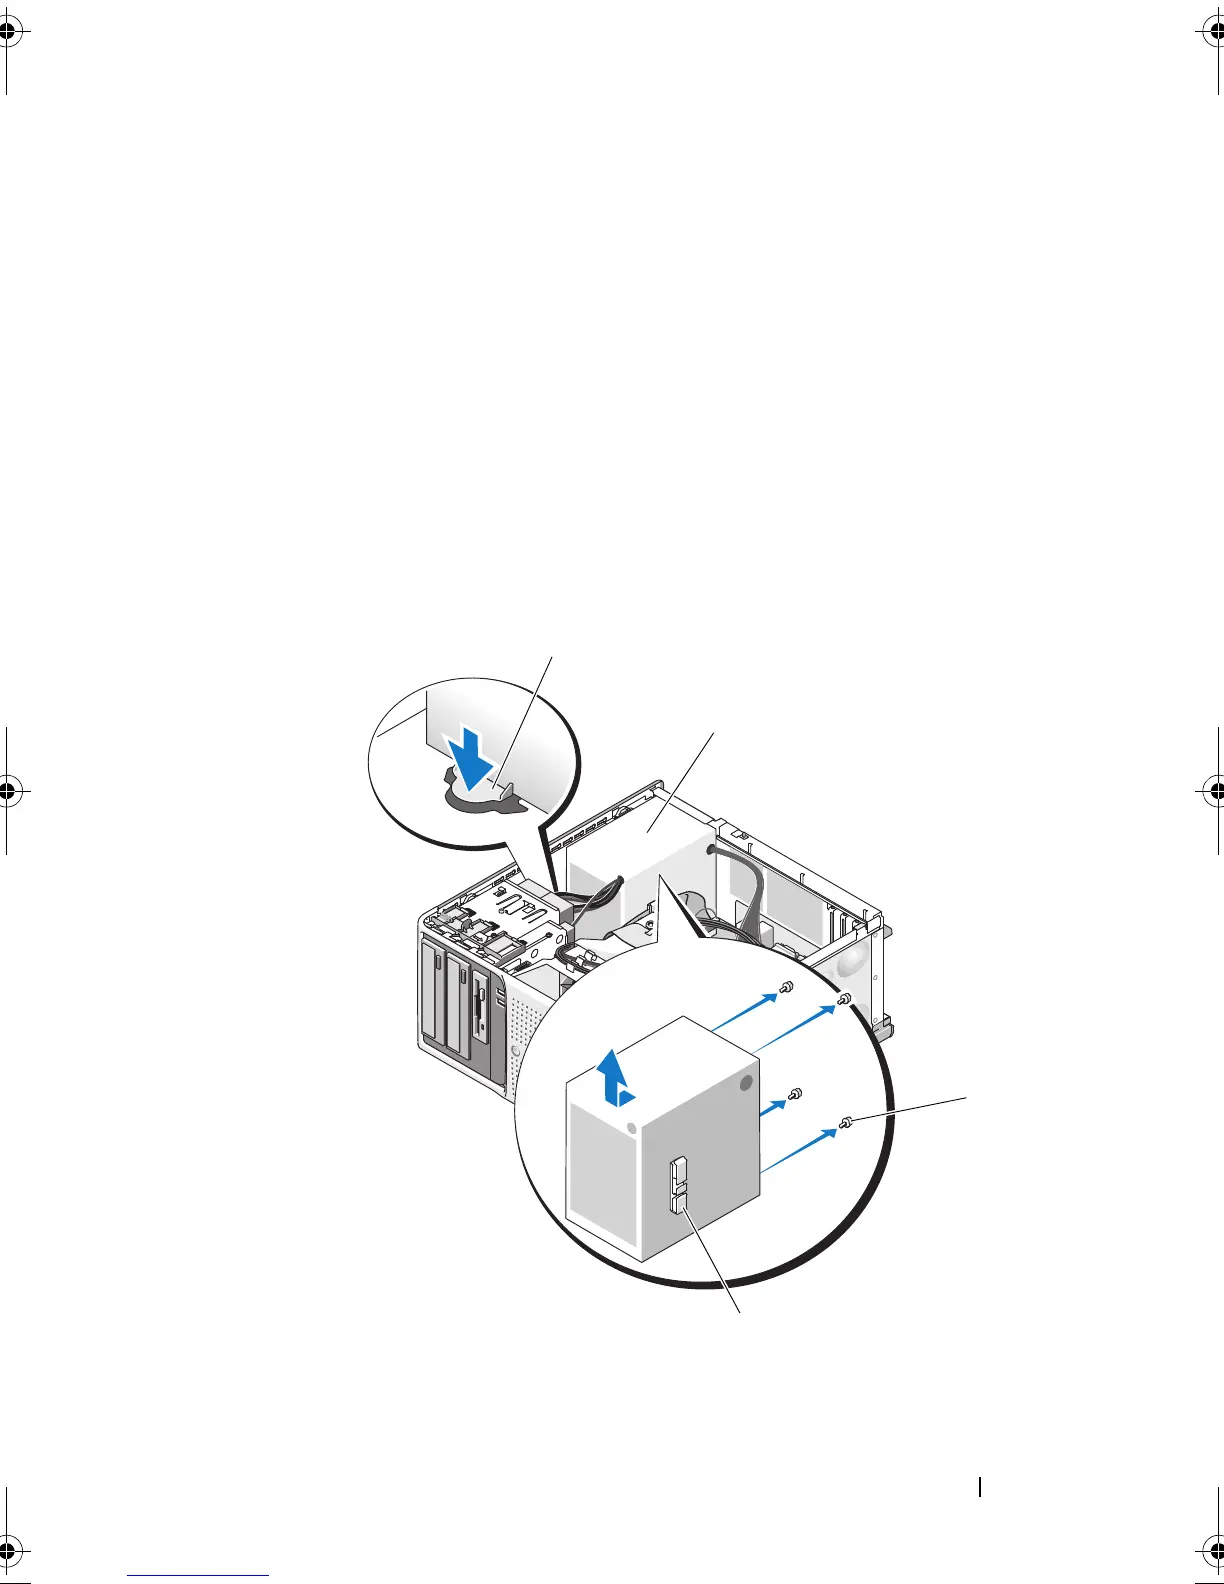
Using a #2 Phillips screwdriver, remove the four Phillips screws that secure
the power supply to the back panel.
8
Press the power-supply release tab down and slide the power supply toward
the front of the system, then lift it out of the system chassis. See
Figure 3-27.
9
Remove the cable clip and set it aside to attach to the new power supply.
Figure 3-27. Removing the Power Supply
1 power supply release tab 2 power supply
3 screws (4) 4 cable clip
book.book Page 93 Wednesday, June 24, 2009 8:21 AM
 Loading...