9 PowerEdge FX2 - Upgrading from 10GbE Pass-through Modules to FN410S I/O Modules | version 1.0
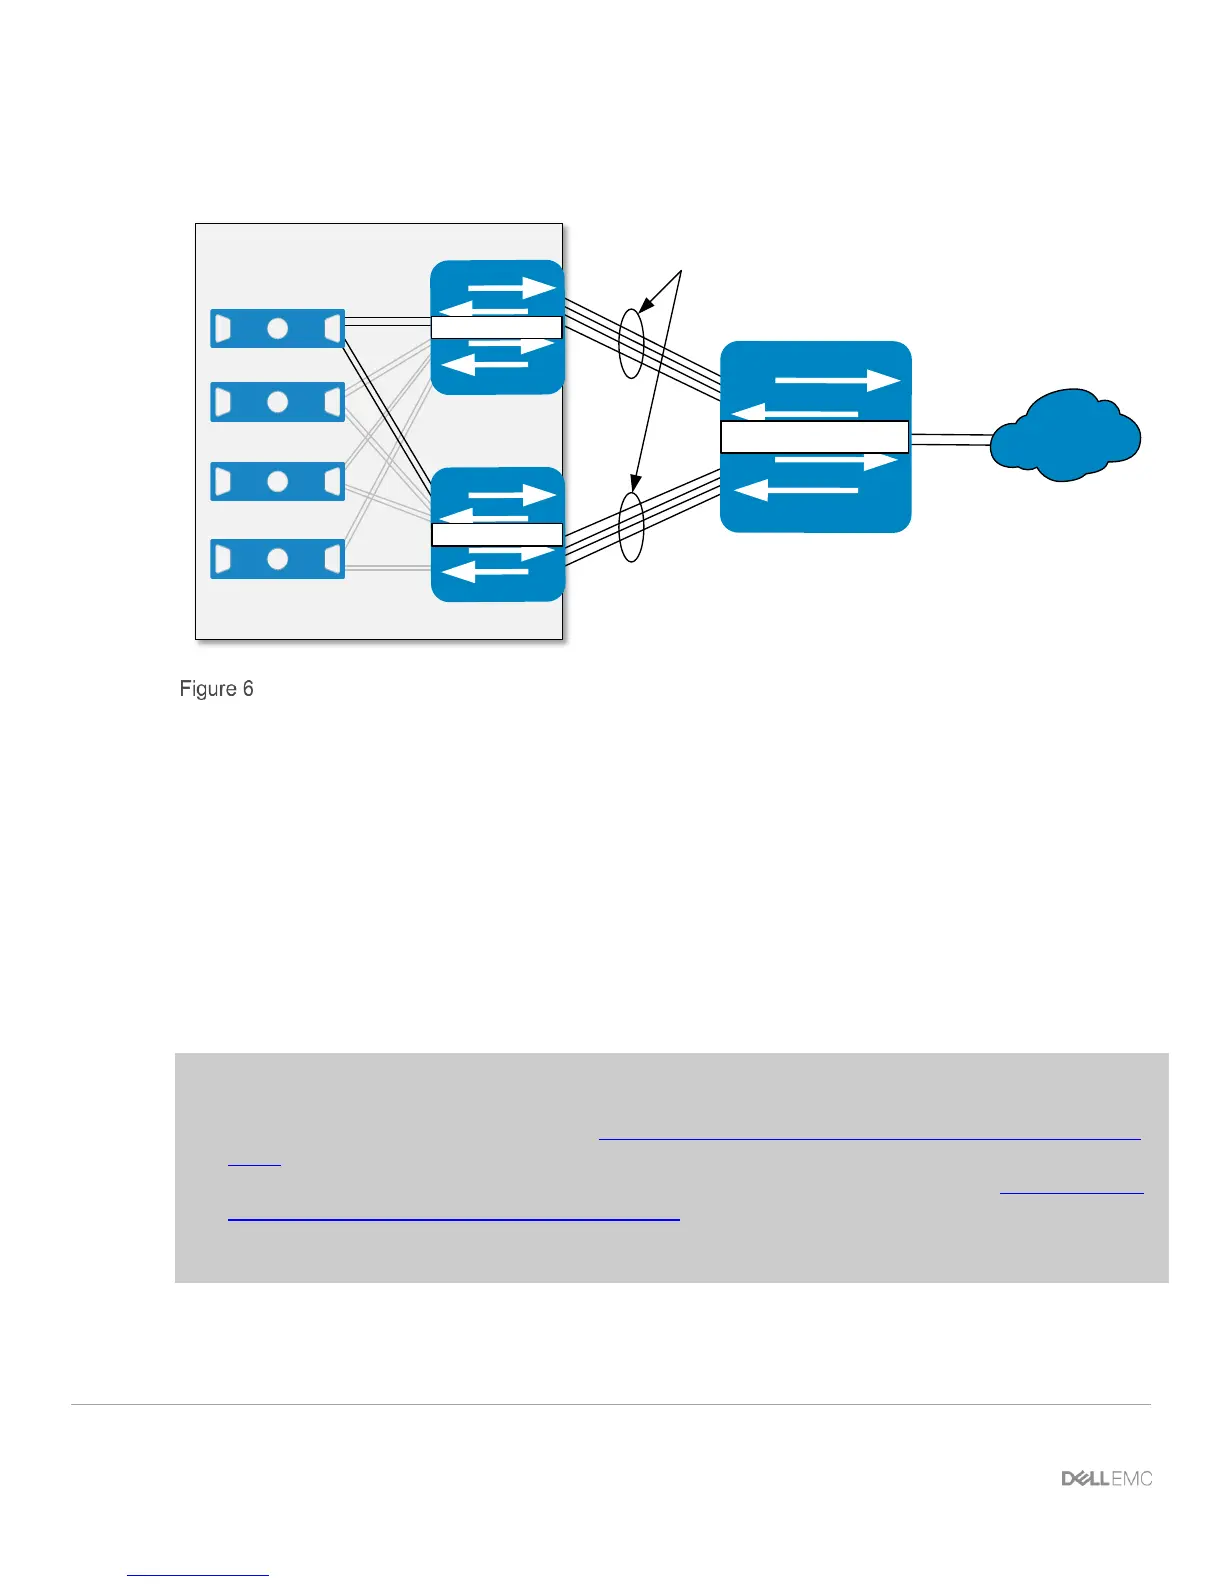
ToR Switch
FX2 Chassis
FC630 Slot 2
FN410S-A1
FC630 Slot 3
FC630 Slot 4
FC630 Slot 1
FN410S-A2
40GbE LACP Port
Channels
After Upgrade
Fully loaded FX2 chassis after upgrade
3.2 Step-by-step example
This section provides steps to replace each PTM with an FN410S in a sequence that minimizes network
downtime on the servers inside the FX2 chassis. The chassis and servers remain up and running throughout
the upgrade.
For clarity in the diagrams, this step-by-step example uses a reduced number of connections as shown in
Figure 7 and Figure 8.
In this example, there are two FC630 servers in the chassis, and each FC630 server has a dual-port CNA. On
each server, one CNA port is untagged in the default vlan and the other port is tagged in VLAN 6. A Dell
Networking S4048-ON functions as the ToR switch.
Notes:
Any Dell or third-party switch that supports 10GbE SFP+ links and LACP may be used as the ToR
switch in place of the S4048-ON. See the Dell PowerEdge FN I/O Module (FN IOM) - Easy Deployment
Guide for LACP configuration commands on common third-party switches.
The FN410S IOMs are at their factory default settings throughout the upgrade. See the Dell PowerEdge
FN I/O Module (FN IOM) - Easy Deployment Guide for steps to reset FN IOMs to factory defaults if
needed.
Replace the VLANs and port numbers in this example with those in your configuration.
 Loading...


