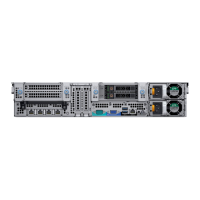
Table 3. Back panel features
Item Indicator, button, or
connector
Icon Description
1 Full-height PCIe expansion
card slot on Riser 1 (2)
Use the card slots to connect up to two full-height PCIe
expansion cards on Riser 1.
2 Half-height PCIe expansion
card slot on Riser 2 (3)
Use the card slots to connect up to three half-height PCIe
expansion cards on Riser 2.
3 Full-height PCIe expansion
card slot on Riser 3 (2)
Use the card slots to connect up to two full-height PCIe
expansion cards on Riser 3.
4 Power supply unit (PSU2) For information about supported PSUs, see the Technical
specications section.
5 Power supply unit (PSU1)
6 System identication button Press the system ID button:
• To locate a particular system within a rack.
• To turn the system ID on or o.
To reset iDRAC, press and hold the button for more than 15
seconds.
NOTE:
• To reset iDRAC using system ID, ensure that the system
ID button is enabled in the iDRAC setup.
• If the system stops responding during POST, press and
hold the system ID button (for more than ve seconds)
to enter the BIOS progress mode.
7 System identication port Use the system identication port to connect the system status
indicator assembly through the optional cable management arm.
8 iDRAC8 Enterprise port Use the iDRAC8 Enterprise port to remotely access iDRAC. For
more information, see the Integrated Dell Remote Access
Controller User’s Guide at Dell.com/idracmanuals.
9 Video port Use the video/VGA port to connect a display to the system. For
more information about the supported video/VGA port, see the
Technical specications section.
10 Serial port Use the serial port to connect a serial device to the system. For
more information about the supported serial port, see the
Technical specications section.
11 Ethernet port (4) Use the Ethernet port to connect Local Area Networks (LANs)
to the system. For more information about the supported
Ethernet ports, see the Technical specications section.
12 USB 3.0 port Use the USB 3.0 port to connect USB devices to the system.
These ports are 4-pin, USB 3.0 compliant.
13 USB 2.0 port Use the USB 2.0 port to connect USB devices to the system.
This port is 4-pin, USB 2.0 compliant.
Related links
Technical specications
14

 Loading...


