Do you have a question about the DELTA DORE TYBOX 117 and is the answer not in the manual?
Visual guide showing the mounting and connection of the thermostat unit.
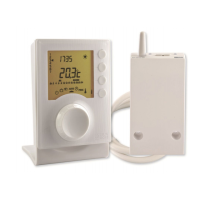
Illustrates electrical connections for TYBOX 117/217 and TYBOX 127/227 models.
Step-by-step guide to set the current time and day on the device.
Allows adjustment of measured temperature readings.
Procedure to reset the device to its original factory settings.
Instructions for replacing batteries in the TYBOX 127-227 model.
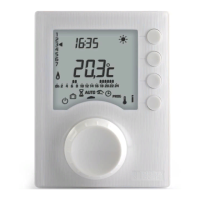
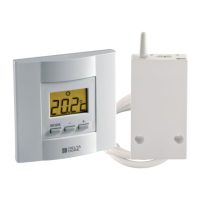
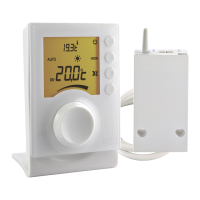
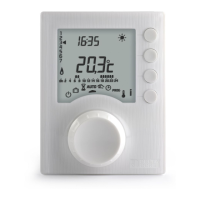
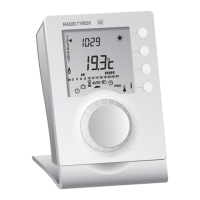
This document describes the TYBOX 117-127 and 217-227, which are thermostats designed for controlling heating systems. The device allows users to manage their home's temperature and programming for optimal comfort and energy efficiency.
The TYBOX thermostat serves as a central control unit for heating systems, primarily managing the circulator for the boiler. It offers various programming modes to suit different lifestyles and heating needs. The device can be configured for daily programming (PROG x1), offering a single program for each day, or for more complex scheduling with two daily programs that differentiate between weekdays and weekends (PROG 5+2). For users who prefer a consistent schedule throughout the week, a weekly programming option (PROG x7) is also available.
The thermostat's core function is to maintain a desired room temperature by activating or deactivating the boiler's circulator. Users can set a specific target temperature, and the device will work to achieve and maintain it. The TYBOX also incorporates a hysteresis setting, which defines the temperature differential around the set point within which the heating system will operate. For example, if the hysteresis is set to 0.4°C and the target temperature is 20°C, the heating will turn on when the temperature drops to 19.8°C and turn off when it reaches 20.2°C. This prevents the heating system from cycling on and off too frequently, which can save energy and extend the life of the boiler.
The device supports both electrical and hot-water heating systems, particularly those equipped with thermostatic valves. In such setups, the TYBOX primarily regulates the Economy and Frost-Protection temperatures, allowing individual radiator or convector thermostats to manage the comfort temperature. This integrated approach ensures that the overall heating strategy is coordinated while still allowing for localized temperature control.
The TYBOX thermostat is designed for intuitive operation, primarily through a selector dial and a few buttons.
Time Setting: To set the current time, users turn the selector dial to the "time setting" mode. The days will flash, prompting the user to select the correct day using the "+" or "-" buttons. Pressing "OK" confirms the selection and moves to the next setting. This process is repeated to set the hours and minutes. To exit the time setting mode, the selector dial is simply turned to another position.
Programming Modes (MENU 1): The device offers different programming options accessible via MENU 1.
Advanced Settings (MENU 2): MENU 2 provides access to more advanced configurations.
The TYBOX thermostat includes features to facilitate maintenance and ensure long-term operation.
Battery Replacement (TYBOX 127-227): For battery-powered models (TYBOX 127-227), a battery symbol will appear on the display approximately one month before the batteries (2 x 1.5V LR03 or AAA alkaline) need to be replaced. Users have about 30 seconds to change the batteries before the time setting is reset. If the time setting is lost, it will need to be reprogrammed.
Reset Operating Counter Hours of the Boiler (2-17): This feature allows users to reset the operating hours counter for the boiler. This can be useful for tracking boiler usage for maintenance schedules or warranty purposes.
Time before boiler maintenance (2-07): Users can set a reminder for boiler maintenance, specifying a period from 0 to 365 days. After each maintenance operation, this reminder can be reprogrammed.
Factory Settings Reset: The device allows users to restore factory settings for each menu. To do this, turn the selector dial to the desired menu, press the "i" button for 5 seconds, and then press the "OK" button to confirm the reset. This can be helpful for troubleshooting or when reconfiguring the device from scratch.
| Display | LCD |
|---|---|
| Mounting | Wall-mounted |
| Accuracy | ±0.5°C |
| Programmable | Yes |
| Temperature Range | 5°C to 30°C |
| Power Supply | 230V |
| Compatibility | Heating systems |