19
Fig. 58
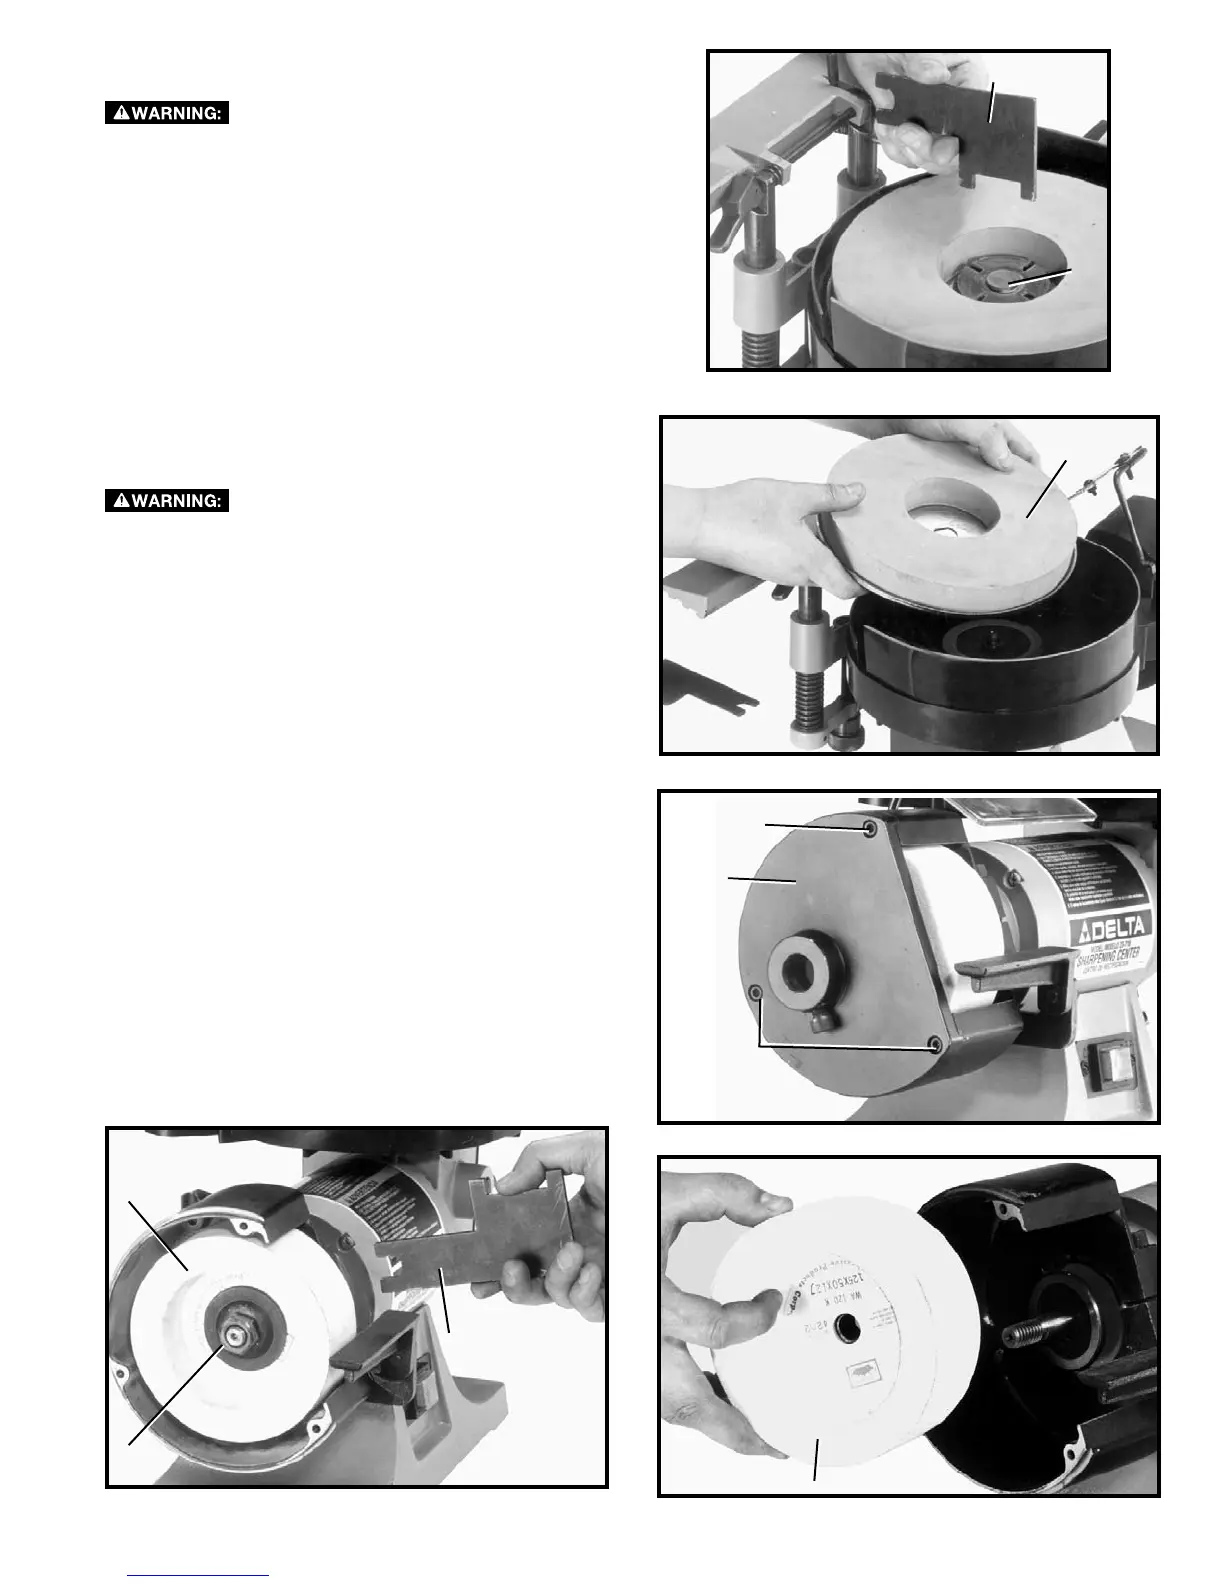
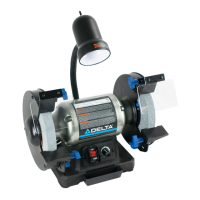
REPLACING WET GRINDING WHEEL
To reduce the risk of injury, turn unit off and
disconnect it from power source before installing and re-
moving accessories, before adjusting or when making
repairs. An accidental start-up can cause injury.
1. Using the wrench (A) Fig. 58, supplied, remove the
wheel locking nut (B).
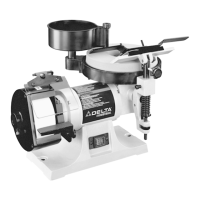
2. Remove and replace the wet wheel (C) as shown in
Fig. 59.
REPLACING DRY GRINDING WHEEL
To reduce the risk of injury, turn unit off and
disconnect it from power source before installing and re-
moving accessories, before adjusting or when making
repairs. An accidental start-up can cause injury.
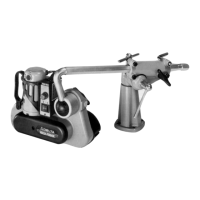
1. Remove three screws (A) Fig. 60, and side cover (B).
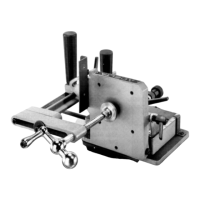
2. Using wrench (C) Fig. 61, supplied, hold motor shaft
on inside of grinding wheel (D) to keep shaft from
turning and remove wheel nut (E). Use a 13/16 wrench
(not provided).
3. Remove grinding wheel (D), as shown in Fig. 62.
Fig. 59
Fig. 60
Fig. 62
Fig. 61
A
C
A
E
B
A
D
C
D
B