EasyManua.ls Logo

Delta DP300 - User Manual

Delta DP300
17 pages
Print Icon
To Next Page IconTo Next Page
Loading...
INSTRUCTION MANUAL
12" Bench Drill Press
(Model DP300)
ESPAÑOL: PÁGINA 17
PART NO. 905575-04-29-04
Copyright © 2004 Delta Machinery
To learn more about DELTA MACHINERY
visit our website at: www.deltamachinery.com.
For Parts, Service, Warranty or other Assistance,
please call
1-800-223-7278 (In Canada call 1-800-463-3582).
62061
RTD10000126AA
Question and Answer IconNeed help?

Do you have a question about the Delta DP300 and is the answer not in the manual?

Summary

SAFETY GUIDELINES - DEFINITIONS

GENERAL SAFETY RULES

IMPORTANT SAFETY INSTRUCTIONS

General safety rules for operating the machine, emphasizing caution and proper procedures to prevent injury.

ADDITIONAL SAFETY RULES FOR DRILL PRESSES

POWER CONNECTIONS

GROUNDING INSTRUCTIONS

UNPACKING AND CLEANING

ASSEMBLY

FASTENING DRILL PRESS TO SUPPORTING SURFACE

OPERATING CONTROLS AND ADJUSTMENTS

STARTING AND STOPPING THE MACHINE

Explains how to turn the drill press ON and OFF using the main switch.

TABLE ADJUSTMENTS

SPINDLE SPEEDS

CHANGING SPEEDS AND ADJUSTING BELT TENSION

DRILLING HOLES TO DEPTH

ADJUSTING SPINDLE RETURN SPRING

OPERATION

INSTALLING AND REMOVING DRILL BITS

CORRECT DRILLING SPEEDS

PARTS, SERVICE OR WARRANTY ASSISTANCE

Overview

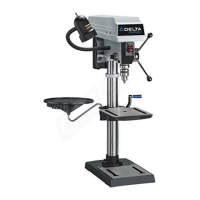
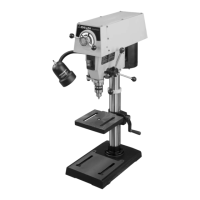
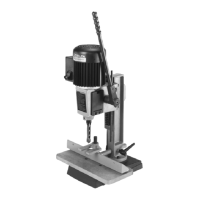
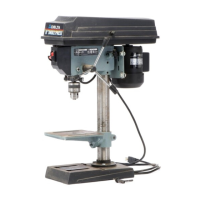
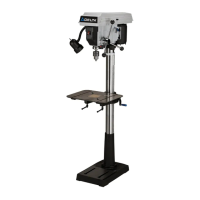
The device described in the manual is a Delta ShopMaster Model DP300 12" Bench Drill Press.

Function Description

The Delta ShopMaster Model DP300 is a 12-inch bench drill press designed for drilling holes in various materials, including wood and metal. It features a flexible work lamp for improved visibility and a utility tray for keeping tools within easy reach. The machine has a tilting table that allows for angle drilling and includes side edges and parallel slots for fast workpiece clamping.

Important Technical Specifications

  • Model: DP300
  • Size: 12-inch Bench Drill Press
  • Electrical Requirements: 120 volt, 60 Hz alternating current. A separate electrical circuit of at least #12 wire, protected with a 20 Amp time lag fuse, is recommended.
  • Spindle Speeds: Five available spindle speeds: 620, 1100, 1720, 2340, and 3100 RPM. These speeds are selected by adjusting the belt placement on the pulleys, as indicated by a belt-positioning speed chart located on the inside top cover of the drill press.
  • Chuck Capacity: Designed for drill bits with a shank of 1/2" or less in diameter.
  • Table: Tilting table for angle drilling, capable of rotating 360 degrees on the column. It includes side edges and parallel slots for workpiece clamping. A tilt scale with a witness line and zero mark is provided to indicate the degree of tilt.
  • Depth Stop: Integrated depth stop in the pinion shaft housing, calibrated in both inches and millimeters, allowing for drilling holes to a precise, repeatable depth.
  • Work Lamp: Flexible work lamp, operating independently of the drill press motor. Requires a 40 watt or less, 120 volt, reflector track-type light bulb (not supplied). Standard household light bulbs are not recommended.

Usage Features

  • Assembly: The manual provides detailed instructions for assembling the drill press, including attaching the column to the base, installing the worm gear and raising rack, mounting the table and table bracket on the column, securing the mounting bracket and utility tray, and attaching the table raising and lowering handle. It also covers seating the drill press head and threading the pinion shaft handles.
  • Grounding: The machine must be grounded during use to protect the operator from electric shock. It is equipped with a 3-prong grounding type plug. Temporary adapters may be used with 2-conductor receptacles if a properly grounded outlet is not available, but this is not permitted in Canada.
  • Starting and Stopping: The ON/OFF switch is located on the front of the drill press head.
  • Locking Switch: A safety feature allows the switch to be locked in the "OFF" position by removing the switch toggle, preventing unauthorized use.
  • Table Adjustments:
    • Height Adjustment: The table height can be adjusted by loosening the table clamp and turning the table raising and lowering handle. It is important to always raise the table to its final position to ensure gears mesh correctly and prevent slippage.
    • Rotation: The table can be rotated 360 degrees on the column by loosening the table clamp, rotating to the desired position, and re-tightening.
    • Tilting: The table can be tilted right or left by removing the table alignment pin, loosening the table locking bolt, tilting to the desired angle, and re-tightening the bolt. A tilt scale helps in setting the angle.
  • Speed Adjustment: Spindle speeds are changed by adjusting the belt position on the motor and spindle pulleys. This involves opening the top cover, loosening the tension lock knob, pivoting the motor, repositioning the belt according to the speed chart, and then re-tensioning and tightening the lock knob. Correct belt tension is achieved when the belt can be flexed about 1" out of line midway between the pulleys with light finger pressure.
  • Drilling to Depth: The depth stop mechanism allows for drilling multiple holes to the same depth. This involves inserting the bit, lowering the spindle to align the pointer with the desired mark on the scale, tightening the lock screw, returning the spindle to the up position, positioning the workpiece, and raising the table until it touches the drill bit.
  • Installing and Removing Drill Bits: Drill bits are inserted into the chuck, ensuring the smooth end is as far as it will go, then backed out slightly. The bit must be centered before tightening the chuck with the chuck key. All three chuck jaws should be tightened. The chuck key, equipped with a self-ejecting pin, must be removed before starting the drill press.
  • Workpiece Securing: For safety, workpieces should be held firmly against the table using clamps or a vise. Long workpieces should be positioned with one end against the column to prevent rotation. Never hold a workpiece by hand when drilling metal.
  • Recommended Speeds: The manual emphasizes using recommended speeds for all operations, as incorrect speeds can damage the machine and/or cause injury. Factors influencing speed selection include workpiece material, hole size, bit type, and desired cut quality.
  • Drilling Wood: Twist drills can be used, but machine spur bits are generally preferred for wood. Hand bits with screw tips are not recommended. For through boring, the workpiece should be aligned so the bit goes through the center hole of the table. A scrap piece of wood should be used as a base block to prevent splintering and protect the bit.
  • Drilling Metal: Clamps are essential for holding metal workpieces. The workpiece must be firmly clamped to prevent tilting, twisting, or shifting, which can lead to rough holes or drill bit breakage.

Maintenance Features

  • Cleaning: The machine should be unpacked and cleaned of its protective coating using a soft cloth moistened with kerosene. Unpainted surfaces should then be covered with a good quality household floor paste wax.
  • Tool Condition: All tools and machines should be maintained in peak condition, kept sharp and clean. Instructions for lubricating and changing accessories should be followed.
  • Damaged Parts: Before use, the machine should be checked for damaged parts, including alignment of moving parts, binding, breakage, and proper guard function. Damaged parts must be repaired or replaced.
  • Spindle Return Spring Adjustment: The spindle return spring is factory-adjusted but can be re-adjusted if necessary. This involves loosening nuts, holding the spring housing, rotating it to adjust tension, and then re-tightening the nuts. It's important that the inside nut does not contact the spring housing when tightened.
  • Cord Maintenance: Damaged or worn power cords should be repaired or replaced immediately.
  • Dust Control: The manual advises operating machinery in well-ventilated areas and providing for proper dust removal, using wood dust collection systems whenever possible, to mitigate health risks from dust inhalation.

Delta DP300 Specifications

General IconGeneral
BrandDelta
ModelDP300
CategoryPower Tool
LanguageEnglish

Related product manuals