Do you have a question about the Delta 37-195 and is the answer not in the manual?
Explains safety alert symbols like DANGER, WARNING, and CAUTION.
Provides essential safety practices and precautions for operating woodworking machinery safely.
Outlines critical safety procedures and warnings specific to jointer operation and maintenance.
Details electrical circuit requirements, including wire gauge, fuses, and extension cord specifications.
Explains the importance of grounding, connection methods, and safety precautions for electrical safety.
Provides guidelines for selecting appropriate extension cords based on ampere rating, voltage, and length.
Introduces the jointer model, its features, and initial unpacking and cleaning procedures.
Identifies and labels the various parts of the jointer assembly with a detailed diagram.
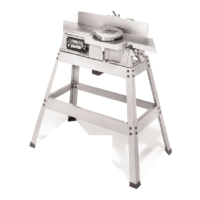
Details the initial assembly steps for the jointer stand, including pre-wired motor and switch.
Guides on how to securely attach the jointer base to the stand using screws and washers.
Instructions for installing the motor pulley onto the motor shaft, ensuring proper key insertion.
Details how to install the drive belt and ensure proper alignment between the cutterhead and motor pulleys.
Explains how to achieve and check correct belt tension for optimal machine performance.
Instructions for assembling the cutterhead pulley guard and carriage mounting bracket to the jointer base.
Guides on securely fastening the fence carriage assembly to the mounting bracket.
Instructions for attaching the fence to the carriage assembly and installing fence handles.
Details the process of installing the cutterhead guard, including spring tension adjustment.
Instructions for attaching the power switch and its mounting bracket to the jointer.
Explains how to attach the dust collector connector to the stand for dust collection.
Provides instructions on how to safely start and stop the jointer using the on/off switch.
Describes how to lock the power switch in the "OFF" position to prevent unauthorized use.
Explains how to adjust the infeed table height, including depth stop functionality and maximum cut depth.
Details how to adjust positive stops to limit infeed table height and depth of cut.
Instructions on how to ensure the outfeed table is perfectly level with the cutterhead knives.
Guides on checking and adjusting jointer knives to be level with the outfeed table.
Details the procedure for precisely adjusting knife height for optimal cut quality and surface finish.
Explains how to adjust table gibs to eliminate play between mating surfaces for smooth operation.
Instructions on how to move the fence across the table and tilt it for various cutting angles.
Guides on setting positive stops for precise 90 and 45-degree fence tilt angles.
Detailed steps for safely removing, cleaning, and installing jointer knives into the cutterhead.
Procedures for setting and aligning the jointer knives precisely for accurate cuts.
General advice for beginners on how to operate the jointer, including checking settings and practicing.
Crucial safety instructions on proper hand positioning when feeding material through the jointer.
Explains the common operation of squaring a workpiece edge using the jointer.
Details how to use the jointer to create a flat surface on a workpiece.
Instructions on how to cut bevels on workpieces by tilting the fence.
Explains the method for cutting tapered edges on furniture legs or similar workpieces.
Guides on how to adjust the fence and infeed table to cut rabbets.
Advice on surfacing dished or warped wood, emphasizing light cuts and avoiding excessive pressure.
Safety precautions and guidelines for surfacing short or thin workpieces, stressing push block use.
Explains the importance of feeding wood with the grain for a smooth finish, contrasting correct and incorrect methods.
Instructions on how to sharpen the jointer knives using a carborundum stone.
Provides a pattern and instructions for constructing a push stick for safe handling of narrow workpieces.
Information on available accessories and a warning about using unapproved items.
Contact information and details for obtaining parts, service, and warranty assistance for the jointer.
Outlines the terms and conditions of the two-year limited warranty provided by Delta.
Lists US locations for Porter-Cable Delta service centers and repair.
Lists Canadian locations for Porter-Cable Delta service centers and repair.
Lists various trademarks associated with Porter-Cable Delta products.
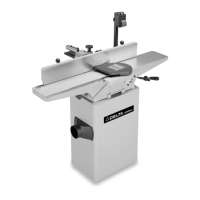
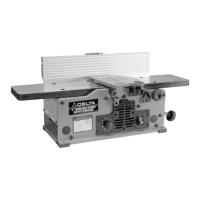
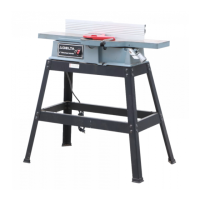
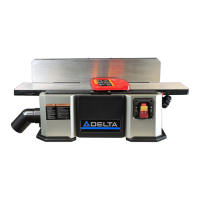
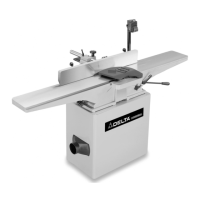
This document describes the 6" Professional Jointer, Models 37-195 and 37-275X, manufactured by Delta Machinery. It serves as an instruction manual covering safety guidelines, assembly, operation, and maintenance.
The Delta Model 37-195 is a 6" Professional Jointer designed for woodworking operations, specifically for jointing and surfacing wood. Its primary function is to create flat and square edges or surfaces on workpieces, which is crucial for subsequent woodworking processes like gluing panels or preparing stock for other machines. The jointer achieves this by passing the workpiece over a rotating cutterhead equipped with sharp knives, removing a thin layer of material to achieve the desired flatness and squareness. It can also perform beveling and rabbeting cuts.
| Brand | Delta |
|---|---|
| Model | 37-195 |
| Category | Power Tool |
| Language | English |