Accessories ·····················································································3
Cautions on Handling ·····································································3
Cautions on Installation ·································································3
About the Remote Control Unit ····················································3
Inserting the Batteries ·······························································3, 4
Operating Range of the Remote Control Unit ································4
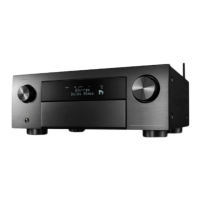
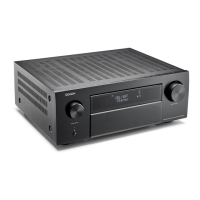
Part Names and Functions ····························································4
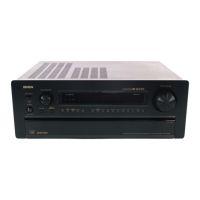
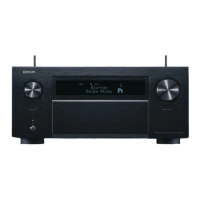
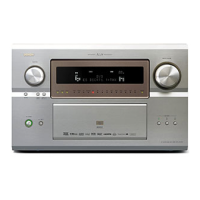
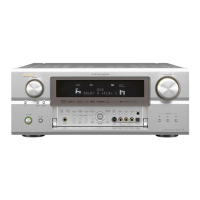
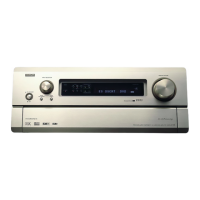
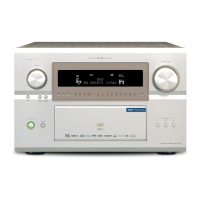
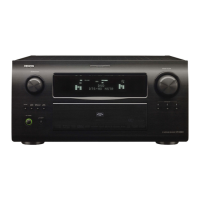
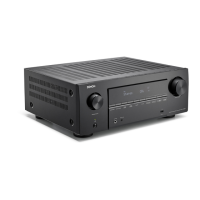
Front Panel ·················································································4, 5
Display ···························································································5
Rear Panel ······················································································6
Remote Control Unit ······································································7
Preparations ··················································································26
Auto Setup ····················································································26
a Auto Setup ········································································26, 27
Error Messages·······································································28
s Option ·····················································································28
d Parameter Check ····································································28
Contents
Example of the Display of the GUI Mark at a Title ····················24
Example of Display of Default Values ········································24
Examples of GUI Screen Displays ···············································24
Example: Browse Menu (Top Menu) ···········································24
Example: Menus with Illustrations (Auto Setup) ··························24
Cursor Position Display ································································24
Operations ·····················································································24
GUI Menu Map ··············································································25
Input Source Selection ·································································45
Settings Related to Playing Input Sources ··························45, 46
a Play ·························································································46
s Auto Preset ·············································································46
d Preset Skip ··············································································46
f Preset Name ···········································································46
g Video ·················································································46, 47
h Input Mode ·············································································47
j Rename···················································································47
k Source Level ···········································································47
l Input Att. ·················································································48
A0 Playback Mode (iPod)······························································48
A1 Assign ···············································································48, 49
A2 Playback Mode········································································49
A3 Still Picture ··············································································49
A4 Antenna Aiming ······································································49
Speaker Setup ··············································································29
a Speaker Configuration·····························································29
s Subwoofer Setup ····································································29
d Distance ··················································································30
f Channel Level ·········································································30
g Crossover Frequency ························································30, 31
h THX Audio Setup·····································································31
j Surround Speaker ···································································31
HDMI Setup ···················································································32
a Color Space ·············································································32
s RGB Range ·············································································32
d Auto Lip Sync ··········································································32
f Audio ·······················································································32
g Monitor Out ············································································32
h HDMI Control ··········································································32
Audio Setup ··················································································33
a EXT. IN Setup··········································································33
s 2ch Direct/Stereo ····································································33
d Downmix Option ·····································································34
f Auto Surround Mode ······························································34
g Manual EQ ··············································································34
Network Setup ·············································································35
a Network Setup ································································35 ~ 38
s Other ·······················································································38
d Network Information ·······························································38
Zone Setup ····················································································39
a ZONE2 ····················································································39
s ZONE3 ····················································································39
d OSD ························································································39
Option Setup ·················································································40
a Pre-out Assign·········································································40
s XLR Out Polarity······································································41
d POA Setting ············································································41
f Volume Control ·······································································41
g Source Delete ·········································································41
h GUI ····················································································41, 42
j Quick Select Name ·································································42
k Trigger Out 1 ···········································································42
l Trigger Out 2 ···········································································42
A0 Trigger Out 3 ···········································································42
A1 Trigger Out 4 ···········································································42
A2 Transducer Setup ····································································42
A3 Digital Out ···············································································43
A4 Remote ID···············································································43
A5 2Way Remote ·········································································43
A6 Dimmer ···················································································43
A7 Setup Lock ··············································································43
A8 Maintenance Mode ·································································43
A9 Firmware Update ····································································43
S0 Add New Feature ····································································44
Language ·······················································································44
Preparations ····················································································8
Cables Used for Connections ························································8
Video Conversion Function ····························································9
Speaker Layout ···········································································10
Connecting to the Power Amp ····················································10
POA-A1HDCI Connection and Operation ·····························10 ~ 12
Connecting Equipment with HDMI connectors ···················12, 13
Connecting the Monitor ·······························································13
Connecting the Playback Components ······································13
DVD Player ···················································································13
Record Player ···············································································14
CD Player ·····················································································14
iPod
®
···························································································· 14
TV/CABLE Tuner ··········································································15
Satellite Receiver ·········································································15
Connecting the Recording Components ····································16
Digital Video Recorder ·································································16
Video Cassette Recorder ·····························································17
CD Recorder / MD Recorder / Tape Deck ···································· 17
Connections to Other Devices ·····················································18
Components Equipped with a DENON LINK connector ··············18
Video Camera / Game Console ····················································18
Component with Multi-channel Output connectors ·····················18
USB Port ······················································································19
XM Connector ·············································································· 19
Antenna terminals ·······································································20
Network Audio ·············································································21
Multi Zone ····················································································22
External Controller ·······································································23
Connecting the Power Cord ························································23
Once Connections are Completed ··············································23
Getting Started
Auto Setup
GUI Menu Operations
Manual Setup
Source Select
Connections