CONNECTION __________ _
(1) Connecting the Output Terminal (FIX-VARIABLE)
Use the included pin cords to connect the left (L) and right (R) output
terminal (FIX-VARIABLE) of the DCD-910 to the CD, AUX, or TAPE
PLAY left (L) and right (R) input jacks of the amplifier.
There are two types of output jacks, one of the variable type and one
of the fixed type. Be sure to use the variable outputs if you want to be
able to control the output level from the DCD-91 O.
~1
TAPE
CO AU
X RECPl..Av
@ @
@r-@
~"=l-="' :
i @ @ @:f
I ~- 11
: II
~-----J !
~-----_J
I
I
I
'
I
I
I
♦
[[])
AC OUTLET
(2) Connecting the Digital Output Jack (COAXIAL)
Power outlet
Use a 75-ohm pin cord to connect the digital output jack (COAXIAL) of
the DCD-910 to the digital input jack (COAXIAL) on a digital processor
or DIA unit, available in stores.
Digital processor or D/A unit
(Amplifier)
DIGITAL INPUT
COAXIAL f
@ III]
AC OUTLET
=
Connection Precautions
DCD-910
Power outlet
• Before proceeding with connections or disconnections of cables and
power cords, be sure to turn all system components off.
• Ensure that all cables are connected properly to the L (left) and R (right)
jacks.
• Insert plugs fully into the terminals.
• Connect the output jacks to the amplifier CD, AUX or TAPE PLAY input
jacks.
OPENING AND CLOSING THE DISC HOLDER AND
LOADING A DISC __________ _
Opening and closing the disc holder (This operation only works while the
power is on.)
1. Press the power switch (POWER) to turn on the power.
2. Press the open/close button (
~
OPEN/CLOSE).
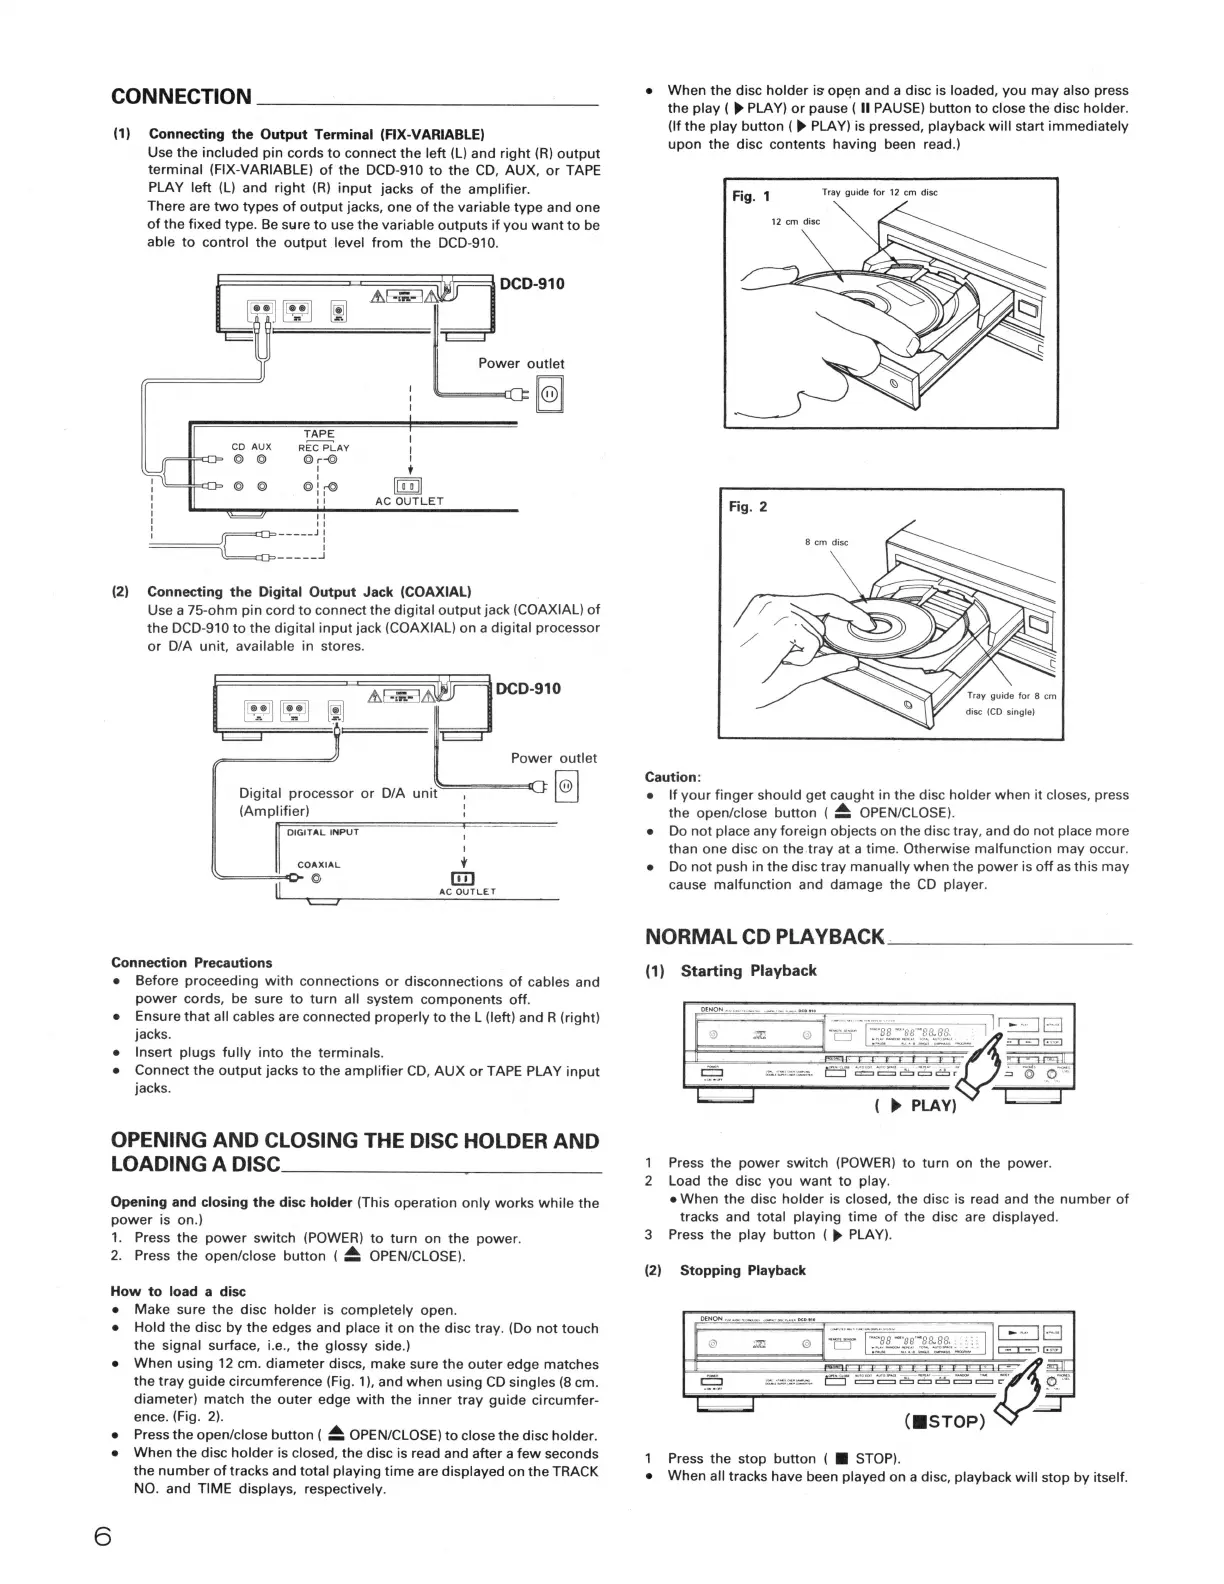
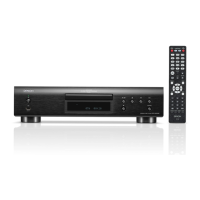
How to load a disc
• Make sure the disc holder is completely open.
• Hold the disc by the edges and place it on the disc tray. (Do not touch
the signal surface, i.e., the glossy side.)
• When using 12 cm. diameter discs, make sure the outer edge matches
the tray guide circumference (Fig. 1), and when using CD singles (8 cm.
diameter) match the outer edge with the inner tray guide circumfer-
ence. (Fig. 2).
6
• Press the open/close button (
~
OPEN/CLOSE) to close the disc holder.
• When the disc holder is closed, the disc is read and after a few seconds
the number of tracks and total playing time are displayed on the TRACK
NO. and TIME displays, respectively.
• When the disc holder is opf!n and a disc is loaded, you may also press
the play (
►
PLAY) or pause ( II PAUSE) button to close the disc holder.
(If the play button (
►
PLAY) is pressed, playback will start immediately
upon the disc contents having been read.)
Tray guide for 12 cm disc
Fig. 2
Caution:
• If your finger should get caught in the disc holder when it closes, press
the open/close button (
~
OPEN/CLOSE).
• Do not place any foreign objects on the disc tray, and do not place more
than one disc on the.tray at a time. Otherwise malfunction may occur.
• Do not push in the disc tray manually when the power is off as this may
cause malfunction and damage the CD player.
NORMAL CD PLAYBACK _______ _
(1)
Starting Playback
-
□
--(:.si:_~•"§..8,8§,fA~~
a~ c=.~6~'='~.; @ p..,,
(
►
PLAY)
1 Press the power switch (POWER) to turn on the power.
2 Load the disc you want to play.
• When the disc holder is closed, the disc is read and the number of
tracks and total playing time of the disc are displayed.
3 Press the play button (
►
PLAY).
(2) Stopping Playback
Press the stop button (
■
STOP).
• When all tracks have been played on a disc, playback will stop by itself.