8
Setup
Connections
7.1
Items not listed in
Introduction > Box Contents are sold separately.
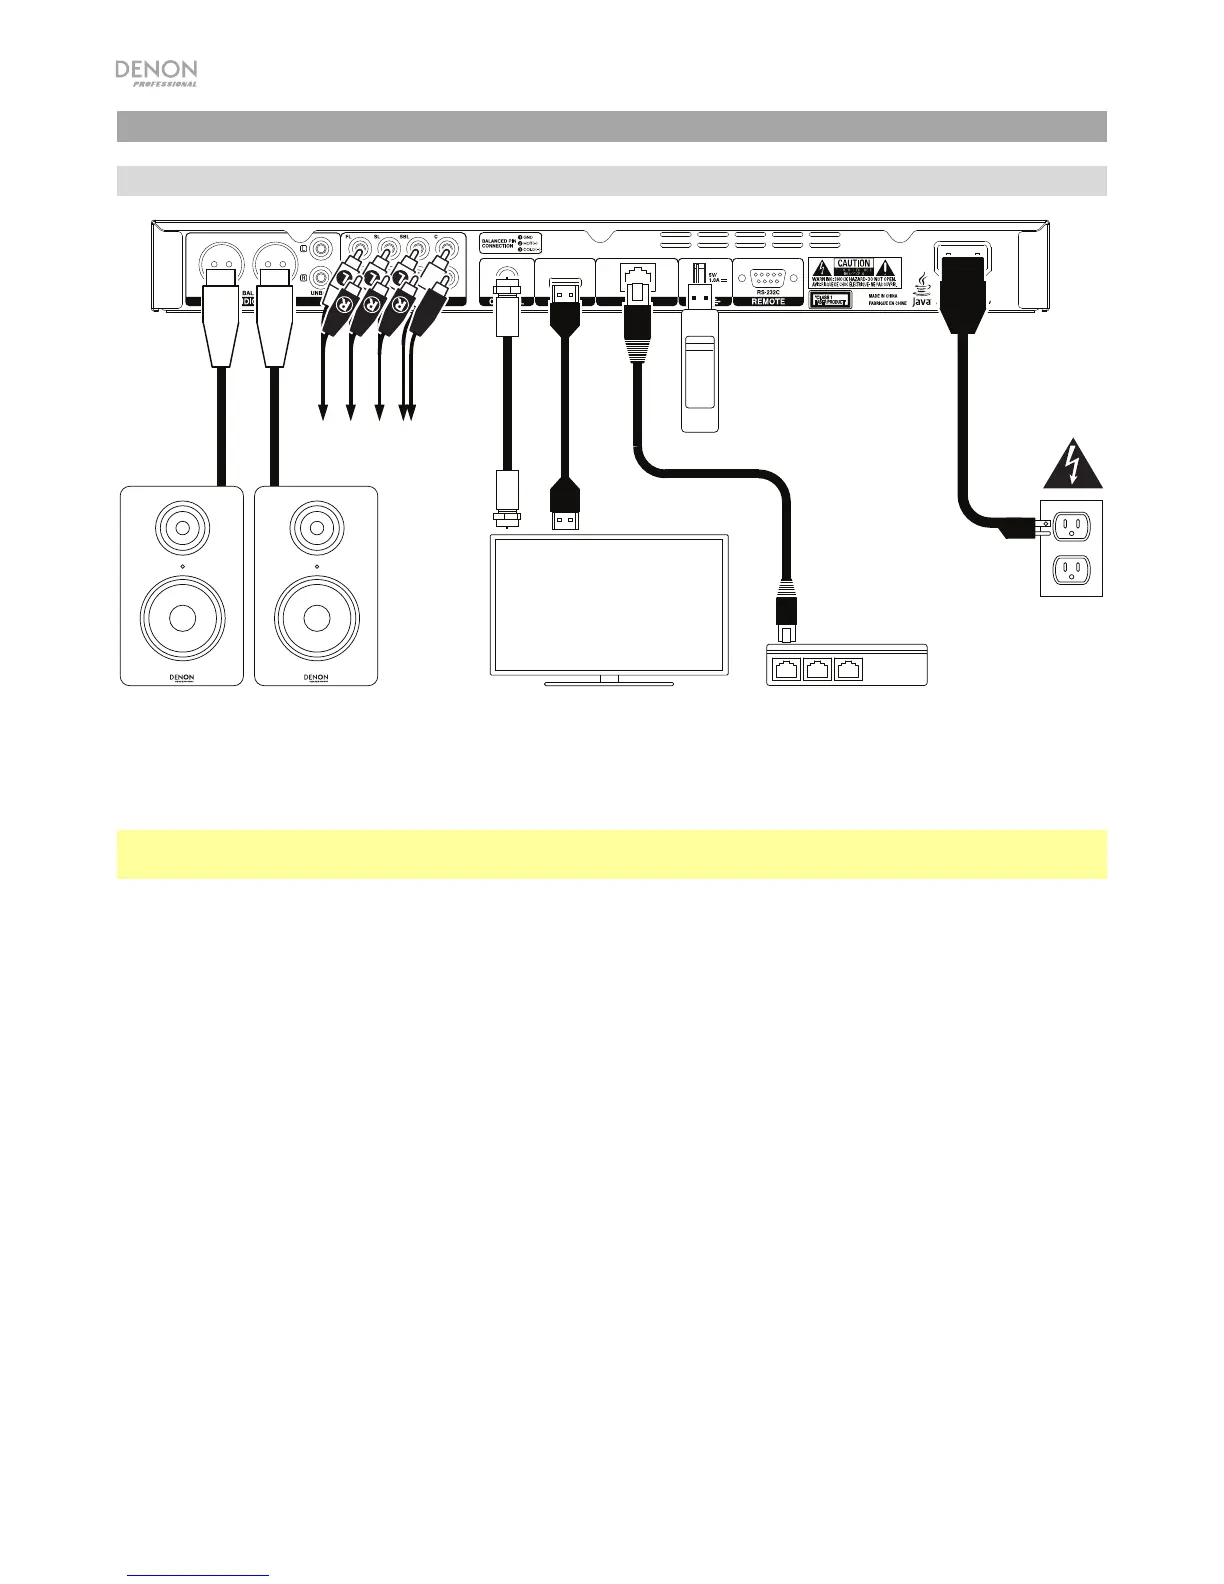
Important: Connect all cables securely and properly (with stereo cables: left with left, right with right). Do
not bundle or wrap them with the power cable.
Not all of these steps may apply to your specific audio/video setup, but you will need to do Steps 1 and 5
at the very least.
1. Connect DN-500BD to your TV monitor or display by doing one of the following:
• Use an HDMI cable to connect the HDMI Output to the HDMI input of your TV monitor or display.
• Use a coaxial HDMI cable to connect the coaxial output to the coaxial input of your TV monitor.
2. Optional: Connect DN-500BD to your sound system by doing either/both of the following:
• Use XLR cables or a stereo RCA cable to connect the audio outputs (balanced or unbalanced) to
the analog inputs of your external receiver, amp, powered speakers, etc.
• Use RCA cables to connect the 7.1 outputs to your 7.1 surround sound system.
3. Optional: Connect a USB hard drive with playable content to the USB port (front panel or rear panel).
4. Optional: Use a 9-pin D-Sub cable to connect the Remote Input to a host device (usually a computer)
that will control it.
5. Optional: Use an Ethernet cable to connect the LAN port to your modem or a host device.
6. After completing all the connections, use the included power cable to connect the AC In to a power outlet.
TV or display
Power
Powered Monitors,
receiver, amp, etc.
Modem
USB hard drive
To 7.1
sound system