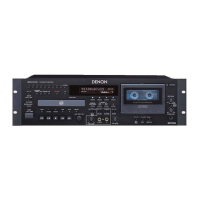
6
ENGLISH
@0
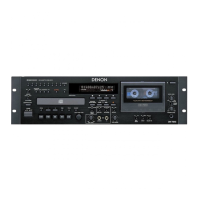
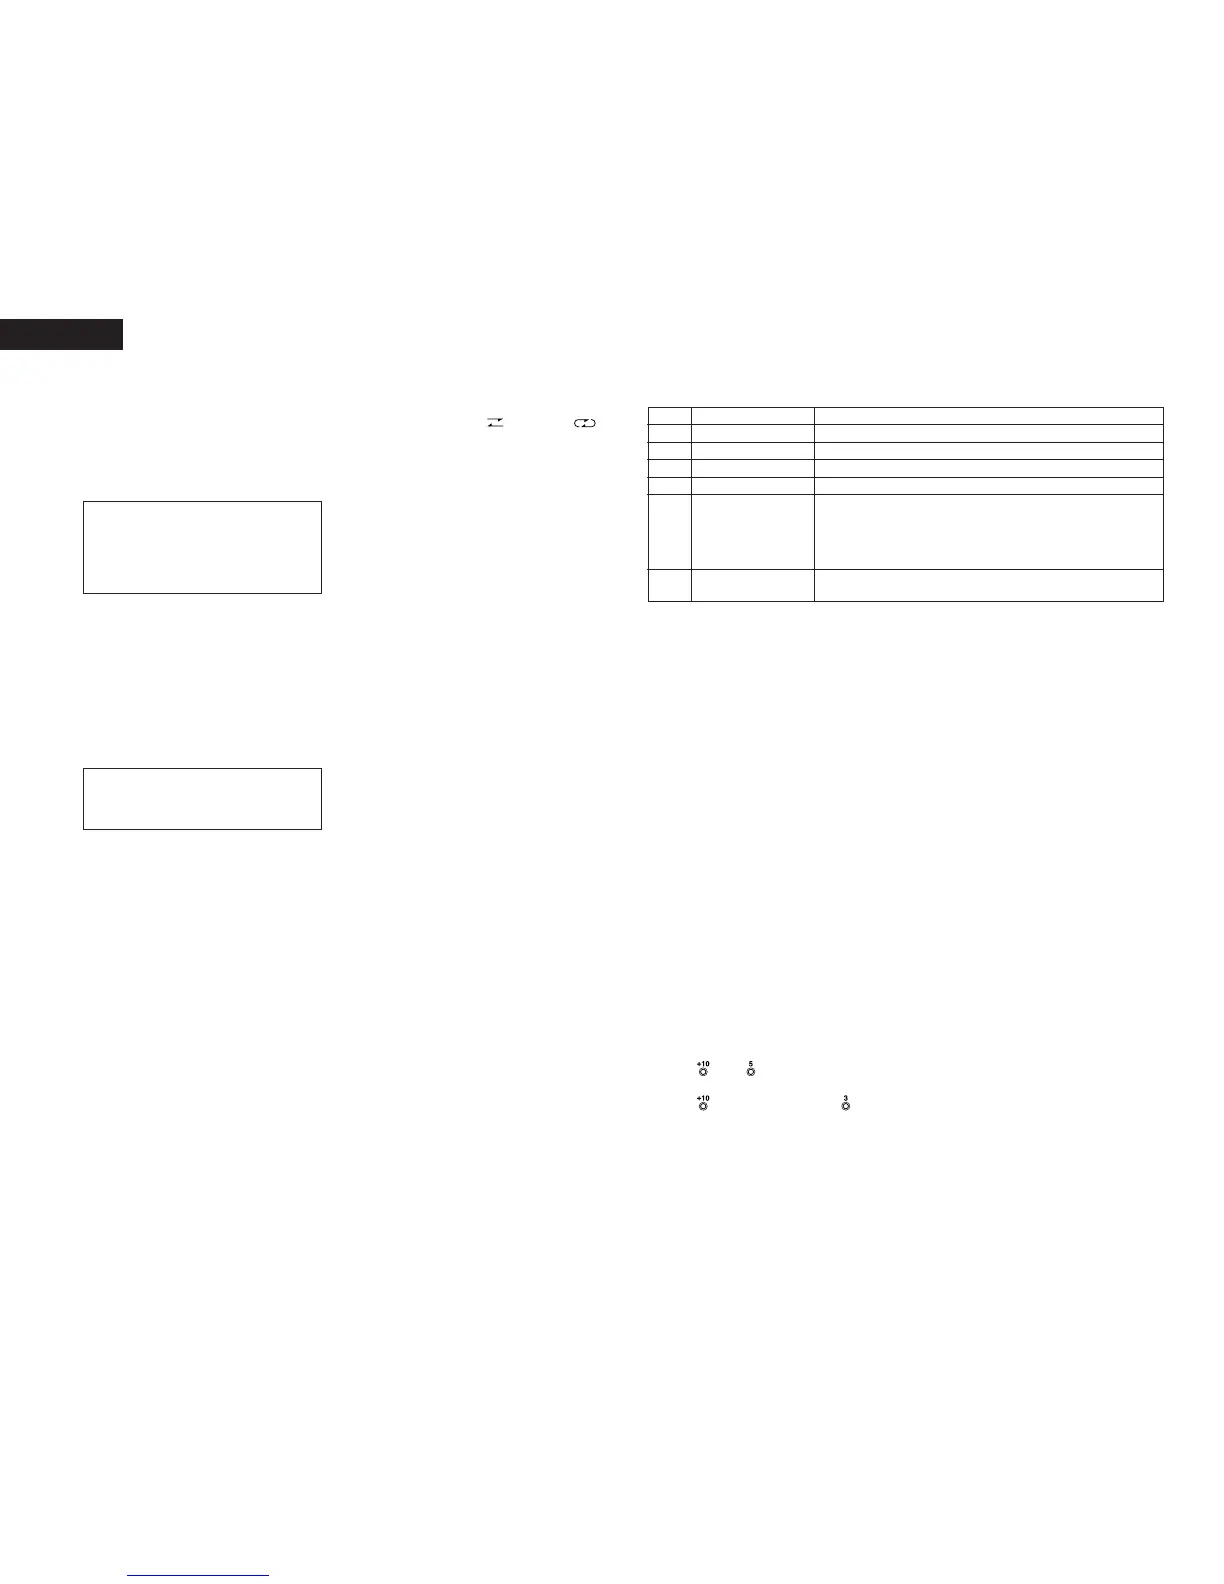
Reverse mode switch (REV. MODE)
• Select the type of tape transport. The reverse
mode can be set to (one side),
(continuous playback).
If the continuous mode is set in the recording
mode, recording continues from side A to side
B and stops at the end of side B.
@1
INPUT switch
• Select the audio input to the tape (CD or LINE
IN).
@2
DOLBY NR switch
• Select the Dolby NR type that suits the
recording and playback.
OFF : Recording without Dolby NR
B:Recording with Dolby NR type B
C:Recording with Dolby NR type C
@3
PHONES SELECT switch
• Use this to select the headphone’s output
signal.
CD :
The CD’s play signal are output to the
headphones.
TAPE/MIX :
The line out (MIX) signals are output to the
headphones.
@4
Headphones jack
• For private listening, you can connect your
headphones to this jack.
• Do not raise the volume level too much when
listening through headphones.
@5
PHONES LEVEL control
• Use this adjust the output level of the
headphones.
@6
INPUT LEVEL control
• This knob adjusts the recording input level.
It affects the level in both channels.
See page 14.
@7
Eject button (5)
• Press this button to eject the cassette. When
the stop the tape transport; then press the
eject button.
@8
Cassette compartment cover
• If this compartment cover is not closed
completely, the tape deck’s transport controls
will remain inoperative.
@9
Tape transport buttons
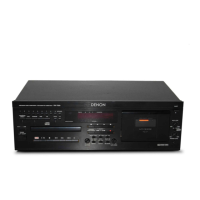
!5
Auto gain control switch of Mic
(MIC AGC) (DN-T645 only)
• Selects the microphone level adjustment
method.
OFF : The level is adjusted with the MIC LEVEL
control !4.
ON : The level is adjusted automatically according
to the level of the microphone input signal.
!6
Microphone jacks (MIC L/MONO, R)
(DN-T645 only)
• Connect the microphone to this jack for
microphone mixed recording.
• MIC signals will be mixed with the line input
signals or CD signal.
• Accepts an balanced (TRS Type) microphone
with 1/4” mono jacks.
• When a microphone is only connected to the
L/MONO jack, the recording will be monaural.
• Connect to both the L and R jacks for stereo
recording.
!7
Microphone mode switch
(MIC MODE) (DN-T645 only)
OFF : Turns the microphone input off.
LINE : The sound input to the microphone is
output from the LINE OUT (TAPE/MIX)
jack. The sound input to the microphone is
not recorded.
REC : Microphone mixed recording is performed.
!8
TAPE SPEED control
• Use this knob to vary the tape speed.
• The speed can be varied with in a range of
approximately ±12 % according to the position
of the speed control knob.
!9
OUTPUT switch
MIX :
The tape’s audio signals and CD audio signals
are output from the UNBALANCED OUT
TAPE/MIX terminals and BALANCED OUT
TAPE/MIX terminals.
SEP. :
Only the tape’s audio signals are output from
the UNBALANCED OUT TAPE/MIX terminals
and BALANCED OUT TAPE/MIX terminals.
NOTE :
• To prevent noise, set the MIC MODE
switch !7 to “OFF” when connecting
microphones to the MIC jacks.
#0
Display
• Refer to page 8 for details.
#1
COUNTER RESET/MEMO button
• When this button is pressed once, the counter
is reset and the display is set to “0000”.
• When the button is pressed again, the position
at which the counter was reset is stored in the
memory and “MEMO” appears on the display.
Memory function : When the tape is rewound,
rewinding stops at the position stored in the
memory.
• When the button is pressed again, the memory
is cleared.
#2
Disc holder
• The disc placed on this holder. Pressing the
disc holder open/close (
5) button w will open
and close the holder.
When loading the CD, place it securely in the
disc holder.
#3
Remote control sensor
(REMOTE SENSOR)
• About the wireless remote control unit : Please
contact local dealer or distributor.
#4
+10 button
• Press this button first when selecting track
numbers over 10.
• Use together with the number buttons #9.
For example, to select track number 15,
press then .
For track number 33,
press three times, then press .
1
Play button (forward) Press to playback tape. (to forward)
Rec/Rec mute button
3
Rec Pause button
Press the rec/rec mute (
4) button and play (0 or 1) button
simultaneously to start recording. If only the rec/rec mute (
4) button is
pressed, the tape deck enters the recording pause mode. Pressing the
button in the recording pause mode will start auto rec mute, and a 4-
second silent space is recorded onto the tape. See page 15.
0
Play button (rewind) Press to playback tape. (to rewind)
2
Stop button Press to stop the tape in any mode.
6
Fast rewind button Press for fast rewind.
7
Fast forward button Press for fast forwarding.
Press this button to enter the recording pause mode from the
recording or recording mute mode.
4
#5
CD synchronized recording button
(CD SYNC.)
• Press for synchronized recording from CD to
cassette deck.
• The recording level is adjusted automatically.
(Refer to page 15 for details.)
#6
A-B (A-B repeat) button
• Use this to play a set section repeatedly.
• When the button is pressed once during
playback, that position is set as the A point and
the “A-B” indicator flashes on the display.
• When the button is pressed again, that position
is set as the B point, the “A-B” indicator stops
flashing (remaining lit), and the A-B section
begins playing repeatedly.
• When the button is pressed again, A-B repeat
is canceled and the mode returns to the normal
play mode.
• The A-B repeat function can be used even
when the REPEAT switch $1 is turned off.
#7
RANDOM button
• When this button is pressed, the random play
mode is set and the “RAND” indicator is lit.
#8
CALL button
• When this button is pressed in the program
mode, the programmed track numbers are
called out.
• When a number button #9 is pressed after a
track number is called out, a new track number
is inserted.
• When the 0/CLEAR button #9 is pressed, the
displayed track number is cleared. (Refer to
page 11 for details.)
NOTE :
• Set the MIC MODE switch !7 to OFF when
not using the set with a microphone
plugged into the microphone jack (because
the white noise level is high when the MIC
AGC mode is on.)
 Loading...