www.desatech.com
108660-01E 19
OPERATING FIREPLACE
FOR YOUR SAFETY
READ BEFORE LIGHTING
WARNING: If you do not fol-
low these instructions exactly,
a re or explosion may result
causingpropertydamage,per-
sonalinjuryorlossoflife.
A. Thisappliancehasapilotwhichmust
be lighted by hand. When lighting
the pilot, follow these instructions
exactly.
B. BEFORE LIGHTING smell all around
the appliance area for gas. Be sure to
smellnexttotheoorbecausesome
gas is heavier than air and will settle
ontheoor.
WHAT TO DO IF YOU SMELL GAS
• Do not try to light any appliance.
• Do not touch any electric switch; do not
use any phone in your building.
• Immediately call your gas supplier from
a neighbor’s phone. Follow the gas
supplier’s instructions.
• If you cannot reach your gas supplier, call
the re department.
C. Use only your hand to push in or turn
thegascontrolknob.Neverusetools.
Iftheknobwillnotpushinorturnby
hand,don’ttrytorepairit,callaquali-
edservicetechnicianorgassupplier.
Forceorattemptedrepairmayresultin
areorexplosion.
D. Do not use this appliance if any part
hasbeenunderwater.Immediatelycall
aqualiedservicetechniciantoinspect
the appliance and to replace any part of
thecontrolsystemandanygascontrol
whichhasbeenunderwater.
LIGHTING
INSTRUCTIONS
NOTICE: During initial operation
ofnewheater,burninglogswill
giveoffapaper-burningsmell.
Orangeamewillalsobepres-
ent.Opendamperorwindowto
ventsmell.Thiswillonlylasta
few hours.
1. STOP! Read the safety information,
column1.
2. Turnwallswitch(ifinstalled)totheOFF
position.
3. Turn off all electric power to appliance.
4. Fully open glass doors if installed.
5. Removefrontrefractorybrickaccess
panel.
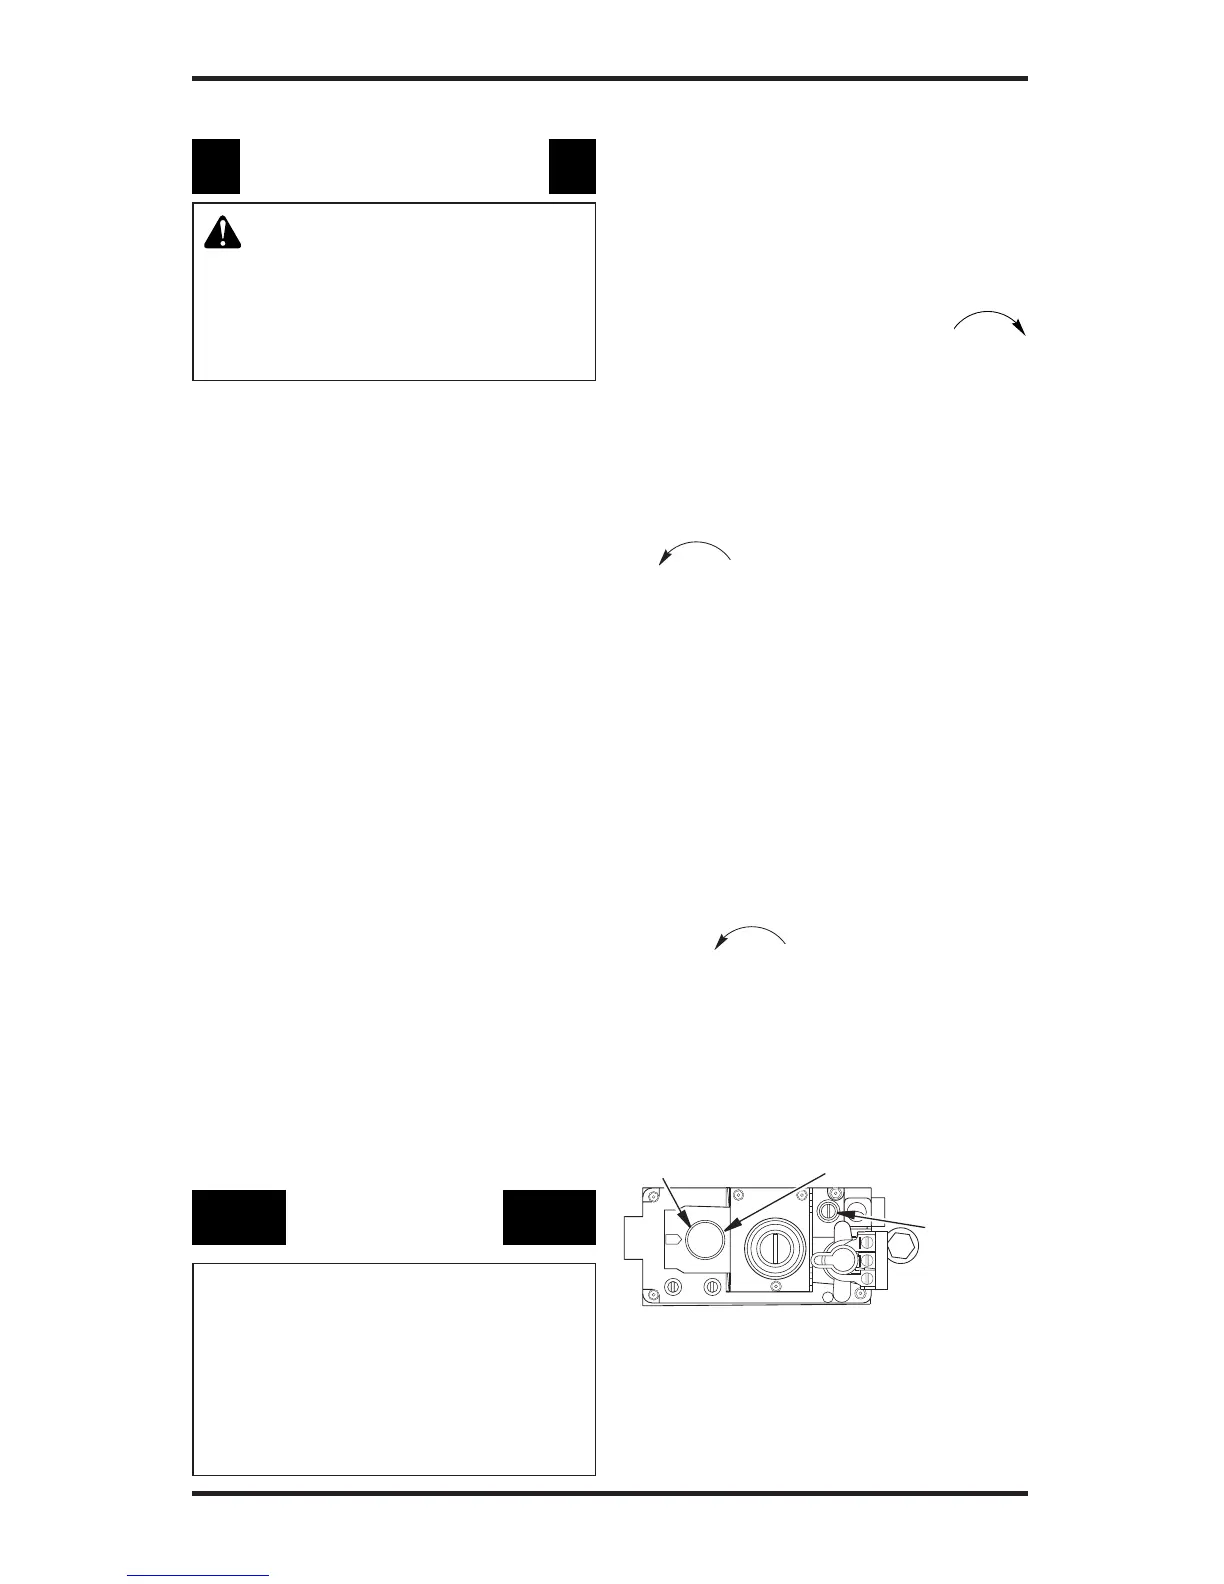
6. Turngascontrolknobclockwise
totheOFFposition(seeFigure36).
7. Waitve(5)minutestoclearoutany
gas. Then smell for gas, including
neartheoor.Ifyousmellgas,STOP!
Follow“B”inthe safety information,
column1.Ifyoudon’tsmellgas,goto
the next step.
8. Turn control knob counterclockwise
to the PILOT position.
9. Push knob in all the way and hold.
Immediatelylightpilotmanually.Con-
tinuetoholdcontrolknobinforabout
(1)minuteafterpilotislit.Releaseknob
and it will pop back up. Pilot should
remainlit.Ifitgoesout,repeatsteps
5 through 9.
• If knob does not pop up when released,
stop and immediately call your service
technician or gas supplier.
• If pilot will not stay lit after several tries,
turn gas control knob to “OFF” and call
your service technician or gas supplier.
10.Turn gas control knob counterclock-
wise to “ON”. Knob can be
turnedto“ON”onlyifcontrolknobis
popped out.
11.Replacefrontrefractorybrickaccess
panel.
12.Fullycloseglassdoorsifinstalled.
13.Turn on all electric powerto the
appliance.
Figure 36 - Control Knob in the PILOT
position