9. Numerical values are displayed on the right side of
the Alignment Menu screen to indicate the relative
optical signal strength for each axis. The numerical
value displayed to the right of “Quad X” indicates
horizontal (left/right) signal strength. The numerical
value displayed to the right of “Quad Y” indicates
vertical (up/down) signal strength. The optimum
value is zero (0.00). It is normal for a fair amount of
signal instability to be present; therefore it is recom-
mended to monitor the value for a minimum of 15-30
seconds to determine the average reading. If the
readings average zero, no adjustments are neces-
sary. Proceed to step 12.
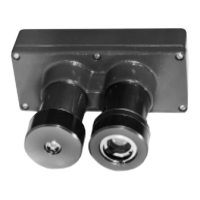
10. If the Quad X reading does not average zero, slowly
adjust the horizontal adjustment knobs as necessary
to achieve an average reading of zero at Quad X.
Make alignment adjustments in very small incre-
ments, and always monitor the value for a minimum
of 15-30 seconds after making any adjustment to
determine the relative average indication change.
Generally, only slight adjustments are required to
achieve maximum signal strength.
NOTE
Do not attempt to tighten any adjustment knob if
the opposing knob is tightened hard against the
mounting plate hardware. It is necessary to slight-
ly loosen the opposing adjuster in all cases before
attempting to tighten an adjuster.
11. If the Quad Y reading does not average zero, slowly
adjust the vertical adjustment knobs as necessary to
achieve an average reading of zero at Quad Y.
Make alignment adjustments in very small incre-
ments, and always monitor the value for a minimum
of 15-30 seconds after making any adjustment to
determine the relative average indication change.
Generally, only slight adjustments are required to
achieve maximum signal strength. Do not attempt to
tighten any adjustment knob if the opposing knob is
tightened hard against the mounting plate hardware.
It is necessary to slightly loosen the opposing
adjuster in all cases before attempting to tighten an
adjuster.
12. When an average numerical indication of “0” (zero)
is displayed for the Quad X and Quad Y values,
slowly hand-tighten the adjustment knobs on each
axis simultaneously. When the knobs are tight, the
OPECL mounting plate should be firmly held in
place by the adjusters.
13. Tighten all Mounting Plate U-bolt nuts and vertical
adjustment bracket bolts. Double check the Quad X
& Y values to ensure that there has been no module
movement.
14. Remove the Alignment Kit adjustment tools.
15. From the Alignment Menu, select Disable Alignment
(selection 5). This places the receiver in normal
mode, generating a green LED indication and a live
4 mA signal level.
16. Perform a zero calibration.
17. Confirm proper operation by blocking the light beam
with a solid object such as cardboard until a beam
block fault is generated (default time delay is 60
seconds).
18. Bypass all system alarms and confirm proper opera-
tion by placing the optical test film into the light
beam and inspecting for a low gas alarm condition.
The alarm condition should clear when the film is
removed from the beam.
19. The system is fully aligned.
17 95-85561.1