6
A-DV5HH
EN
seT up
System Assembly
NOTE- Follow Steps 1-3 if you received your humidifier system and CPAP
separately. Start with Step 4 if you received the complete system in
one carton.
1. Locate the heater power connector on the bottom of the
device. Remove the port plug and insert it into the storage
opening in the bottom of the humidifier cradle (Fig 1).
2. Remove the air supply tubing from the back of the device.
3. Locate the air supply port at the bottom of the device.
Remove the port plug and insert it into the air supply port
in the back of the device (Fig 2).
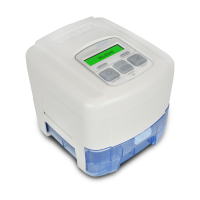
Attaching Flow Generator
4. For easier attachment, remove the water chamber before
assembling the flow generator and humidifier cradle.
5. Align the base of the device with the cradle at a slight angle
as shown (Fig 3). Slide the device forward and align cradle
locking tabs with the recesses in the CPAP. Firmly press
down the back to lock into place.
6. Verify that both sides of the device have clicked into place
with the humidifier cradle.
7. Attach the air supply tubing to the air supply port outlet on
the humidifier cradle (Fig 4).
8. Insert the power cord into the back of the flow generator.
Make sure the power cord is fully inserted into the
connector (Fig 5). Plug the other end of the power cord
into the AC wall outlet.
CAUTION– The height of the system must always be lower than
the interface mask during use to prevent water from
getting into the CPAP mask.
Filling The Chamber
1. Hold the chamber upright and fill with distilled water to the
top of the opening (Fig 6).
CAUTION– Use only distilled water that is at room temperature.
Do not add any medication or other additives to the
water.
2. Carefully tip the chamber back to the level position. The
water in the fill ports will flow into the chamber when it is
tipped back to the level position.
1
2
3
4
5