CUTTING
KERF
A,IARKS
OpuoNer:
Prior to
cutting
kerf marks
you
may elect
to
place
a
protective
material over
your
table
top. This
material can
easily
be
replaced as required
without disturbing
the saws
alignment.
Cut a
piece
of V+"
plywood
the
same size as
the
front
board
and secure it to the
front board
with
countersink
3/q"
brads.
Do not
nail where the saw
kerfs
will
be
located.
It
is not necessary to cover
the spacer
or back boards.
After
all
your
adjustments
are made
you
should
now
cut into
the table top
the most common
kerf marks.
This
will allorv
you
to
move the saw
into different
positions
u'ithout chang-
ing the elevation.
To do so
proceed
as follows:
(a)
Locate
and lock the arm 90" to
the fence.
Locate
the blade
90" to the table.
(b)
Draw the saw
out to about the
middle of the
track
and lower the blade until
it
just
grazes
the
ply
top.
(c)
Turn
the saw on
and
push
the
roller head all the
wav
back.
This will cut the fence
and lightly score thc
Plv
top.
(d)
Lower the arm
(saw
still
running)
1/4
turn.
Pull thc
saw forward to the end
of the arm with
your
lelt
hand.
This will cut a
groove
in
the table
top 7
i32"
deep.
Tighten Rip
Lock.
(Refer
to figure
l)
With the saw
stilI running and
your
left hand still on
the handle
release the
yoke
lock
with
your
right
hancl
and
pull
it with suflicient strength
so the
yoke
clamp
handle
presses
against
the
yoke
locator
pin
bell
pull-
ing the
yoke
locatcr
pin
out cf the hole
in
the
roller
head. You can
now rotate
the
saw blade in a clock-
wise
direction.
Release
the
pressure
on the bell ancl
continue
rotating the blade until the spring
rnounted
yoke
locator
pin
falls into the next
hole. You have
now
cut
in the table
top a
t/4
turn
groove
known as
the swing
line. The saw
is now in
the
"in-rip"
posi-
tion.
(Refer
to
figure 2)
Loosen
Rip Lock.
Once
the
1/1r
turn
cut is complete lock the
yoke
lock
wirh
your
right
hand and with the
blade
still revolv-
ing
push
the
yoke
back on the track until the bladc
reaches
the fence.
This will
cut
the rip through iu
the
center
of the table.
Stop
Motor.
(Refer
to fig.
3)
Return sa\\' to
position
shown
in figure 1.
Lock
Rip
Lock
and start motor. Using the
1'oke
clamp handle,
release
the
pressure
on the bell and
rotate
sau'
counterclockwise,
to the outrip
position.
This cuts
the swing line
for
outripping.
Loosen rip
lock.
(h)
Lock the
yoke
lock
(clamp
handle)
,
and
g'ith
1'our
right hand and blade still revoh'ing.
push
the sau'
back
until the
new trough matches
the
trough
cut
in
(f)
Stop
Motor.
Return saw to
position
shown in figure 1 and
move to
the
rear
position
behind
the
fence.
Lock Rip Lock
and
start
mOtor. With
motor running
release the
miter handle
with
your
right hand and
move arm to the
45" right hand miter
position.
This
will cut
a trough
for mitering.
(Optional
step)
Repeat above
for 45" left hand miter.
Stop
Motor.
(e)
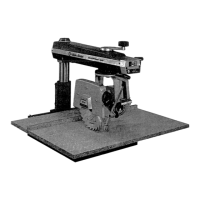
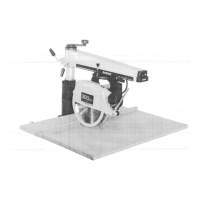
FIGURE
I
:
(l
)
(e)
(
j)
(k)
-ryqryry-S
!t!lrlt?
E?,Sg
rcset
saw
**-Srl!lllii"
qi6
&**
"r*
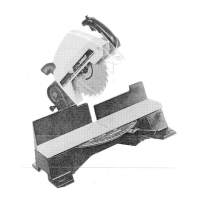
FIGURE 2
t2
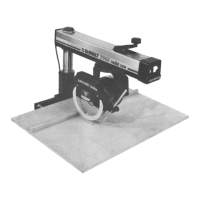
FIGURE
3

 Loading...