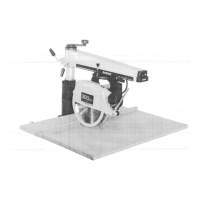
OPERATING
INSTRUCTIONS
I
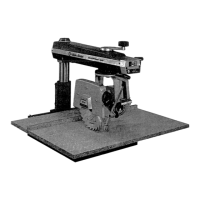
ARM
ROTATES
RIGHT
OR
LEFT
FOR
MITER
CUTS
FIG'
A
Pullclamp (B)
then
Yilg-lh:,rm
(4).rig.trt.gr
left
to
the
desired.angle.
The
catibrated
miterscate.(D)
is
at
eye
tevet
and
shows
the
orecise
angtq
ygg
wa'nt.
wTtrr
tii"'iririilrci".i"iiii-tmit";;i;ri-;fiiautomaticary
rocate
0o
and
45o
angre.
After
positionine
arfr'(Ai
ir-ide;i;;a;dE,;;"rr,irliiii
el
to rock
the
arm.
Elevation
Yoke
Swivels
3600
for
Rip
Cuts
Each
full
turn
on
the
elevating
handle
(C)
puil
yoke
ctamp
handle
(E)
against
lifts
or
lowers
the
arm (A)
exacily
/s
pin
tifter (F)
and
swing
yoke
right
inch.
or
left,
With
lifter
released,
the
yoke
automatically
stops
at
four
90"
positions.
Saw
Tilts
for
Bevel
Cuts
Elevate
the
arm
2t/.
inches
(lg
turns).
Pull
handle
(G)
and
tilt
to
the
desired
angle.
With
the
handle
released,
the
bevel
locating
pin
automatically
locates
popular
O",45",
and
90.
bevel
positions.
When
desired
bevel
angle
is
obtained,
push
clamp
handle
(G)
and
lock
bevel.
NoTE:
Always
leave
the
anti'kickback
assembly
in
place.
Adiust
it
to
iust
crear
the
workpiece
in
crosscutting
operations
and
about
1'28"
below
the
top
ol
the
workpiece
during
all
ripping
operations.
observe
caution
tag
on
guard
-
do not
rip
from
anti-kickback
end.
CROSS.CUTTING
l"1il'Jihil#:"J.il1[t'ilt'i:ff[;:ji,x'.?:,i1,]j;,:,;de
iust
crears
the
rence
and
workpiece
cramp
it
in
this
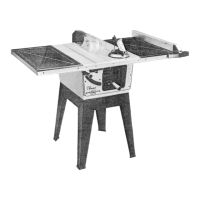
FENCE
LOCATIONS
{
{
Position
(A)
is
used
ror
most
cutotf
and
narrow
ripping
operations.
Position
(B)
is
used
ror
maximum
width
rippine.
posifrJ;l'c)IJuseo
to
achieve
extra
cutotf
capacity
in
thin
worrl
to-acrriere
ttris
po}iion
on
i'!o0"1
7749
rip
a Ls/e'
wide
strip
off
tne'space.
board
and
prace
this
piece
between
guide
lence
and
front
board.
t4