ENGLISH
9
cause personalinjury.
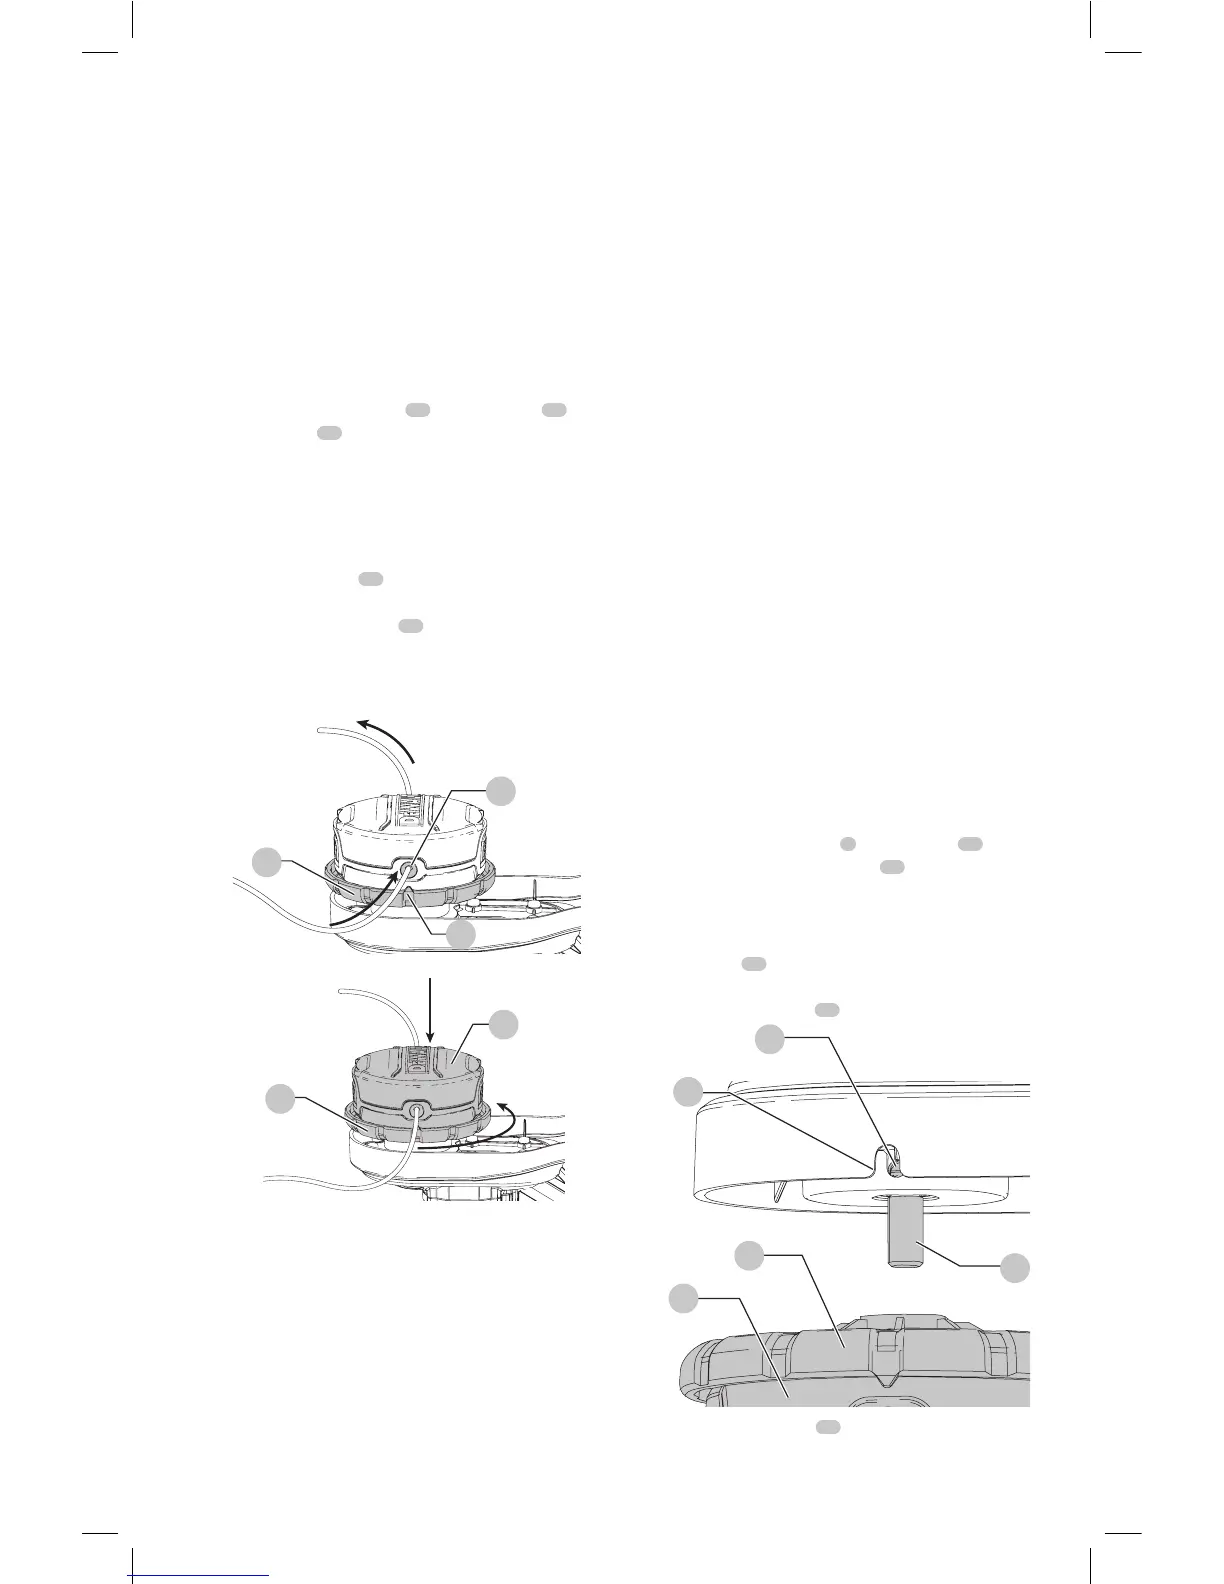
Your trimmer uses 0.080 inches (2.032 mm) diameter
line, however a 0.095 inches (2.413mm) line may be
used as long as it is spiral-shaped with smooth, round
edges, but may reduce runtime of the trimmer.
CAUTION: To avoid appliance damage, if
the cutting line protrudes beyond the trimming blade,
cut it off so that it just reaches the blade.
Use only
replacement line.
1. Remove battery.
2. Cut a max of 25 feet (8 m) length of trimmer line.
3. Align spool housing eyelets
14
with the arrow
15
on
the spool head
16
as shown in Figure H.
4. Thread one end of the trimmer line through an eyelet.
Guide the line through to the second eyelet and
continue to pull the line through until there are equal
lengths of string on each side of the spool housing as
shown in Figure H.
5. Secure the spool cap
17
from moving with one hand.
Using your other hand, wind the string onto the spool
by rotating the spool head
16
counter clockwise as
shown in Figure I. Continue winding until 5 inches
(127mm) of string remain on each side of the spool
housing.
Fig. H
16
15
14
Fig. I
16
17
MAINTAINENCE
WARNING: To reduce the risk of
serious personal injury, turn unit off and remove
the battery pack before making any adjustments
or removing/installing attachments or
accessories. An accidental start-up can causeinjury.
Cleaning
WARNING: Blow dirt and dust out of all
air vents with clean, dry air at least once a week. To
minimize the risk of eye injury, always wear ANSI Z87.1
approved eye protection when performing this.
WARNING: Never use solvents or other
harsh chemicals for cleaning the non-metallic parts
of the appliance. These chemicals may weaken the
plastic materials used in these parts. Use a cloth
dampened only with water and mild soap. Never let
any liquid get inside the appliance; never immerse any
part of the appliance into a liquid.
Accessories
WARNING: Since accessories, other than
those offered by
recommended accessories should be used
with thisproduct.
Recommended accessories for use with your tool are
available at extra cost from your local dealer or authorized
service center. If you need assistance in locating any
accessory, please contact
(1-800-433-9258).
Replacement Accessories
Replacing Spool Assembly (Fig.A, J, K)
1. Rotate the spool housing
8
until the hole
18
in the
spindle plate aligns with notch
19
in the guard. Insert
a screwdriver through the notch and into the hole, to
prevent the spindle from turning.
2. Uncrew and remove the spool housing by turning the
spool head
16
clockwise.
NOTE: Do not try to remove the spool housing by
turning the spool cap
17
.
Fig. J
16
17
19
18
21
3. Remove spindle plate
20
before installing a new
housing. Remove any dirt and grass from the motor
housing and spindle plate.