INSTALL GUIDE
Keypad & RFID
|
Basic & Advanced
11
Rear View
Rear View
Front View
2
3
Front View
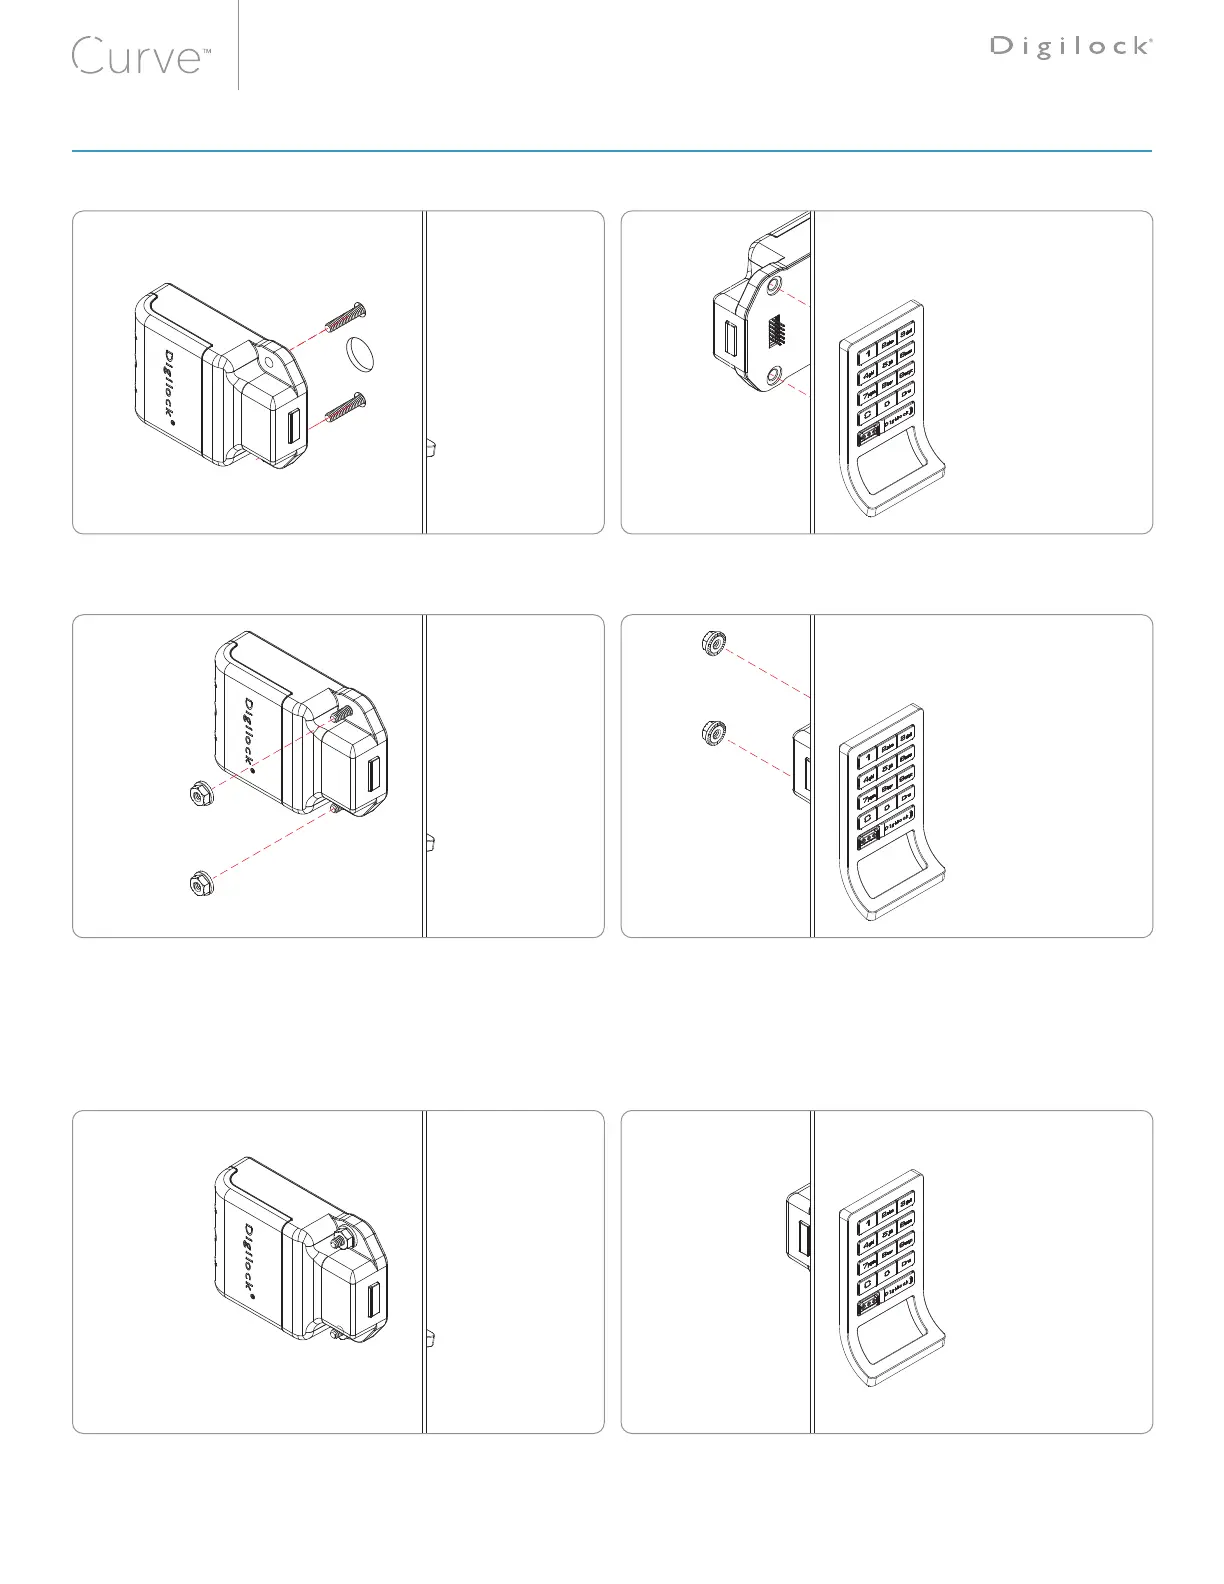
Insert the front unit screw posts through the doors mounting holes.
Hold the front unit against the front of the door. Use the rear unit mounting holes as a guide, then slide the front and rear units together.
Make sure the connector pins align properly with the connector.
If properly connected, a triple beep will be heard and the LED will flash three times.
For illustration, a keypad front unit with a bolt rear unit is shown�
Note: Mounting hardware requires a torque level of: 21.4 kgf/cm² ±20% for hand or powered tools to insure proper lock functionality.
Rear View
4
Front View
Make sure the connector pins align properly with the connector.
If properly connected, a triple beep will be heard and the LED will flash three times.
LOCK INSTALLATION STEPS