INSTALL GUIDE
Keypad & RFID
|
Basic & Advanced
7
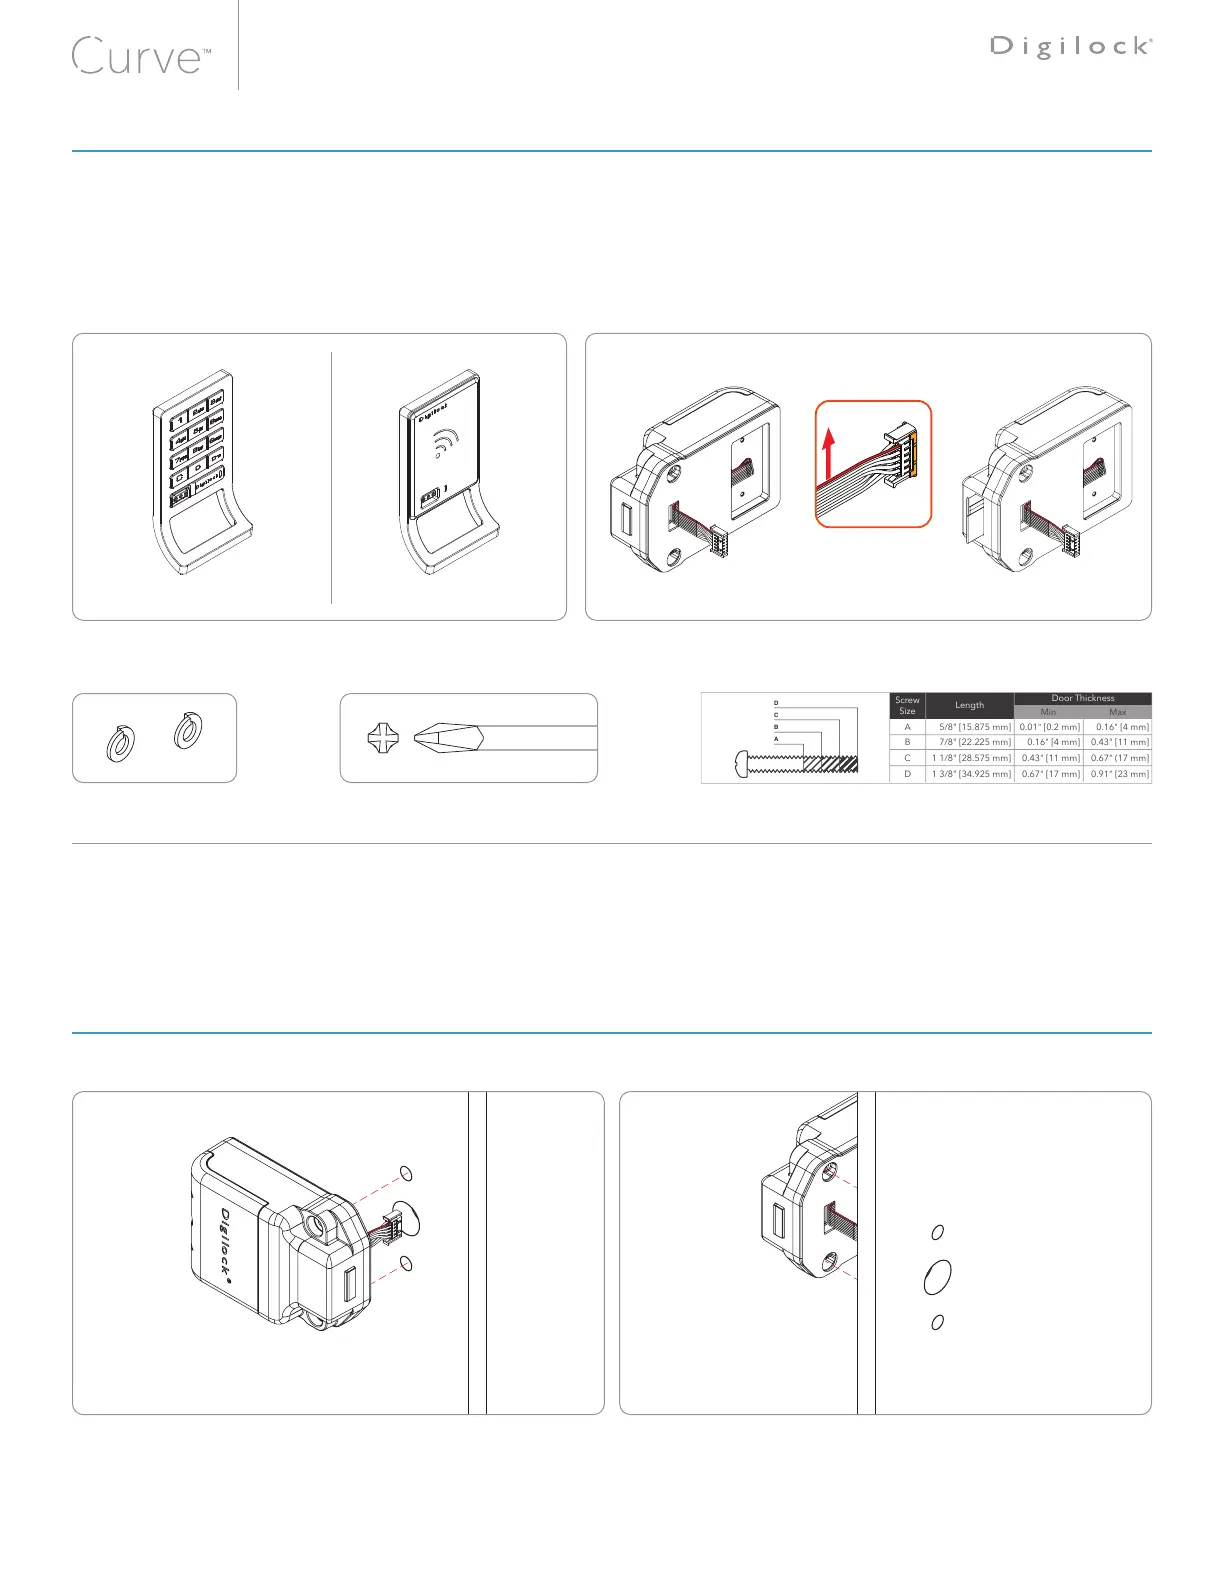
For door thickness measuring between 0�16” - 0�91” [4mm - 23mm]
Required Components
Front Unit Rear Unit
RFID Standard BodyKeypad Standard Body Deadbolt - Cable Deadlatch - Cable
1*- Phillips Head Screwdriver (#2)2 - Split Lock Washers 2 - #10-24 Pan-Head Phillips Screws
Min Max
A 5/8" [15.875 mm] 0.01" [0.2 mm] 0.16" [4 mm]
B 7/8" [22.225 mm] 0.16" [4 mm] 0.43" [11 mm]
C 1 1/8" [28.575 mm] 0.43" [11 mm] 0.67" (17 mm]
D 1 3/8" [34.925 mm] 0.67" [17 mm] 0.91" [23 mm]
* Not Included
Note: Mounting hardware requires a torque level of: 21.4 kgf/cm² ±20% for hand or powered tools to insure proper lock functionality.
For illustration, a keypad front unit with a bolt rear unit is shown�
Rear View Front View
1
With the rear unit behind the door, extend the ribbon cable through the doors center opening.
Cable Connector
Orientation
NUT POST - CABLE CONNECTOR INSTALLATION
LOCK INSTALLATION STEPS (1-6)