INSTALL GUIDE
Keypad & RFID
|
Basic & Advanced
5
Drill x2
5/16" 0.3125in
[7.94 mm]
Drill 3/4"
0.75in [19mm]
0.31”
[7.94mm]
0.31”
[7.94mm]
0.75”
[19mm]
1.09”
[27.75mm]
1.09”
[27.75mm]
2.19”
[55.5mm]
CENTER LINE
CENTER LINE
ALIGN EDGE OF
STRIKE PLATE HERE
FOR LEFT
CLOSING DOOR
ALIGN EDGE OF
STRIKE PLATE HERE
FOR RIGHT
CLOSING DOOR
ALIGN EDGE OF
STRIKE PLATE HERE
FOR LEFT
CLOSING DOOR
ALIGN EDGE OF
STRIKE PLATE HERE
FOR RIGHT
CLOSING DOOR
0.92”
[23.4mm]
0.92”
[23.4mm]
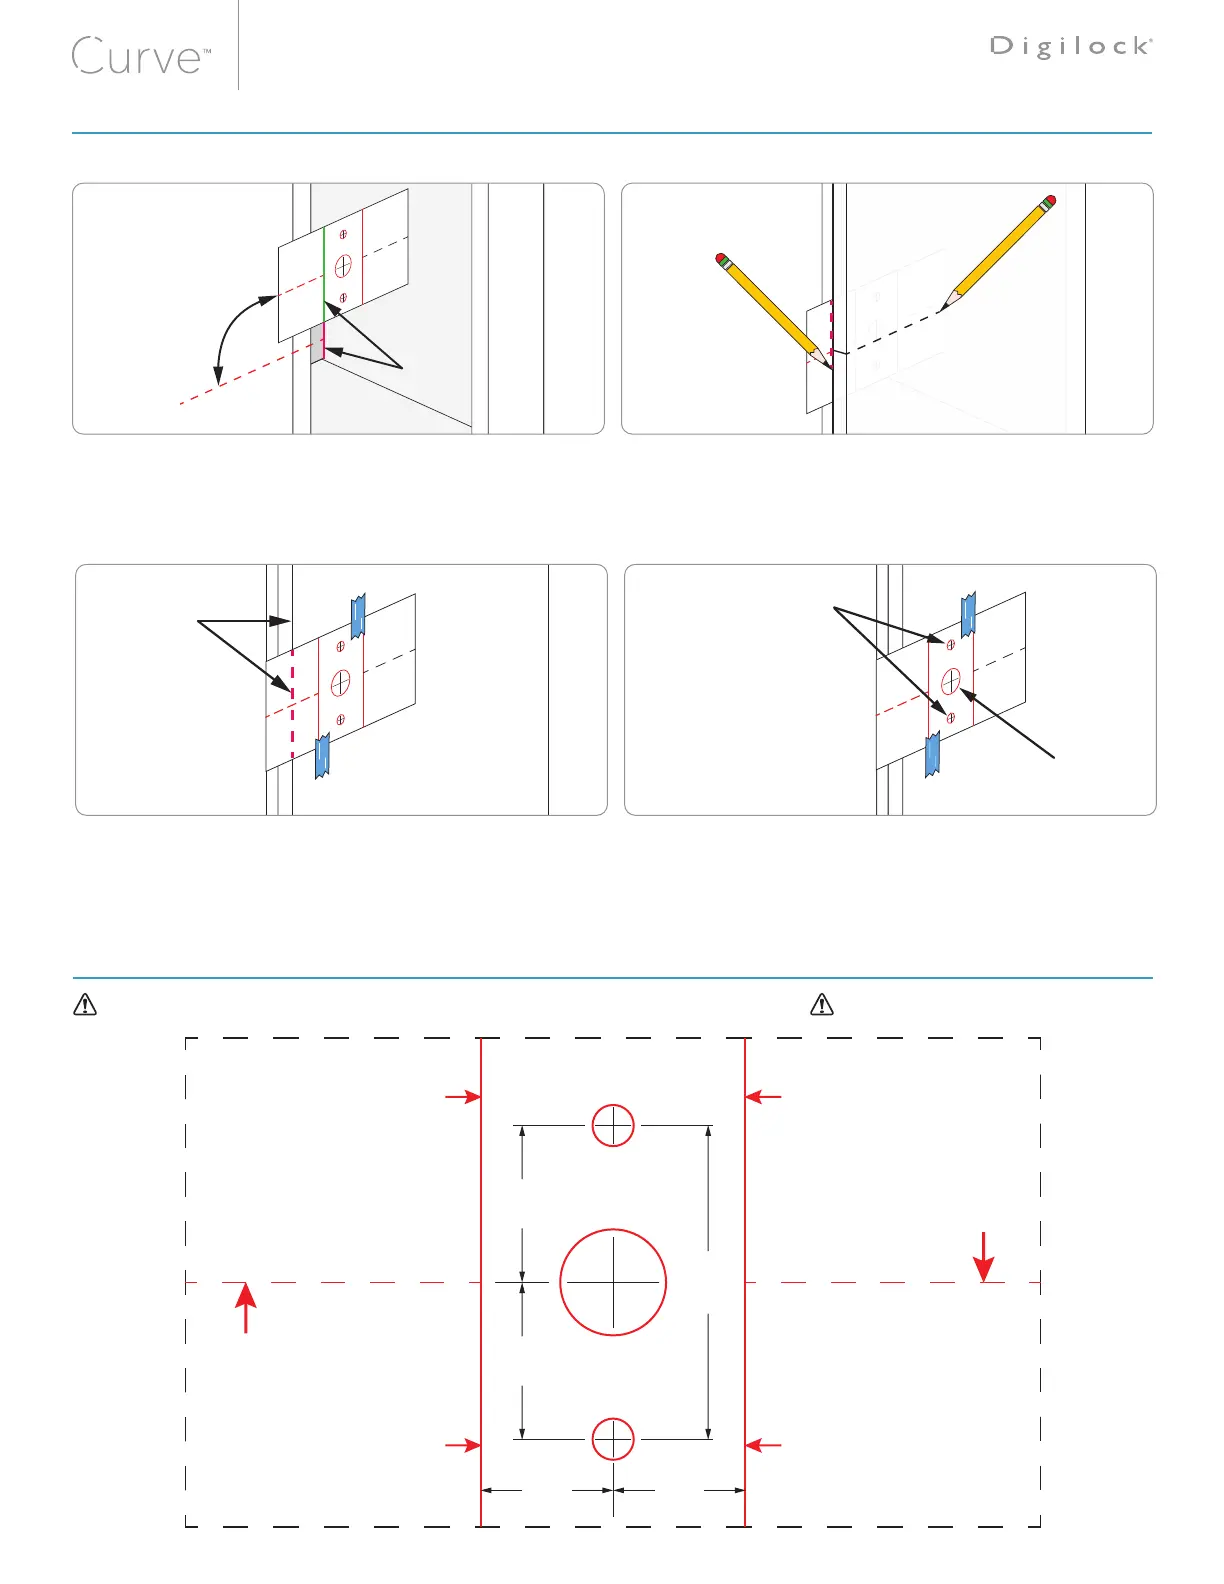
Door Mounting Holes Drill Instruction and Template
With the door open place the Template over the locker frame.
(a) Align the edge of Strike Plate with the Strike Plate Marker.
(b) Center the Template to the center of the Strike Plate.
You may secure the Template with removable tape.
Close the door over the Template.
(a) Mark the door edge at the Template Center Line.
(b) Mark the Template with the edge of the door.
1 2
Place the Template on the front of the door.
(a) Align the drawn mark on the Template with the door edge.
(b) Center the Template with the mark on the door.
Secure the Template with removable tape.
Mark the center points of the door mounting holes on the
front of the door. Drill the holes according to the specified
dimensions.
3 4
Cut along the dashed lines for New Doors or Drawers
Before printing, turn off auto scaling or “Fit to Paper” in your printer setup and print at 100%
WOOD DOOR DRILLING INSTRUCTIONS
HOLE MOUNTING TEMPLATE