25
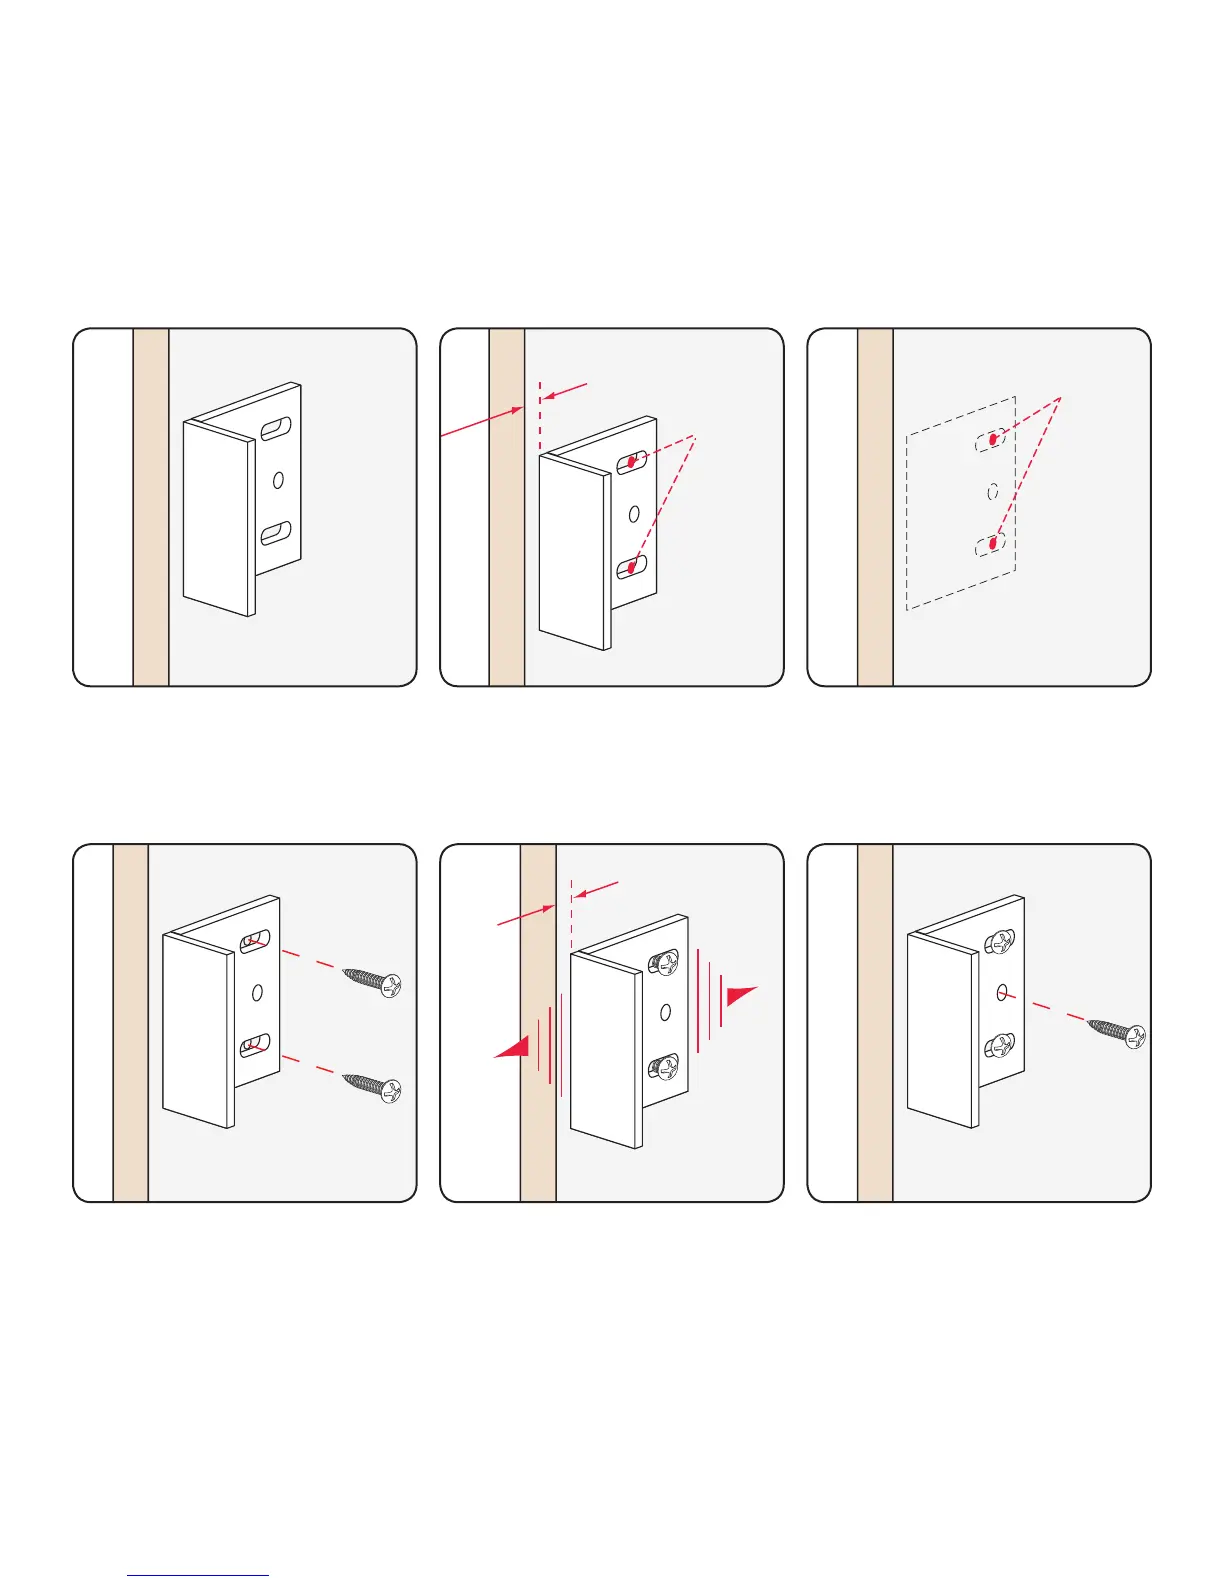
Strike Plate Installation
Note: Skip these steps if a Digilock compatible strike plate is already present.
Position the Strike Plate on the
door frame centering it adjacent
to the center of the mounting
holes.
1
Door Frame
0.125 in
(3.18 mm)
Mark Here
Allow 1/8” or 0.125 in (3.18 mm)
from door edge and mark pilot
holes for the adjustment slots as
shown above.
2
Door Frame
Drill Pilot
Holes Here
Drill 0.25 in (6.35 mm) pilot holes
using a 1/16 in drill bit.
3
Position the Strike Plate and 2
self-tapping screws into the 2
outer adjustment slots.
NOTE: Do not tighten the screws.
4
Door Frame
0.125 in
(3.18 mm)
Adjust the Strike Plate to the
proper position (as shown in Step
2). Then tighten the 2 screws in
the adjustment slots.
5
Place and tighten the third screw
into the center Strike Plate hole to
lock the Strike Plate into position.
6
Required Hardware & Tools:
• Digilock Strike Plate with 3-Self-Tapping Screws
• Pencil: To mark screw holes
• Phillips Screwdriver: #1 or Cordless drill (with torque adjustment) and a phillips driver recommended