Page 7
Replacing an older Model IP7
If the IP7-FX is being used to replace an existing an existing IP7-
ST/STX, IP7-SS8/SE8 or an IP7-FD, please note the following:
• The J3-7 (Case) connector on older models was an extra
ground. If replacing an older model with an IP7-FX, any
wire connected to J3-7 should be moved to J3-6.
• If replacing an IP7-ST/STx, make sure the internal ST-MIC
switch (located on the DIN clip side) is set in the same
position on the IP7-FX
• If the older IP7’s J2-6 (SPKR 8Ω+) and J2-7 (SPKR 8Ω-) is
connected to an amplifier or amplified speaker, use the IP7-
FX’s J2-3 (Line Out) and J2-4 (GND) instead
• If replacing an IP7-SE8 / IP7-MSR-BRD with an IP7-FX, the
IP7-MSR-BRD can be eliminated by changing the IP7-FX’s
ST-MIC internal switch to the ST position
• The IP7-FX does not support the Aiphone IE/ IF series call
station. An IP7-ST/STx must be used
• Other than the exceptions noted above, the J1, J2, J3, and
network can be moved over to the IP7-FX
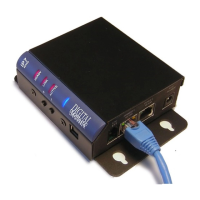
Connecting to an Ethernet Network
The Ethernet 10/100 connects to a 10/100 network switch port. Port 2
10/100 allows an additional IP device to be connected to the network
without the need for an additional network drop. The second port is not PoE
capable.
• Plug a Cat5 cable into the RJ-45 connector labeled Ethernet 10/100
and connect the other end to a 10/100 switch.
• To optionally connect a second IP device to the network, plug a Cat5
cable in the RJ-45 connector labeled Port 2 10/100
• The Ethernet 10/100 connector supports auto “MDIX” and can be
plugged directly into a PC for diagnostic purposes.
Connecting Power
The IP7-FX auto senses the power source and voltage. An external power
source will always override PoE power.
PoE
Plug a Cat5 cable from an 802.3af compatible switch or injector into the RJ-
45 connector labeled Ethernet 10/100. 15.4 watts will be requested from
PoE (802.3af compatible) Power Source Equipment (PSE).