Page 15
Mounting Instructions
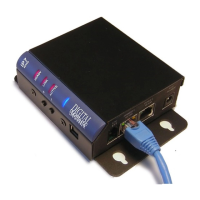
The IP7-FX can be installed on a DIN Rail or surface mounted.
Din Rail Mounting
To DIN rail mount:
• Cut a piece of 35mm DIN rail (not supplied) to the desired length and
secure it to the location
• Place the IP7-FX onto the DIN rail by tilting the top of the unit (J1, J2,
J3 connectors facing up with Volume buttons and USB-B connector
facing forward) back towards the DIN Rail until the IP7-FXs DIN clip
catches the top of the rail
• Press in at the bottom of the IP7-FX to snap it in place
Surface Mounting
To attach the surface mount plate to the IP7-FX:
• Snap the plastic mounting plate in
half at the score marks
• Line up the two pieces of the surface
mount plate to the back of the unit.
The two mounting holes of the
surface mount plate should be above
the J1, J2, and J3 connectors
• Attach the two halves of the plate
using the four machine screws
included in the package
• Attach two (2) #8 pan head screws 2” (52 mm) apart and screw in to
within ¼”
• Place the mounting holes of the IP7-FX over the #8 screws
Setting Volume Levels
The IP7-FX supports seven volume levels for an attached speaker.
• Press the “+” or “- “ button one time to increase or decrease the
speaker volume
• If the IP7-FX’s Ready and Link LEDs are on solid, a high frequency
beep is heard when the volume “+” is pressed and a low frequency
beep is heard when the volume “-” is pressed
• Pressing the “-” or “+“ button seven times sets the unit at its lowest or
highest setting.
• Refer to the software manuals for setting the volume via software.