860-00186-00 Rev J
Digital Ally Inc.| Device Configuration
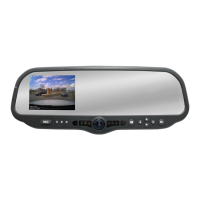
Display
LCD Brightness
The LCD brightness is separately adjustable for day and night modes. To use this setting, choose
the desired brightness setting for day and night modes. A light sensor located on the front of the
DVM automatically places the system in the correct mode (day or night). This sensor uses a
sampling filter to sense changes in ambient light; therefore some delay will be present when
switching between the two modes. This is designed to prevent the DVM from switching
unnecessarily when the dome light or car door is opened, for example.
Settings: Day Mode 1-7 [Default =5]
Night Mode 1-7 [Default =5]
The LCD brightness setting can be temporarily overridden by the DVM operator. See page
5-5 for more information.
Record LED Behavior
The Red Record LED behavior is adjustable to accommodate your desired operation when the
DVM is in record mode.
Settings: Off (Stealth Mode), Slow, Medium, Fast, Solid [default]
LCD Mode
This parameter defines how the LCD screen will operate during pre-event and during recorded
events. Consult the table below.
Settings: Off, On, Auto [default]
LCD will always be ON during pre-event & event recording.
User cannot turn off the LCD unless using covert mode.
LCD is ON as mirror boots-up to allow user login.
LCD is OFF during pre-event.
LCD is OFF during recorded events.
LCD can be forced to stay ON by holding the DOWN key for 3 seconds.
As soon as a recording completes, the LCD will remain ON for the duration of the Entry
Timeout as configured in VuVault to allow user input profiling screens (if profiling
screens are enabled).
LCD is ON as mirror boots-up to allow user login.
LCD is OFF during pre-event.
LCD is ON during recorded events.
LCD can be forced to stay ON by holding the DOWN key for 3 seconds.
As soon as a recording completes, the LCD will remain ON for the duration of the Entry
Timeout as configured in VuVault to allow use of profiling screens (if profiling screens
are enabled).
Table 4-4: Choosing your LCD display behavior
This LCD behavior can be overridden for external sensors such as the light bar or reverse gear. LCD
overrides for connected external sensors are configured separately in the IF box input sensors section.