29
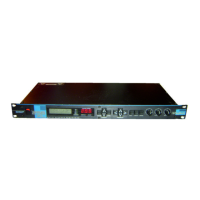
SECTION 4 - INPUT LEVELS & UTILITIES
AUTOMATIC INPUT LEVELING
Proper input level adjustment can be the difference between an acceptable recording and a great recording.
Fortunately, the Studio Quad 4 has the ability to automatically optimize your input levels based on the signal sent to
the input(s).
The concept of Auto Leveling is simple: the Studio Quad 4 listens to the signal for approximatley 8 seconds, and sets
the input levels accordingly. You also have the option of leveling the inputs manually if you want.
To automatically level the inputs, do the following:
1. Press and hold the <In Levels> button until:
AUTO LEVEL
appears in the Information line of the display.
When you release the button, the display looks something like this:
2. Select the inputs you want to auto level using the <1> through <4> buttons. The number buttons you select
light brightly, the <NEXT PAGE> button begins flashing, and the Information line of the display alternately
reads:
PRESS NEXT PAGE TO BEGIN
and
SELECT INPUTS 1 THRU 4
. You can choose to auto
level any combination or all of the inputs.
3. Make sure that the program material you want is playing through the inputs, then press the <Next Page>
button. The display reads:
AUTO LEVELING...
for eight seconds while listening to the input signal(s),
after which the display returns to the manual leveling screen.
NOTE: If no signal is detected, the Input Level will be set to the factory default of 70%.
MANUAL INPUT LEVELING
To manually adjust the input levels, do the following:
1. Press the <In Levels> button. The display shows all four inputs and their current level settings.
2. By using the <1> through <4> buttons and the <Data> wheel, select and set the input level of the input
you want to level manually.
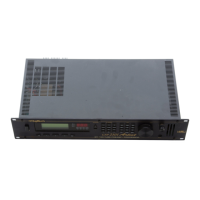
UTILITY
There are settings in the Studio Quad 4 that affect many things simultaneously. They can be found in the Utility
menu, and are considered "global" settings. This list of items includes: Display contrast, MIDI assignments, system
exclusive options, etc.
The Utility section contains eight Pages. To access Utility mode, press the <Utility> once. Once inside, you can use
the <Prev Page>, <Next Page>, <1> - <4> buttons, and the <Data> wheel to navigate through Utility mode.
ADJUSTING THE SCREEN CONTRAST
The SCRN CONTRAST control in the Utility menu allows you to adjust the contrast of the display from different
viewing angles. To change the screen contrast, do the following:
1. Press the <Utility> button and scroll to Page One of the Utility menu using the <Next Page> and
<Prev Page> button. The display reads: