12
When “default” is not available to choose
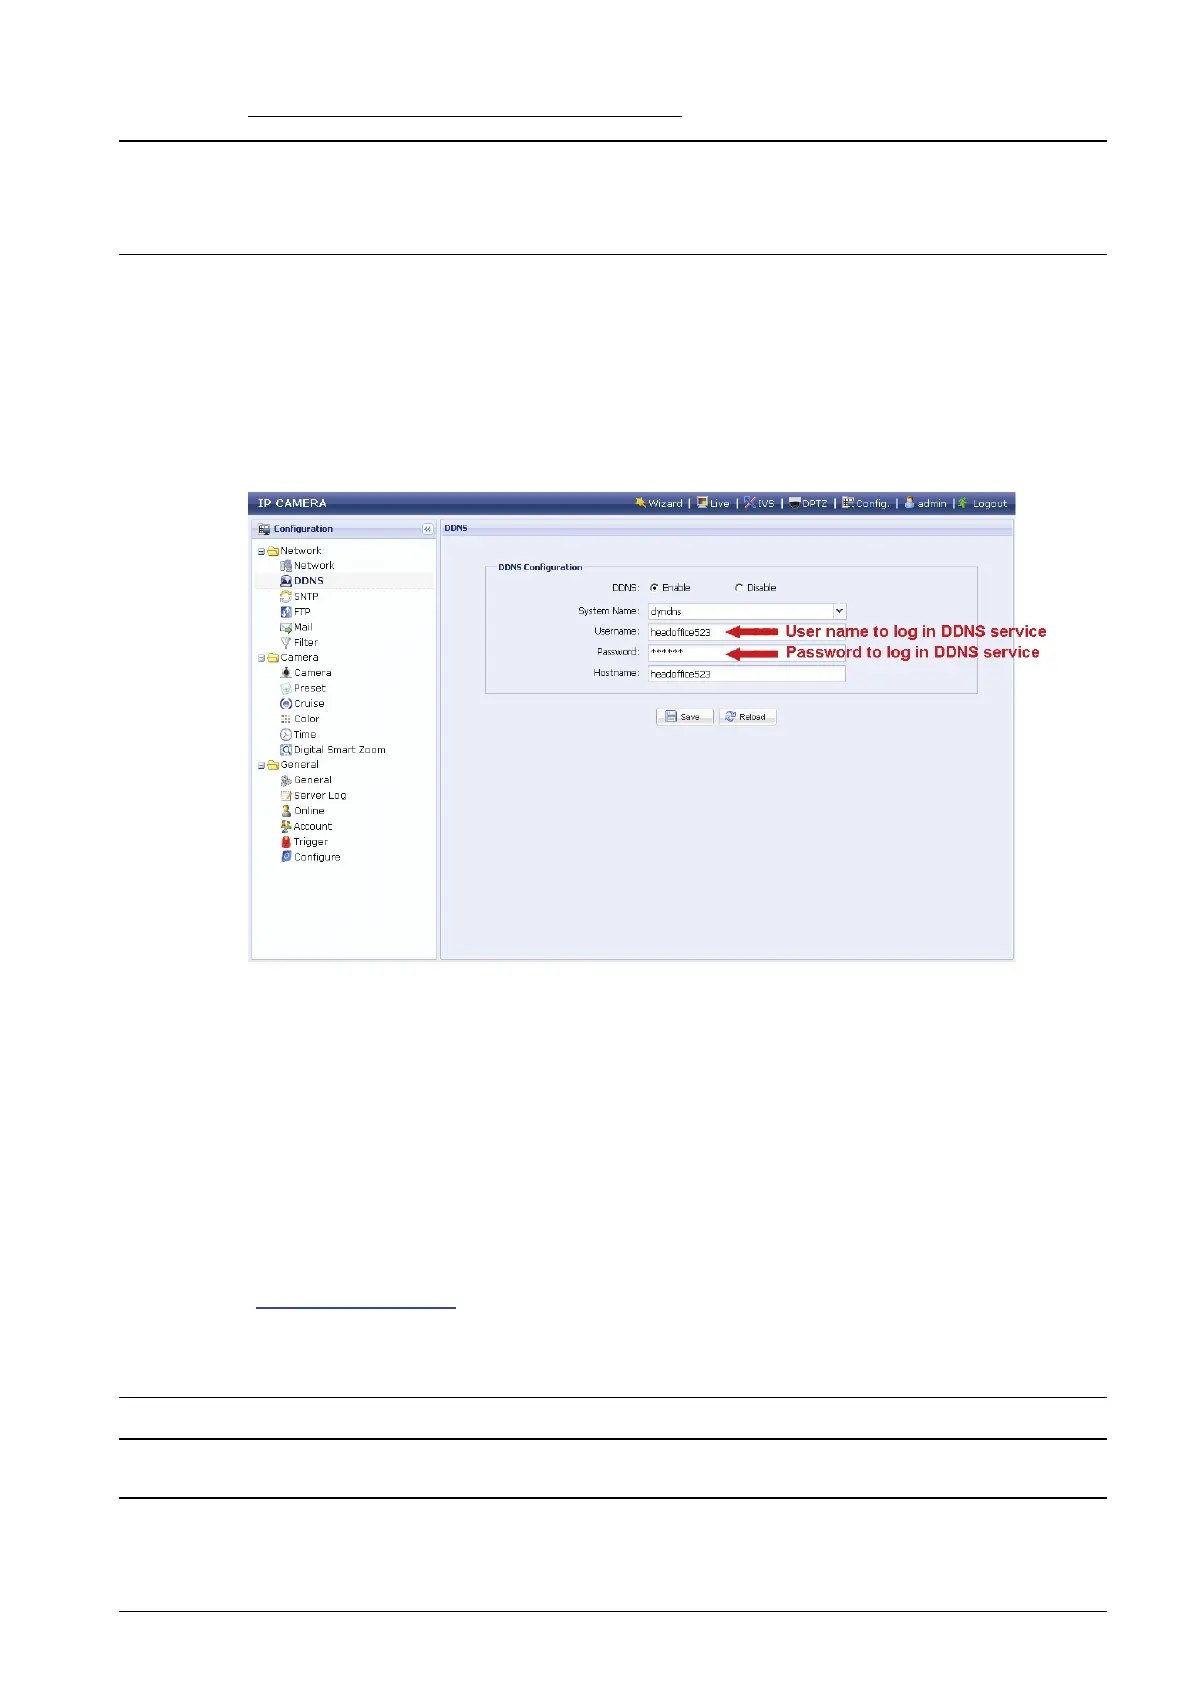
Note: You need to create a DDNS account from a website which provides free
DDNS service. For details, please refer to “APPENDIX 1 CREATING AN
ACCOUNT FOR DDNS SERVICE” at page 15.
Select the system name you set when subscribing the DDNS service from the
drop-down list, for example, dyndns.
Enter the user name & password you used to log into the DDNS service.
Then, enter the host name you set when subscribing the DDNS service, for
example, headoffice523.
Step5: Click “Save” and log out. Then, disconnect your camera and your PC, and
connect them to Internet separately.
Step6: Enter the host name you just note down in the URL address box of the web
browser, and see if you can access the camera successfully.
3.3 Network Configurations via Web Browser
Step1: Open your web browser, for example, Microsoft Internet Explorer, and enter
“http://192.168.1.10” in the URL address box.
Step2: In the login page, key in the default user name (admin) and password (admin),
and enter the security code from the image below if any. Then, click “LOGIN”.
Note: Skip the wizard if any.
Step3: In the live page, click “Config.” or “Configuration” to open the configuration page.
Note: Different camera models might have different live view and configuration
pages. The figures below are just examples and may look different from the
ones in your hand.