This document is an owner's manual for the Dimplex electric fireplace models DFI2309 and DFI2310. It provides important safety information, installation instructions, operational guidelines, and maintenance procedures to ensure safe and effective use of the fireplace.
Function Description
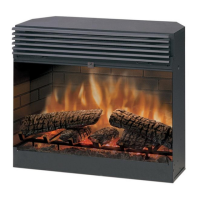
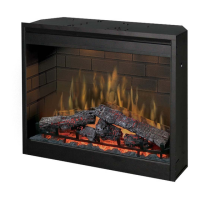
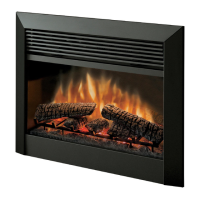
The Dimplex electric fireplace is designed to provide the ambiance of a traditional fireplace with the convenience and safety of an electric appliance. It features a heater that can operate at low or high heat settings, and it includes a flame effect to simulate burning logs and embers. The unit is intended for indoor use and can be installed into an existing fireplace opening or as a standalone unit with appropriate clearances.
Usage Features
The fireplace offers both manual and remote control operation.
Manual Controls:
The unit is equipped with a 3-position switch (A) for primary control:
- "I" position: Enables manual operation, bypassing the remote control.
- "II" position: Activates remote control operation, allowing the unit to be turned ON and OFF using the provided remote.
- "O" position: Turns the unit OFF.
Additionally, there are separate switches for heat control:
- Low Heat On/Off Switch (B): Supplies power to the heater fan and element for low heat operation when in the ON position.
- High Heat On/Off Switch (C): Supplies power for high heat operation when in the ON position. For high heat to function, the Low Heat Switch (B) must also be in the ON position.
Remote Control:
The fireplace comes with an integrated On/Off remote control. To use the remote, the 3-position switch (A) must be set to the "II" position.
- ON Button: Turns the fireplace ON.
- OFF Button: Turns the fireplace OFF.
Remote Control Initialization/Reprogramming:
If the remote control ceases to operate the fireplace, it can be re-initialized:
- Set the 3-position switch (A) to the "O" (Off) position.
- Wait a minimum of five seconds.
- Set the 3-position switch (A) to the "II" (Remote Control) position.
- Within 10 seconds of changing the switch position, press the ON button on the remote control. This synchronizes the remote control and the fireplace receiver. It's important to complete this step within 10 seconds.
Temperature Cut-off Switch:
The heater is equipped with an automatic safety device to prevent overheating. If the heater overheats, it will automatically cut out and will not come back on without being reset. To reset, switch the 3-position switch (A) to the "O" (Off) position and wait five minutes before switching the unit back on. If continuous resetting is required, the unit should be unplugged, and a local dealer should be contacted.
Installation:
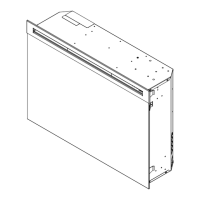
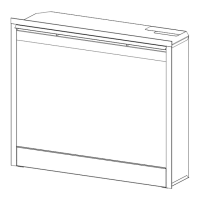
The electric insert must be installed in an opening with minimum dimensions of 24 inches (61 cm) wide, 21.5 inches (54.6 cm) high, and 12 inches (30.5 cm) deep. The fireplace does not require any additional venting.
When installing into an existing fireplace:
- Seal all drafts and vents with non-fibrous insulation to prevent chimney debris from falling onto the fireplace. Avoid installing in damp fireplaces.
- Cap the chimney flue to prevent rain entry.
- Plan the electric power supply. A 15-amp, 120-volt circuit is required, with a dedicated circuit preferred, especially if the circuit breaker trips regularly.
- Install an outlet in the existing fireplace. If not possible, the power cord can run along the hearth to a nearby outlet.
- Ensure the insert power is off, then plug the insert into the outlet and slide it into the existing fireplace.
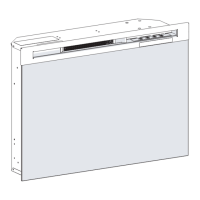
- Push the insert into the firebox and center it within the opening. Adjust the four feet on the bottom of the insert by turning them counter-clockwise to raise and clockwise to lower, ensuring it is level with the existing fireplace hearth.
- Install the trim kit (if applicable) and push it back until it is flat against the finished wall.
It is crucial to ensure adequate airflow if using existing fireplace screens and to avoid using existing fireplace doors that close, as this can seal off the insert and prevent heat exhaustion. If installed behind bi-fold doors, they must remain open when the heater is in use.
Maintenance Features
Regular maintenance is essential for the safe and efficient operation of the fireplace. Always disconnect power before performing any maintenance or cleaning to reduce the risk of electric shock, fire, or damage.
General Cleaning:
The fireplace should not be operated with an accumulation of dust or dirt, as this can lead to heat buildup and damage. The heater should be inspected regularly, at least yearly.
Fireplace Surface Cleaning:
Use warm water only to clean painted surfaces. Do not use abrasive cleaners.
Glass Cleaning:
The glass is cleaned at the factory. During shipment or installation, dust particles may accumulate and can be removed by buffing lightly with a clean, dry cloth. For fingerprints or other marks, use a damp cloth with a good quality household glass cleaner. Dry completely with a lint-free cloth or paper towel. Do not use abrasive cleaners or spray directly onto the glass surface.
Light Bulb Replacement:
Light bulbs need replacement when a dark section of the flame becomes noticeable. There are two bulbs under the log set that generate the flames and embers.
- Light Bulb Requirements: Two clear chandelier or candelabra bulbs with an E-12 (small) socket base, 60 Watt rating (e.g., GE 60BC or Philips 60CTC). Do not exceed 60 Watts per bulb.
- Replacement Procedure:
- Allow at least 10 minutes for the light bulbs and heater to cool before starting.
- Using a Phillips screwdriver, remove the screws from the Log Grate.
- Remove the Log Set by lifting it straight up. Some force may be necessary as it fits tightly.
- (DFI2310 only) Disconnect the Log Set LED Wire Harness from the unit.
- Unscrew the bulbs counter-clockwise.
- Insert and install new bulbs.
- (DFI2310 only) Reconnect the Log Set LED Wire Harness to the unit.
- Replace the Log Set into the insert.
- Replace the Log Grate and install the screws removed in step 2.
Battery Replacement (Remote Control):
- Slide the battery cover open on the hand-held transmitter.
- Correctly install one 12 Volt (A23) battery in the battery holder.
- Close the battery cover.
Batteries must be recycled or disposed of properly according to local authority or retailer advice.
Servicing:
Except for light bulb replacement and cleaning, all other servicing should be performed by an authorized service representative. Do not attempt to wire new outlets or circuits yourself; always use a licensed electrician.