24 www.nectreusa.com
Replacing the Door Seal
This task may be easier with the door removed from the stove and laid horizontally on a workbench
(refer to page 16 on how to remove the door).
1. Remove any old seal from the door.
2.
or equivalent.
3. Run a thin line of clear roof and gutter silicone along the groove.
4. Starting with the end that has the silver tape around it, press the new door seal rope into the
groove on the door.
5. Towards the end, there will be a small amount of excess rope. Trim this to the correct length,
remove the backing from the adhesive silver tape supplied with the rope, and wrap the tape
around the end that has been trimmed. Fit the end of the rope into the groove.
6.
Adjusting the Door Latch
1. Using the 4 mm Allen key supplied with the stove, slightly loosen the two screws fastening the
2. Gently tap the latch down only a millimeter to start with.
3. Retighten the screws and test for any improvement.
4.
Replacing the Main Bae
!
NOTE:
technician.
1. Remove the stove door. Refer to instructions under the Replacing Door Glass procedure.
2. Remove both the left (LH) and right (RH) brick retainers.
3. Remove all four side vermiculite
boards & two rear refractory bricks.
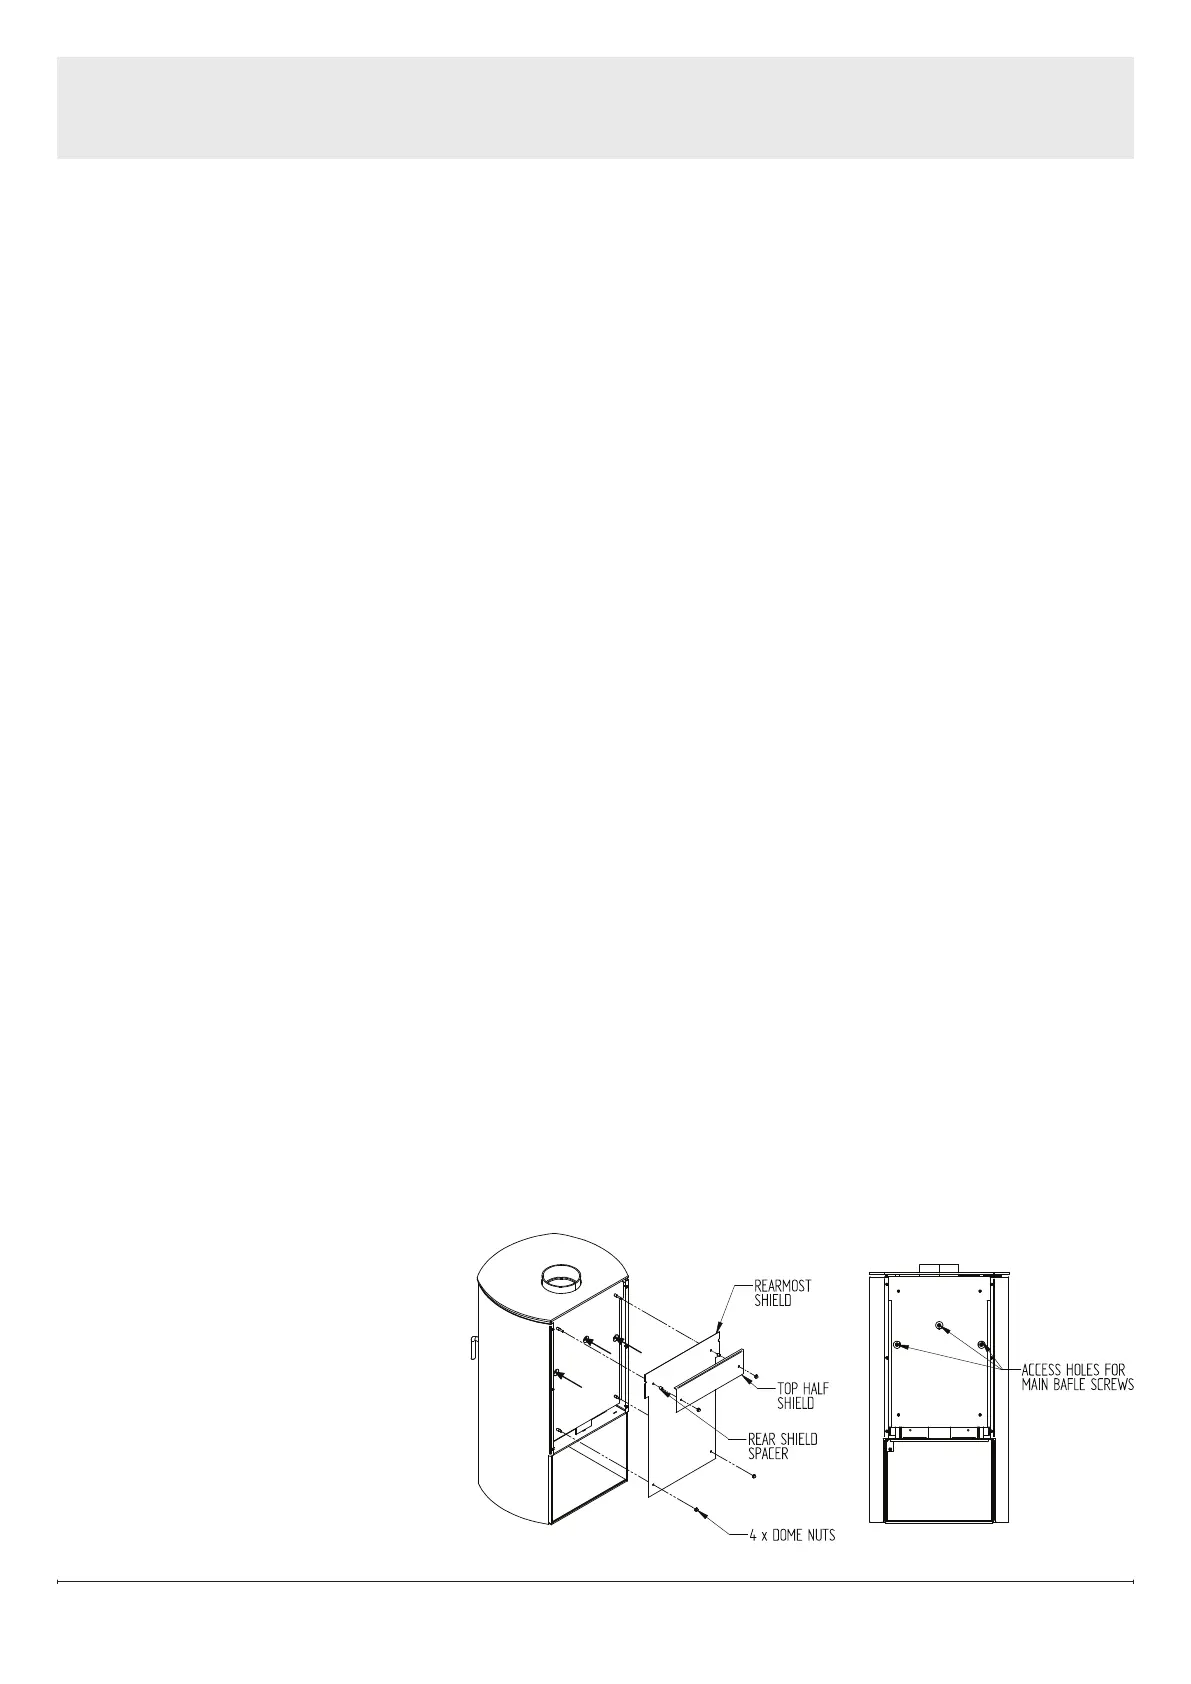
4.
small wrench, remove the 4 dome
nuts (Figure 17).
5. Remove the top half shield A and
the rearmost shield B along with
the spacers.
Service
Figure 17