8
www.dimplex.com
Tools Required: Phillips Head Screwdriver
Side Cutters (to cut wire ties)
1. Follow the steps of “Preparing for Service” on page 6 of this manual before continuing.
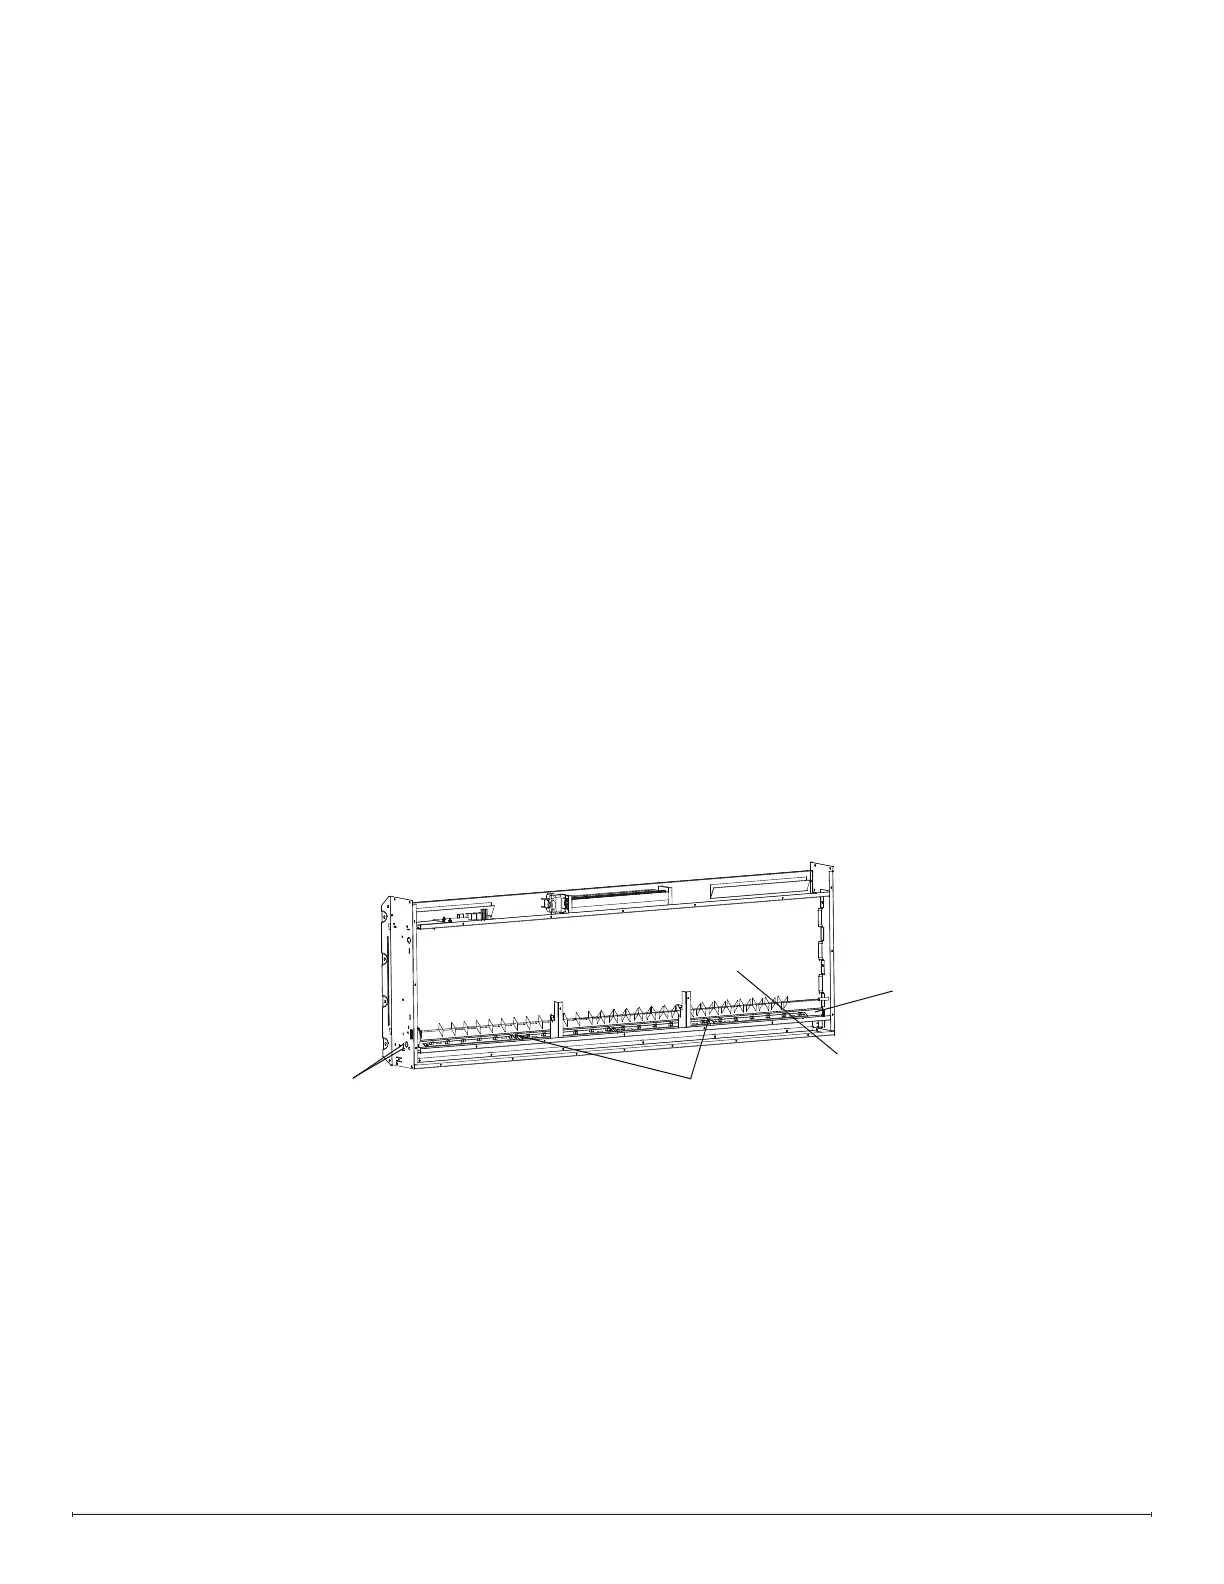
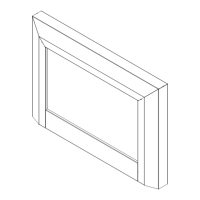
2. Remove the screws that hold the ame panel retaining bracket (Figure 7).
3. Flex the ame panel carefully to remove it.
4. Remove the two screws that secure the main board (you can leave the standoffs connected) in order to access the
screw underneath.
5. Remove the screws that hold the touch pad bracket.
6. Trace the wires from the touch pad to the main control board. Disconnect them, while making note of their original
locations.
7. Put the screwdriver in the guide holes on the touch pad bracket to unscrew the touchpad. There are two small
screws to remove.
8. Place the new touchpad in the bracket, ensuring that the components go into the corresponding spaces. Screw it
into place with the previously removed screws.
9. Secure the touch pad bracket into place, as well as the main board.
10. Put the ame panel back into place, making sure that the screw holes are oriented toward the bottom, and that it is
inserted into the slots at the top.
11. Secure the ame panel retaining bracket.
12. Reassemble the replace by reinstalling the top panel, followed by the back panel.
Touch Pad Replacement
Flame Panel
Flame Panel
Retaining Bracket
Remove these screws
Remove these screws
(on both sides)
Figure 7