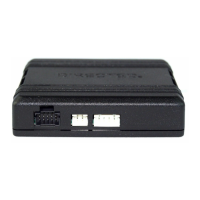
The DB3 is an all-in-one door lock and override module designed for vehicle security and remote start applications. This installation guide specifically supports the DB3 in Remote Start Ready (RSR) mode for the 2013 Ford Taurus (40-Bit), using firmware 403.FORD6 3.24 RSR.
Function Description:
The DB3 module provides comprehensive vehicle control and security features, primarily functioning as a remote start ready (RSR) system. In RSR mode, the module can independently remote start the vehicle without requiring an aftermarket or OEM remote starter. It supports various control options, including 3x OEM Lock Remote Start Activation (if applicable), an RF System, or SmartStart (all sold separately).
Key functions compatible with the 2013 Ford Taurus (40-Bit) include:
- Security: Arm/Disarm Factory Security, Factory Alarm Trigger Monitoring.
- Door Control: Door Lock Control, Door Unlock, Door Locks Status.
- Remote Start: Remote Start Ready (RSR), Remote Start Takeover, 3x LOCK START (Start control using OEM Remote), 3x LOCK STOP (Stop control using OEM Remote).
- Immobilizer Bypass: Immobilizer Bypass-Data No Key Req'd, Ford Key2Go (40-bit keys only).
- Convenience: Trunk / Hatch Release, RAP Shut Down (Retained ACC Power).
- Monitoring: Entry Monitoring ALL Door Pins, Entry Monitoring Hood Pin, Entry Monitoring Trunk/Hatch Pin, Brake Status (foot brake), E-Brake Status, Ignition Status, Fuel Level.
Important Technical Specifications:
- Firmware: 403.FORD6 3.24 RSR, specifically for 2013 Ford Taurus (40-Bit).
- Programming: Requires DirectLink (www.directechs.com) or the Directechs Mobile application for flashing and configuration.
- Key Requirements for Programming:
- For full programming, 1 or 2 master keys are required.
- Key2GO is compatible with 40-bit PATS systems, allowing programming with only one key.
- For convenience-only programming (skipping transponder), no keys are required.
- T-Harness Compatibility: Compatible with the optional Plug & Play THFD1 T-Harness.
- Data Bus Compatibility: Supports MS CAN High/Low and HS CAN High/Low for data communication.
- Power Input: (+) 12V Input (Yellow wire on H1/7, Red wire on H1/13).
- Outputs:
- (+) Ignition Output (Yellow wire on H1/8).
- (-) Lock Output (Green/Black wire on H2/2).
- (-) Unlock Output (Red/Black wire on H2/4).
- (+) Starter Output (Gray wire on H2/6).
- (+) Accessory/Keysense Output (Gray/Black wire on H2/7).
- (-) Trunk Hatch Release/Power Liftgate Output (Violet/Brown wire on H2/9).
- (-) Parking Lights Output (Blue/Red wire on H2/12).
- Inputs:
- RAP Off Interrupt (vehicle side: Orange/Red wire on H1/10; connector side: Yellow/Red wire on H1/11).
- Driver's Door Trigger.
- Hood Switch Input (White/Black wire on H3/6).
- Relay Requirements: Parking Light Output (H2/12) requires a relay and a 15A fuse to 12V.
- Diode Requirement: Accessory/Keysense Output (H2/7) requires a diode if OEM alarm is equipped.
Usage Features:
- Remote Start Activation:
- 3x OEM Lock: Pressing the Lock button on the OEM remote three times consecutively will remote start the vehicle. Pressing it three times again can shut down the remote starter if the OEM remote remains active while the engine is running.
- RF System (with XL202): Connects to an optional XL202 RF system for remote control.
- SmartStart: Integrates with Directed SmartStart for control via a smartphone application, offering features like Lock/Arm, Unlock/Disarm, Remote Car Starter, Trunk Release, Panic, AUX Channels, GPS tracking, SmartSchedule, vehicle status, roadside assistance, and parked car finder.
- Pit Stop/Idle Mode: Allows the vehicle to remain running while the driver exits with the key. Activated by putting the vehicle in Park and pressing the Remote Start button.
- Vehicle Takeover: After remote start, the driver can enter the vehicle, insert the key, turn it to the ON position, depress the brake pedal, and put the car in gear to drive off.
- Key2GO: Facilitates immobilizer bypass programming with only one key, by generating a duplicate of the original key's encryption via server interaction.
- Module Programming:
- 2 Keys Required: Involves connecting harnesses, inserting and removing two different master keys in sequence.
- 1 Key Required (Key2GO): Involves connecting harnesses, inserting the key, turning ignition ON/OFF twice, then removing the module to submit a Key2GO request via computer.
- Convenience Only (Skip Transponder): Involves connecting harnesses, pressing the programming button five times, turning ignition ON, and then OFF.
- LED Diagnostics: Provides visual feedback through LED flashes (solid red, green, orange, red & orange, red flashes) to indicate programming status, errors, active commands, and shutdown codes.
Maintenance Features:
- Soft Reset: Erases only the programming steps performed, without affecting the flashed firmware and settings. Performed by connecting harnesses, pressing and holding the programming button, and releasing after the LED turns solid orange.
- Hard Reset: Reverts the flashed firmware back to its default factory settings. This may require reconfiguring RFTD and D2D options. Performed by connecting harnesses, pressing and holding the programming button, and releasing after the LED flashes orange and red.
- Troubleshooting: The manual provides detailed LED diagnostics and troubleshooting tables for module programming, error codes, active ground when running status, commands, shutdown codes, and RSR error codes, guiding installers through common issues.
- Firmware Updates: The module can be updated via DirectLink or the Directechs Mobile app, ensuring access to the latest features and vehicle compatibilities.
Installation Considerations:
- Intended for installation by a professional installer only to prevent damage to the vehicle's electrical system.
- RSR installations are not compatible with manual transmission vehicles.
- All connectors are displayed from the wire side, except for the OBDII diagnostic connector.
- Specific wiring connections are detailed for the Data 14-pin blue connector (H1) and Output 12-pin red connector (H2), Input 10-pin black connector (H3), D2D 4-pin white connector (H4), and RF 2-pin white connector (H5).
- SmartStart and XL202 modules must be connected in a specific order, and the DB3 module must be disconnected from power before connecting SmartStart to prevent damage.
- SmartStart Revision A requires cutting the Brown or Blue loop, while Revision B requires connecting the Gray wire to ground.
- XL202 requires using the D2D Crossover (XOVER) cable provided with XL202, not the one in the DB3 package.