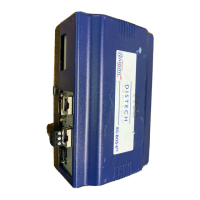
EC-BOS-6
AX
Mounting and Wiring Instructions
Revised: February 2008 Part Number: 05DI-HIBS6AX-10
Wiring Details
Communications Wiring
14
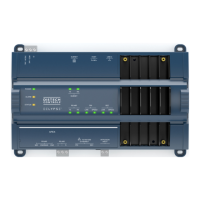
Figure 4 EC-NPB-PWR-UN module wiring connections.
Procedure 3 Wiring EC-NPB-PWR-UN input power and earth ground
Step 1
Remove power from the AC circuit being wired to the EC-NPB-PWR-UN - see previous warning.
Step 2
Remove the EC-NPB-PWR-UN cover.
To do this, press in the four tabs on both ends of the unit and lift the cover off.
Step 3
If the EC-BOS-6
AX
or EC-Net
AX
IO-16 accessory module is plugged into the unit, you may need to
slide it away to get to the cover tabs.
Step 4
Connect the supplied earth grounding wire to a nearby grounding point. See Figure 4.
Step 5
Make AC circuit connections line (mains) and neutral to the terminals labeled “INPUT PWR”.
Step 6
Replace the cover on the EC-NPB-PWR-UN.
Make sure all modules in the mounted assembly are firmly connected together and secured.
Caution Do not energize the AC circuit wired to the EC-NPB-PWR-UN until all other EC-BOS-6
AX
mounting and wiring is completed. See “Power Up and Initial Checkout,” page 16
Communications Wiring
Connect communications wiring to the EC-BOS-6
AX
using ports on the bottom of the unit (Figure 5), which
include:
• Ethernet
• Serial
Remove cover
EC-BOS-6
AX
or EC-Net
AX
IO-16
120 or 240Vac
50-60Hz
Single Phase
Earth Ground
Note: The 6-pin connector of the
EC-NPB-PWR-UN is not used with an
EC-BOS-6
AX
series controller.
6-pin
connector
not used
L N
Line
Neutral
AC Input
 Loading...