JT920/JT920L - SETUP 83
ASSEMBLE DRILL STRING
JT920/JT920L - SETUP 83
ASSEMBLE DRILL STRING
3. Tighten joint.
4. Turn screw opposite way two turns to relieve pressure and
remove quick wrench components.
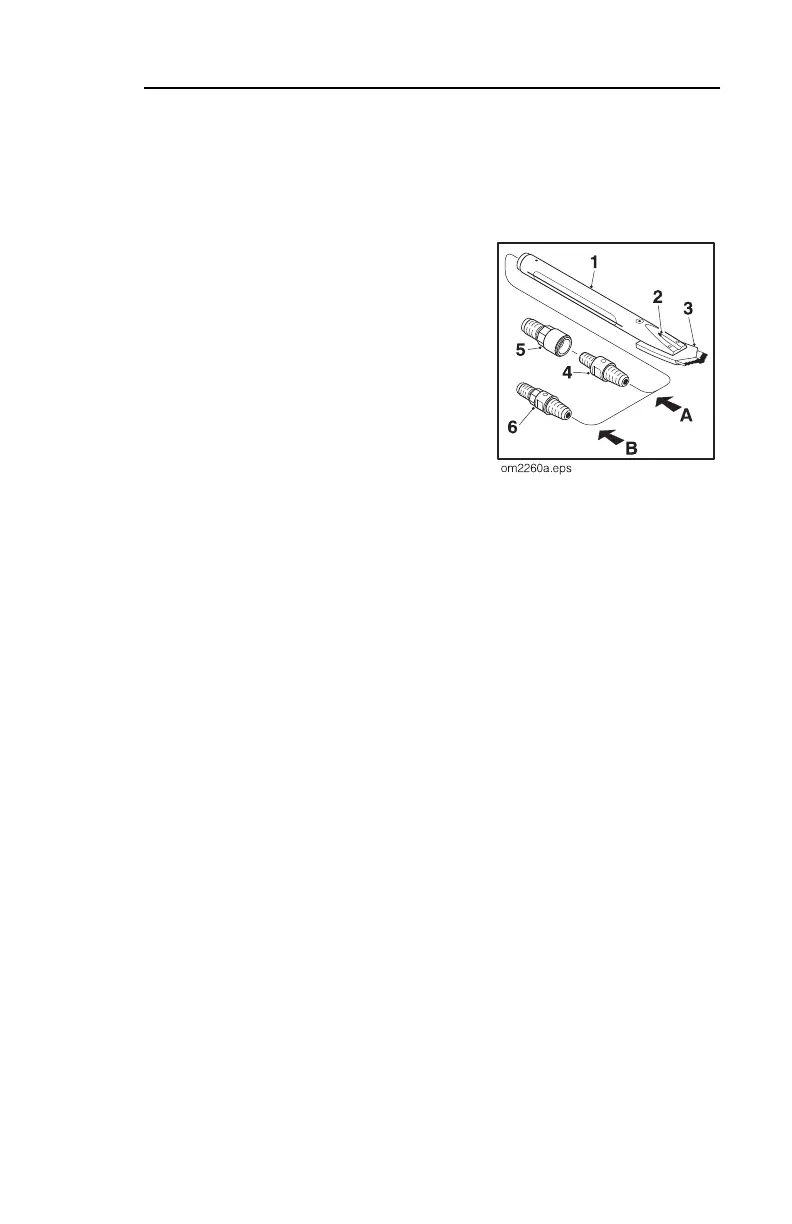
5. Hand tighten EZ-Connect pin (5)
to pin-to-pin adapter (4).
6. Attach quick wrench in join
position.
7. Tighten joint using scribe line
technique to achieve proper
preload.
8. Turn screw opposite way two
turns to relieve pressure and
remove quick wrench
components.
Option B
1. Apply tool joint compound to threads and hand tighten pin to
EZ-Connect pin adapter (6).
2. Attach quick wrench in join position.
3. Tighten joint using scribe line technique to achieve proper
preload.
4. Turn screw opposite way two turns to relieve pressure and
remove quick wrench components.
3. Tighten joint.
4. Turn screw opposite way two turns to relieve pressure and
remove quick wrench components.
5. Hand tighten EZ-Connect pin (5)
to pin-to-pin adapter (4).
6. Attach quick wrench in join
position.
7. Tighten joint using scribe line
technique to achieve proper
preload.
8. Turn screw opposite way two
turns to relieve pressure and
remove quick wrench
components.
Option B
1. Apply tool joint compound to threads and hand tighten pin to
EZ-Connect pin adapter (6).
2. Attach quick wrench in join position.
3. Tighten joint using scribe line technique to achieve proper
preload.
4. Turn screw opposite way two turns to relieve pressure and
remove quick wrench components.