Do you have a question about the dji RC Plus and is the answer not in the manual?
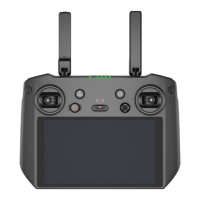
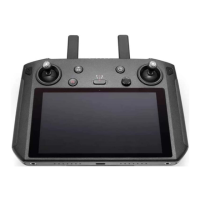
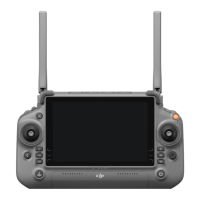
Overview of the DJI RC Plus remote controller's key features and technology.
Detailed description of the product's main features and capabilities.
Instructions for mounting accessories like the WB37 battery and dongle.
Guidance on positioning antennas for optimal signal strength and avoiding damage.
Details the controller's water/dust resistance and usage conditions.
Instructions on charging the internal and external batteries and checking battery level.
Steps to power the controller on/off and the initial activation process.
Instructions for pairing the remote controller with the aircraft.
Explanation of the three pre-programmed control stick modes and custom configurations.
How to toggle flight modes and use the Return to Home (RTH) button.
Details on using buttons and dials for camera and gimbal operations.
Explanation of functions for specific shoulder buttons, which may vary by aircraft.
How to configure custom buttons and understand LED indicator meanings.
Overview of the icons and functions available on the remote controller's home screen.
Explains common touch gestures for navigation and app management on the screen.
View system or app notifications and access recently opened apps.
Controls for Wi-Fi, Bluetooth, Do Not Disturb, display enhancement, screen recording, etc.
Controls screen brightness and volume, including muting options.
Explains default functions of button combinations like Back + Dial, Back + Record.
Guide on using the DJI Pilot 2 app for flight status and parameter settings.
Steps to calibrate the compass when experiencing interference.
How to configure touchscreen sharing via HDMI cable.
Instructions for updating the remote controller's firmware via DJI Pilot 2.
Technical details for OcuSync, Wi-Fi, and Bluetooth connectivity.
Details on model, screen, dimensions, weight, internal battery, storage, and GNSS.
Information on charging type, rated power, charging time, and operating time.
Video output port, operating, storage, and charging temperature ranges.
The DJI RC Plus is a sophisticated remote controller designed for operating DJI aircraft, featuring DJI's proprietary OcuSync video transmission technology. This technology allows the remote controller to automatically match with the appropriate OcuSync firmware for the user's aircraft model, enabling the transmission of live HD video feeds from the aircraft's camera to the controller's touchscreen. The device is equipped with a comprehensive array of functional buttons, providing intuitive control over both the aircraft and its camera. It supports dual transmission, dynamically switching between 5.8G and 2.4G frequencies to ensure a stable and reliable link, even in environments with interference. The remote controller boasts a maximum operating time of 3 hours and 18 minutes with its internal battery, which can be extended to up to 6 hours when an external WB37 intelligent battery is used.
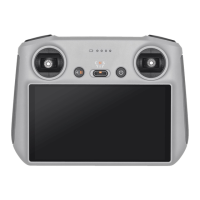
The DJI RC Plus features a high-bright screen, which is a high-performance 7.02-inch touchscreen with a resolution of 1920x1200 pixels and a brightness of 1200 cd/m², powered by an 8-core CPU. This ensures clear and vibrant display of flight data and video feeds.
For connectivity, the remote controller offers multiple options. Running on an Android operating system, it includes functions such as Bluetooth and GNSS, and users can connect to the internet via Wi-Fi. This allows for various applications and data transfer capabilities.
The device also supports audio and video functionalities, with built-in speakers and support for H.264 4K/120fps and H.265 4K/120fps videos. It also provides video output through an HDMI port, allowing users to connect to external monitors for a larger display.
Extended storage capability is another key feature, with 64 GB of internal storage. Additionally, it supports the use of a microSD card for storing photos and videos, facilitating easy export to other devices like computers.
The DJI RC Plus is designed for reliability in diverse environments, capable of operating normally within a wide temperature range from -20°C to 50°C (-4°F to 122°F). It is important to use the specific version of the DJI RC Plus that matches your aircraft model, as there are various versions available. The remote controller also holds an IP54 ingress protection rating, in accordance with the global IEC 60529 standard, offering protection against dust and splashing water.
Before first use, the internal battery is in hibernation mode and must be charged to activate. A full charge of the internal battery takes approximately 2 hours using a recommended charging device. If a WB37 battery is installed and the internal battery is at 0%, both will fully charge in about 2 hours. If the internal battery is at 100% and a WB37 battery is installed, it takes approximately 1 hour and 10 minutes to charge the WB37. For optimal charging, it is recommended to use the charging device from the compatible aircraft or a certified USB-C charger with a maximum rated power of 65W and a maximum voltage of 20V, such as the DJI 65W Portable Charger. To check the battery level, simply press the power button once.
To power on or off, press the power button once, then press and hold it again for two seconds. When powered on, a single press of the power button will turn the touchscreen on or off.
The remote controller requires activation before first use. This involves powering it on, selecting a language, agreeing to terms, connecting to a Wi-Fi network, setting time, logging into a DJI account (or creating one), and then tapping "Activate." If activation fails, check the internet connection and try again, or contact DJI Support.
Linking the remote controller to the aircraft is typically pre-done if purchased as a combo. Otherwise, after activation, power on both the aircraft and controller. Run DJI Pilot 2, tap "Link Remote Controller," and then press and hold the aircraft's power button for at least five seconds. Successful linking is indicated by the controller's status LED turning solid green and the aircraft's rear indicators blinking green. Ensure the controller is within 50cm (1.6ft) of the aircraft during linking and connected to the internet if logging in with a DJI account.
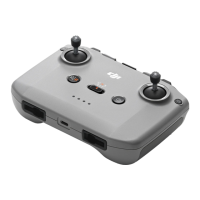
The external RC antennas transmit control and video signals. Adjust them so their flat side faces the aircraft for optimal transmission. Do not push antennas beyond their limit to avoid damage. Avoid using other 2.4 GHz or 5.8 GHz communication devices during flight to prevent interference. A weak signal prompt in DJI Pilot 2 indicates the need to adjust antennas.
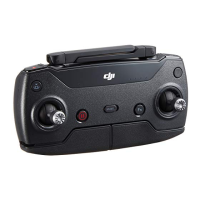
The remote controller offers three pre-programmed control stick modes (Mode 1, Mode 2, Mode 3) and custom modes configurable in DJI Pilot 2. Mode 2 is the default. The left stick controls altitude (up/down) and orientation (left/right rotation), while the right stick controls pitch (forward/backward) and roll (left/right movement). Keep the remote controller away from magnetic materials and store it in a carrying case to protect control sticks.
The Flight Mode Switch allows selection between F-mode (Function), S-mode (Sport), and N-mode (Normal). N-mode uses GNSS and vision systems for stabilization, braking, and obstacle avoidance. S-mode increases flight speed and attitude for maneuverability but disables active braking and obstacle avoidance. F-mode can be set to T-mode (Tripod) or A-mode (Attitude) in DJI Pilot 2; T-mode limits speed for easier control, while A-mode requires caution.
The Return to Home (RTH) button initiates RTH when pressed and held until two beeps are heard. Pressing it again cancels RTH.
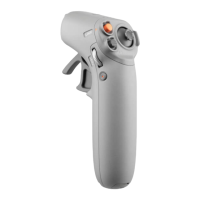
Camera control is facilitated by several buttons: the Record Button starts/stops recording, the Scroll Wheel's functions vary by aircraft, and the Focus/Shutter Button focuses halfway and takes a photo when pressed all the way down. Gimbal control is managed by the Left Dial for tilt (downwards/upwards) and the Right Dial for pan (left/right rotation).
The L1/L2/L3/R1/R2/R3 buttons have functions that vary by aircraft model, which can be viewed in DJI Pilot 2. The C1, C2, C3, and 5D buttons are customizable within DJI Pilot 2's camera view. Combination buttons (using the back button with other buttons) offer shortcuts for features like adjusting brightness/volume, record screen, screenshot, and navigating the home screen/shortcut settings/recently opened apps.
The Status LED indicates the remote controller's status: solid red for disconnected, blinking red for low aircraft battery, solid green for connected, blinking blue for linking, solid yellow for firmware update failed, blinking yellow for low remote controller battery, and blinking cyan for uncentered control sticks. Battery Level LEDs show the current charge.
The remote controller provides alerts through vibrations or beeps for errors or warnings, displayed on the touchscreen or in DJI Pilot 2. Mute mode can be enabled in Shortcut Settings to disable all voice alerts, including RTH and low battery warnings, requiring cautious flight.
The compass may need calibration if the remote controller is used in areas with electromagnetic interference. A warning prompt will appear if calibration is needed. To manually calibrate, go to the home screen, open Settings, swipe up, and select Compass, then follow the on-screen diagram. "Calibration Success" will be prompted if successful. If the compass is working normally, calibration is not necessary.
The touchscreen can share its display with an external monitor via an HDMI cable. The resolution can be adjusted in Settings, Display, Advanced, and then HDMI.
Firmware updates are performed using DJI Pilot 2. Power on the remote controller, ensure internet connection, and open DJI Pilot 2. A prompt will appear for new firmware versions; tap it to enter the update screen. The update will start automatically after downloading and the remote controller will restart upon completion. Ensure the remote controller is charged over 25% before updating. The update typically takes about 15 minutes, but download time varies with internet speed.
Safety precautions for handling batteries include: avoiding contact with liquids to prevent chemical decomposition, fire, or explosion; using the battery in an ideal environment of 15°C to 35°C (59°F to 95°F) to prevent wear and extend life; allowing the battery to cool to room temperature after flight before charging to extend battery life; and keeping batteries away from heat sources, direct sunlight, or hot vehicles.
| Screen Size | 7 inches |
|---|---|
| Brightness | 1200 cd/m² |
| Wi-Fi Protocol | 802.11 a/b/g/n/ac |
| Bluetooth Operating Frequency | 2.4 GHz |
| Video Output Port | HDMI |
| Operating System | Android |
| Screen Resolution | 1920 x 1200 |
| Operating Temperature | -20° to 45° C (-4° to 113° F) |
| Connectivity | USB-C, HDMI |
| Wi-Fi Operating Frequency | 2.4 GHz, 5.8 GHz |
| Operating Frequency | 2.400-2.4835 GHz; 5.725-5.850 GHz |
| Max Transmission Distance | 15 km |
| GNSS | BeiDou |
| Charging Time | Approximately 2 hours |
| Compatibility | DJI Matrice 30 Series |
| Battery Life | Approx. 6 hours |