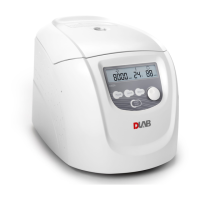
High Speed (Refrigerated) Micro-Centrifuge
16
speed up parameter changing.
There is a circulating function to increase/ decrease parameters. Clockwise rotate
parameter button , values circulate from small → large → maximum → minimum.
counter-clockwise rotate parameter button , values circulate from large → small →
minimum → maximum.
(2)Set the time:
Press select button , time value flash into time setting mode.
Rotate parameter button to set running time range from 30 seconds to 99 minutes.
When time displays as HD, that showing long-running mode.
(3)Set the temperature (D3024R):
Press select button , temperature value flash into temperature setting mode.
Rotate parameter button , input temperature value range from -20℃-40℃.
When temperature symbol flash, indicating refrigeration system is running,
otherwise refrigeration stops working.
8.1.3 Start the operation
(1)Press button
to start running
The door should be locked before rotor starts rotating.
It will start timing once the rotor starts running, the screen displays remaining run time.
(2)Inquiry and modify the operation parameters
Operation parameters can be modified after the centrifuge reaches setting speed.
Press select button , return to the preparation interface and displays setting parameters.
Press again the select button , once the parameter symbol is flashing, rotate parameter
button to modify parameters. Release button after 5 seconds, centrifuge will return to normal
operation mode and run process according to the new parameters.
After time parameter has been modified, the operation time is not cleared and will continue
to be accumulated.
(3)Alarm display
If anything wrong in processing, the centrifuge will brake to stop automatically, and display
the error code on the time area. You can find out the malfunction causes by checking the table
10-1, and make correct actions accordingly.