66 Dolby
®
Digital Cinema System Manual Issue 0.92 (Preliminary)
Installing a Dolby Digital Cinema System
3.14 Maintaining the DSL100 Internal Hard Drives
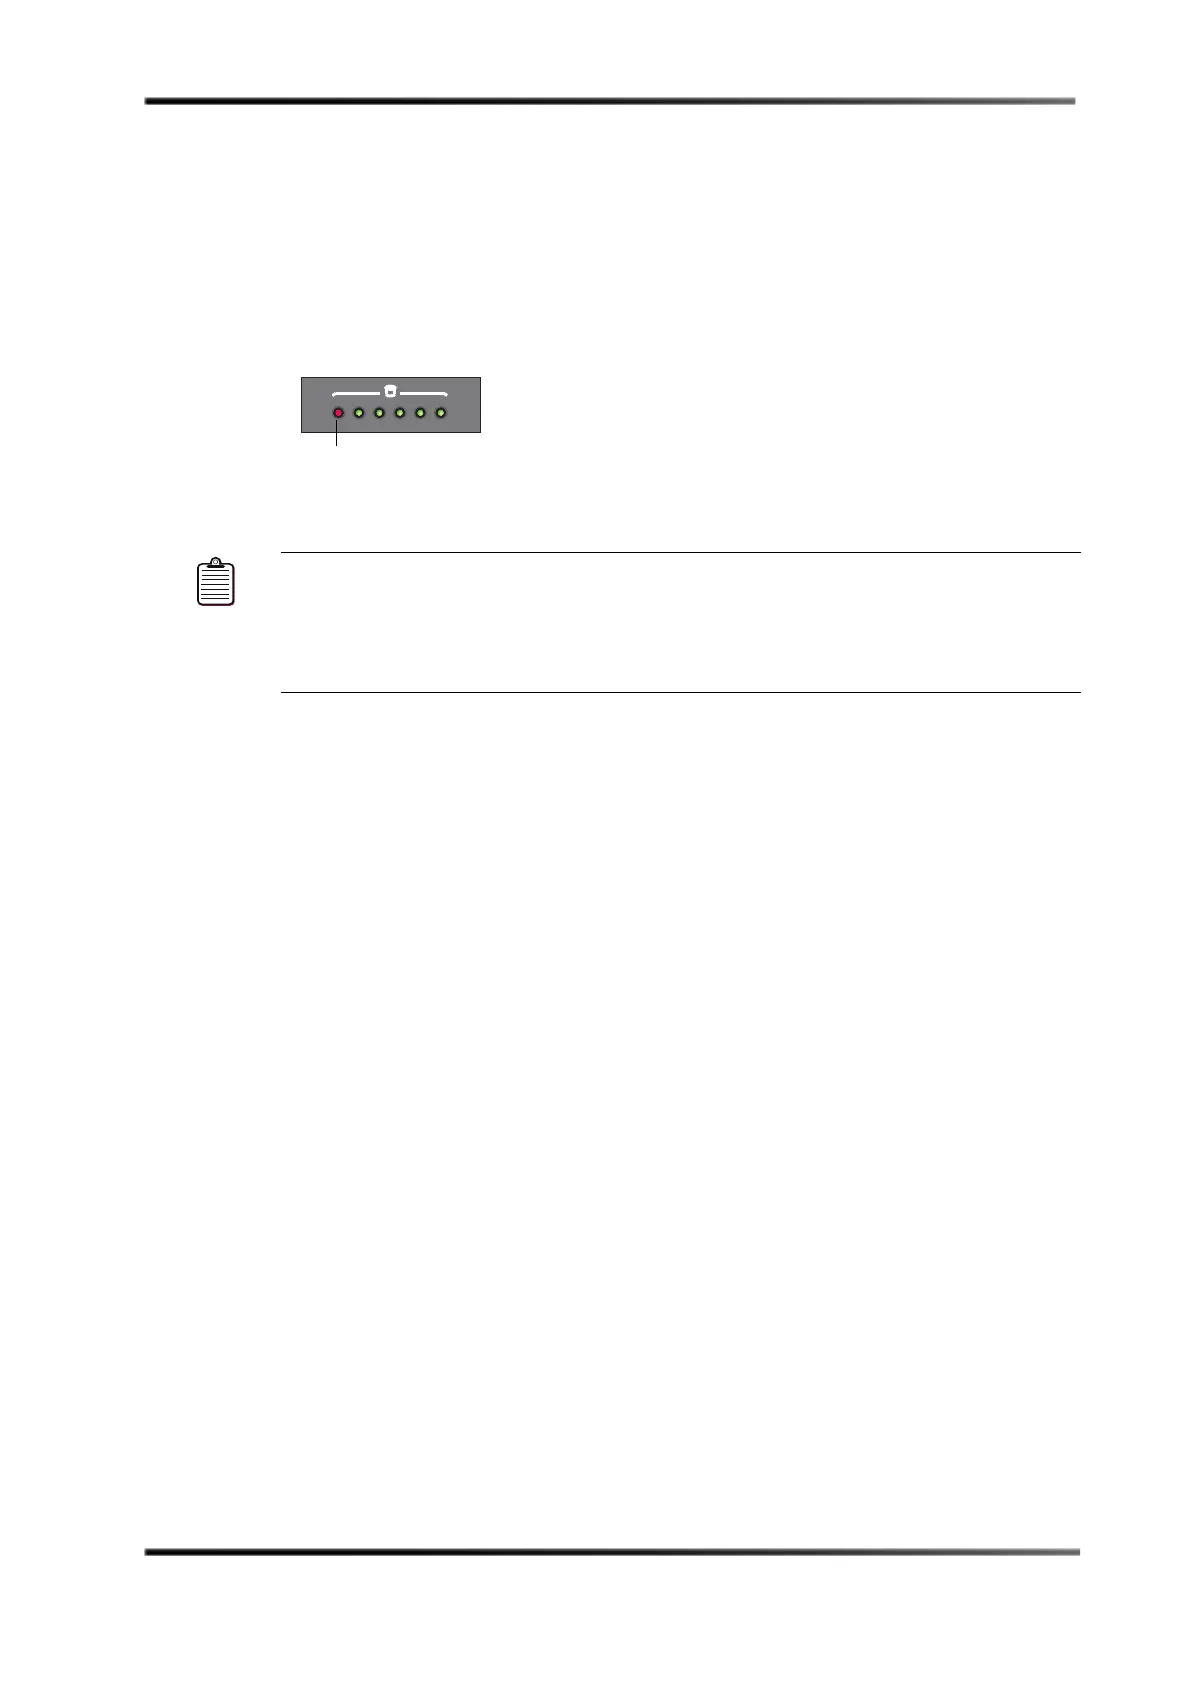
If one of the DSL100 internal hard drives fails, its corresponding front-panel LED turns
from green to red, as shown in Figure 3-78.
In the DSL100 RAID 6 configuration, if one or two drives fail, no information is lost. If three
drives fail before you replace one of them, all information is lost. After a software
installation, you will need to reconfigure your settings and reload your content.
Figure 3- 78
Figure 3-78 Identifying a Failed Drive in the DSL100
The system automatically rebuilds a replacement drive (or a reseated drive), but there are
some instances when you may have to rebuild a drive manually. For information on
rebuilding a drive manually, see the Show Manager online help.
3.14.1 Replacing a DSL100 Drive
To replace a DSL100 internal hard drive:
1. Note the front-panel number that corresponds to the problem drive (the number next
to the red LED).
2. Remove the DSL100 front panel by placing one hand on its left side and one hand on
its right side, then pulling it toward you until it disengages from the main unit, as
shown in Figure 3-79.
Note: A drive LED may turn from green to red if one or more of the DSL100 internal hard
drives is dislodged during shipment or relocation. For this reason, before
attempting to fix or replace a drive, power down the unit and reseat the failed drive.
After reseating, the drive may function properly. For reseating instructions, refer to
Section 3.14.1; reseating is similar to removing and inserting a replacement drive.
 Loading...