22
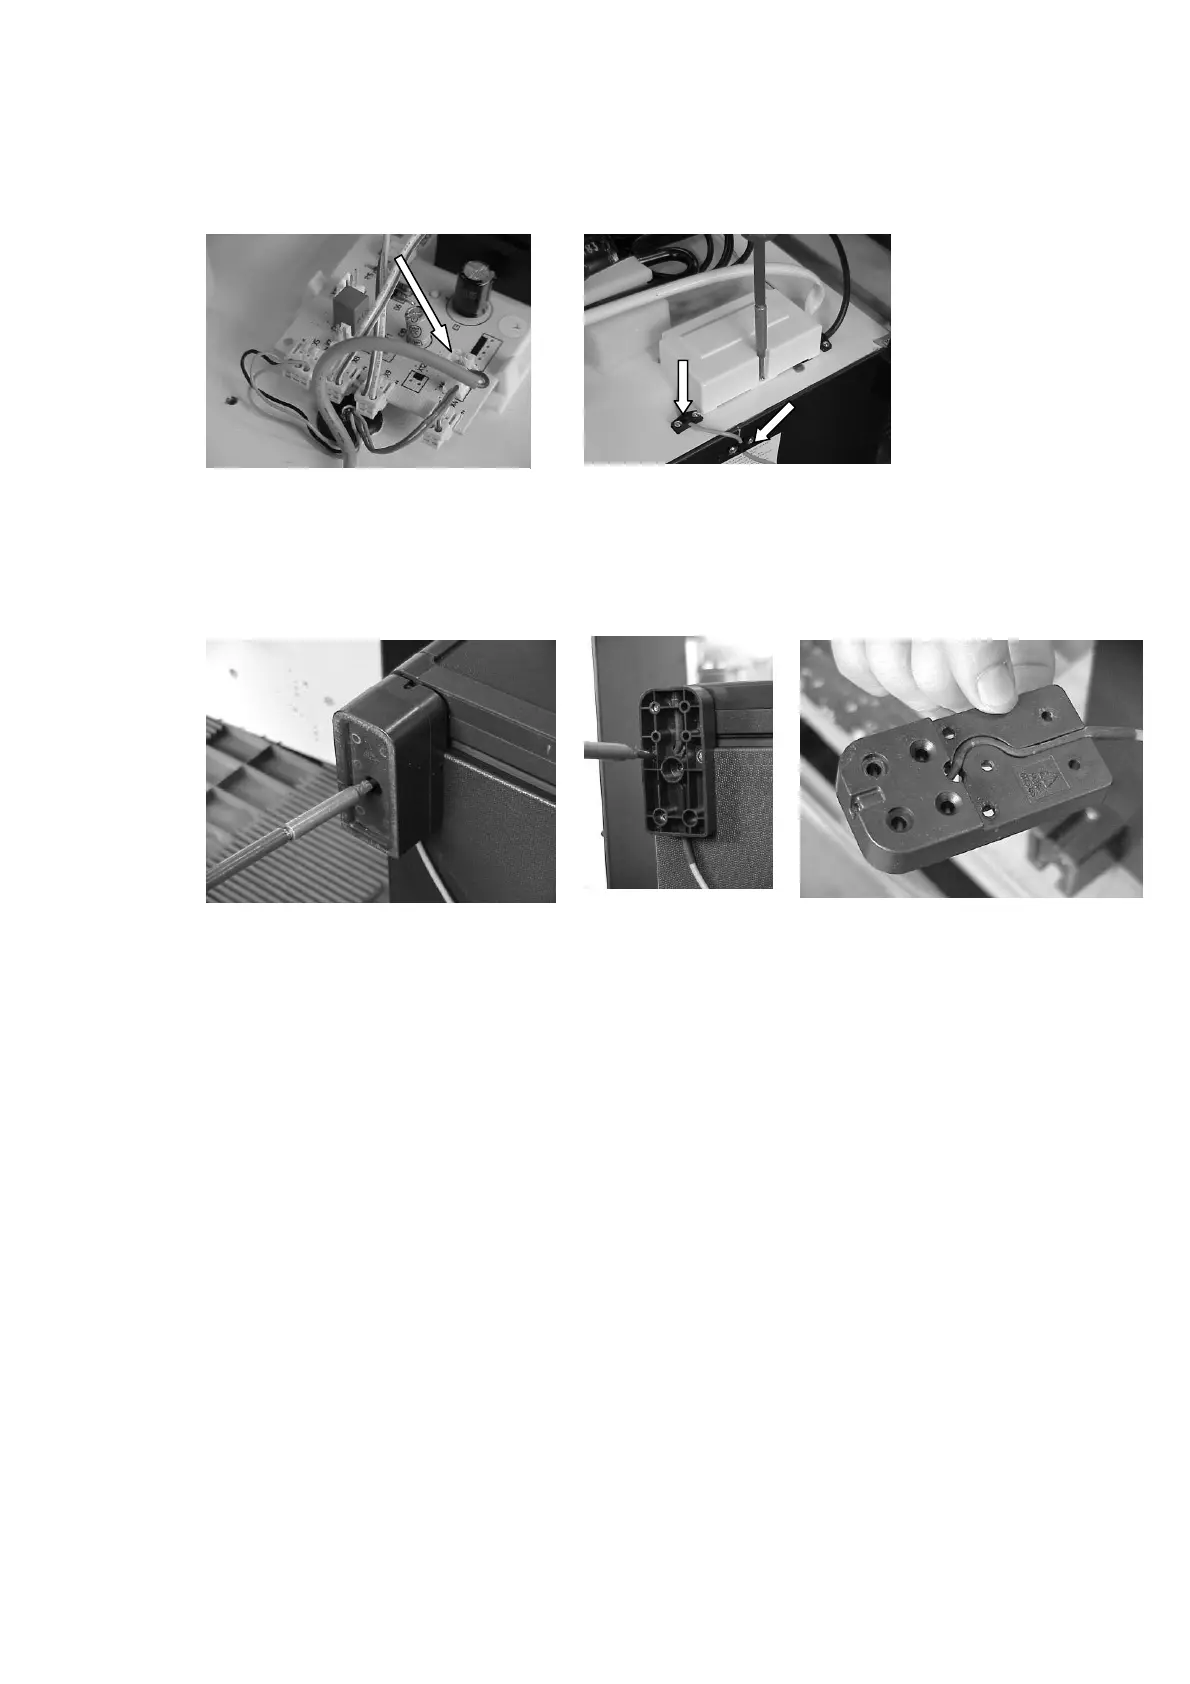
2.3.2.2.4. Replacing the Automatic Door Control LED
- Remove electrical cover (see 2.3.2.2.)
- Pull off PCB connector of automatic door control LED cable from
motherboard (X6). (Figure 71)
- Remove screws from LED cable fasteners on back panel and bottom
panel. (Figure 72)
- Turn refrigerator on its back.
- Unscrew and remove fastening screw of fott extension. (Figure 73)
- Remove the 3 screws from fastening foot, remove foot (Figure 74, 75)
- Remove LED cable from fastening foot groove, restoring new cable.
(Figure 75)
- Screwing on fastening foot and foot extension.
- Order LED cable on bottom panel and fasten in cable fastener.
- Connect PCB plug to motherboard, restore electrical cover.
- Order cable, fasten in cable fastener.
- Turn back refrigerator on its feet.
- Test electrical insulation resistance (with testing apparatus for 1000 V
electrical insulation resistance).
Insulation resistance is R
ins
> 2Mohm
- In case of conformance connect appliance to electrical supply, and check
operation the self-test of the electronics.
Figure 71
Figure 73 Figure 74 Figure 75
Figure 72
 Loading...