- 18 -
operating instructions
turning on the refrigerator
Check that all the manual gas valves are in the ON 1.
position.
Make sure that a continuous 12V DC supply is 2.
available for the electronic control to function.
Press the ON/OFF button. 3.
Select operation mode:4.
AUTO mode (AC and GAS) -
Press the AUTO/GAS mode selector button
(if not already on).
GAS mode (gas operation only) -
Press the AUTO/GAS mode selector button to turn
off the AUTO mode (if not already off).
adjusting the thermostat
The adjustable thermostat ranges from 1 - 5 (5 = coldest
temperature setting).
After the initial start-up, adjust the thermostat by
pressing the TEMP. SET button repeatedly until the
desired setting is displayed.
The thermostat controls both the gas and electric operation.
Thus, it is not necessary to reset each time a different energy
source is employed.
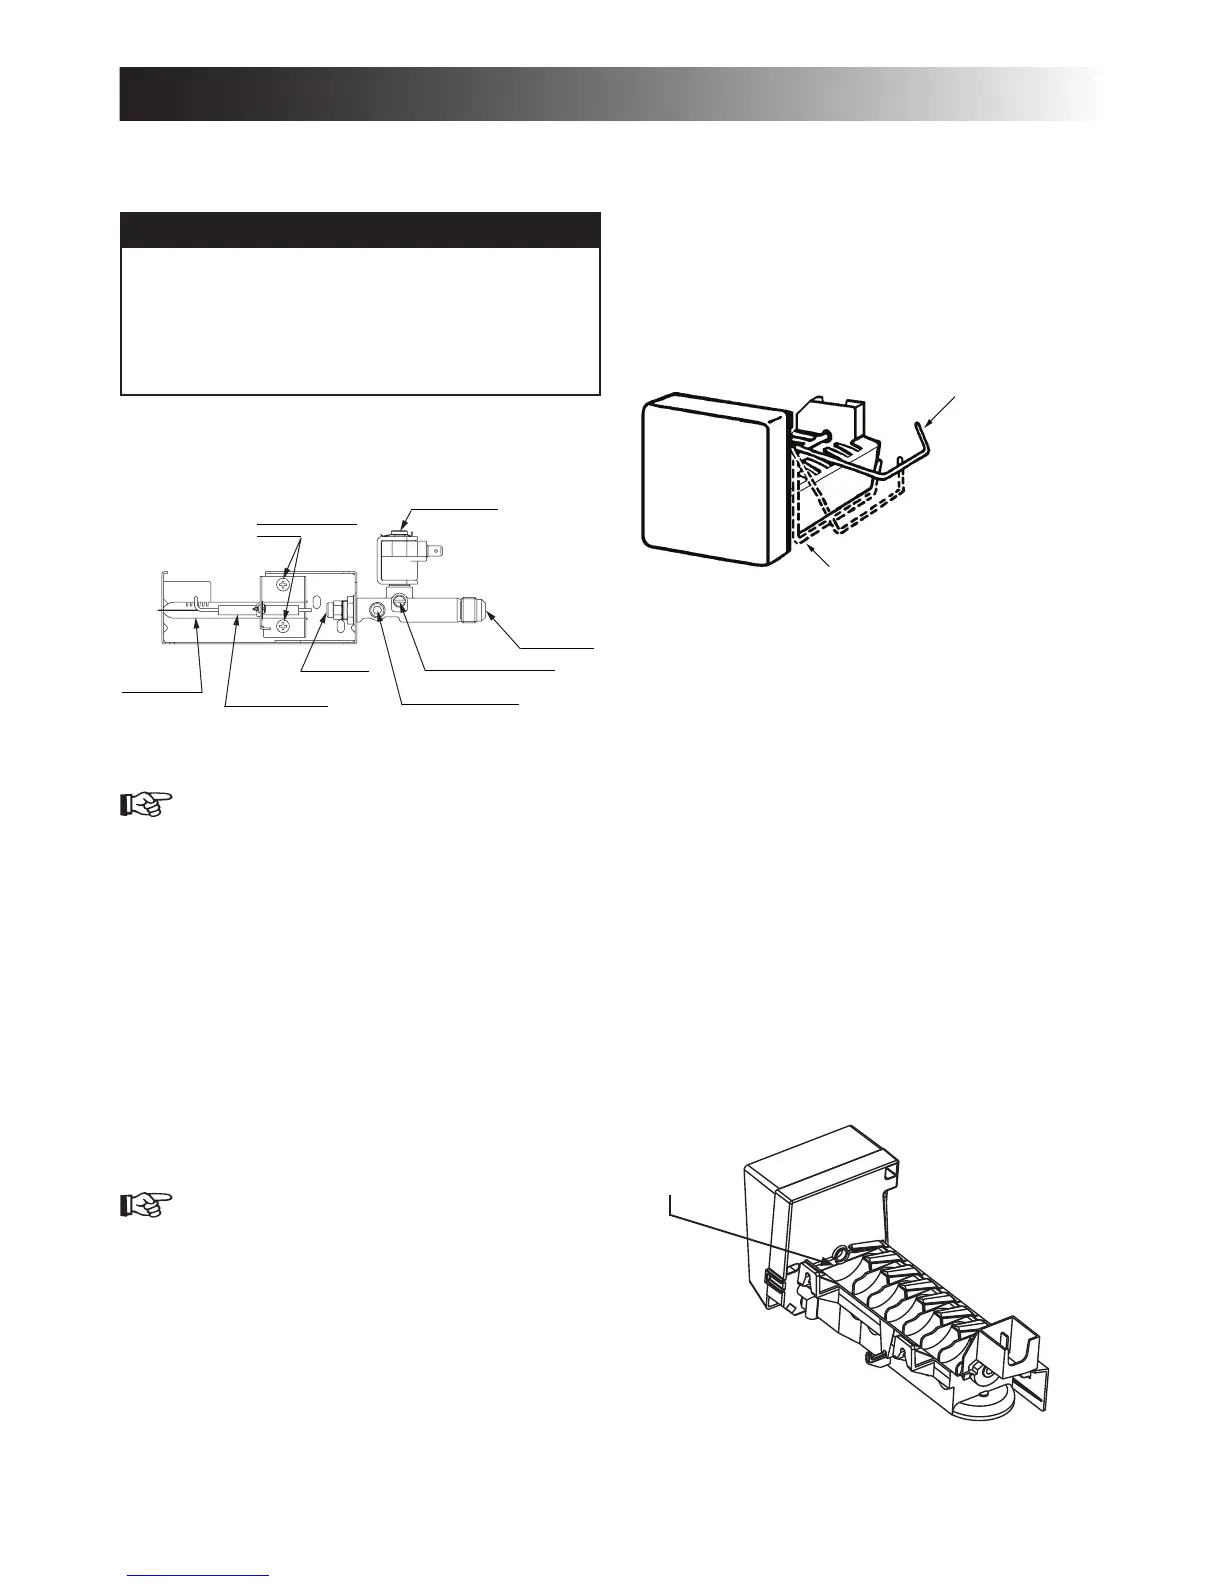
operating the ice maker
rm1350im, rm1350mim, rm1350wim & rm1350wid
Before the ice maker can operate, make sure that:
The refrigerator is connected to 120 V AC . •
The water valve supplying the refrigerator is turned on.•
The ice level bail arm is in its fully down position. •
When the ice maker thermostat senses the preset temperature
for the ejection of the ice cubes, the ngers will start to rotate,
dumping any ice cubes and lling the mold with water.
When the storage container is full, the bail arm will come in
contact with the ice cubes. The bail arm cannot return to the full
down position and the ice production is stopped until the bin is
emptied, or ice cubes are removed.
To prevent water from splashing out of the mold assembly when
your recreational vehicle is moving, raise the bail arm to the full
“UP/OFF” position about 1-1/2 hours before departing. This will
allow the water in the mold to freeze.
water supply
The water supply system must have a minimum pressure of
15 pounds per square inch gauge (psig). A 1/4” diameter water
line to the water valve should be used at the rear of the refrig-
erator. The water line must have a manual shutoff valve placed
where it is easily accessible.
The maximum water level is represented by a thin line. It is es-
sential that the water level does not exceed this line!
If necessary, change the water ow by adjusting the water
supply. For instructions, see
ADJUSTING THE SIZE OF CUBES.