2. General
General information
Working on electrical equipment must only be performed
by trained and properly qualied electricians.
Electrical installaion:
· The electrical supply installaion (115 V AC ± 10%,
50/60 Hz) is to be provided by others.
· The operator is supplied from the factory
with a two-pole-and-earth plug.
· If the operator is to be xed to a metallic
door leaf, the door leaf must be properly
grounded/earthed.
· This should supply a two-pole-and-earth socket
prtected by a 10 a fuse.
Maintenance and care:
The door set shoud be inspected by an
engineer prior to the rst start-up and
then checked and maintained in
accordance with requirements, with a
minimum inspection rhythm of once a
year.
Ensure that the unit is properly
disconnected fom the power source
when carrying out cleaning and
maintenance work.
1
2
3
4
0
2. General
3. Installation instructions
4
3
2
1
0
3. Installation instructions
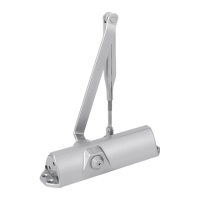
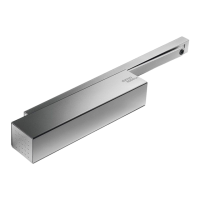
Fixing procedure
Overview and exploded drawing
Remove cover
The cover is grounded (earthed) with a ground (earth)
cable.
The cover is latched and held by a screw fastener remove
the screw fastener
Move the cover approx. 1/8” [2 mm] away from the switch
side to unlatch and remove. Disconnect the ground cable.
Only Grip the operator at the positions indicated in the
illustration.
Unscrew the drive unit from the mounting plate.
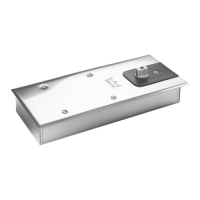
Structural conditions
The following accessories are available to accommodate
special structural conditions:
A
B
8
7
6
5
Fixing the mounting plate
If the frame comprises steel proles, drill a pilot hole for a
10-32 screw and then tap to the required thread size.
In the case of timber frames, use wood screws
(included in standard supply)
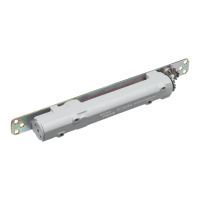
Slide channel operator for:
- Top jamb xing on the pull side - Operator type G
- Top jamb xing on the push side - Operator type B
Fixing dimensions
Please note the dierent weights governing the xing
modes.
Mark the holes (8) for installing the mounting plate in
accordance with the dimensional data, then drill and tap
threads as necessary. Mark the holes (2) for xing the slide
channel or the standard arm in accordance with the
dimensional data. Drill holes and tap threads as necessary.
Fix mounting plate.
Fitting the spindle cover
Secure the spindle cover in position so that the hole is
centrally located over the spindle to which the arm is tted.
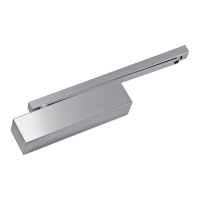
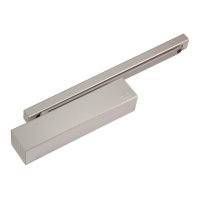
Mounting the operator (drive unit)
Place the drive unit on the mounting pins and push in the
direction of the switch unitl latched in position. Secure the
drive unit using the captive screws and the four additional
screws (1/4-20 x 3/8”)
2. General
Maintenance and care
3. Fixing procedure
Work on electrical equipment must only be performed
by trained and properly qualied electricians.
Electrical installation.
Main closing edge safety
per prEN 12650/DIN 18650.
As-delivered condition:
We strongly recommend that you conclude a
maintenance agreement with DORMA to cover this
aspect.
Overview and exploded drawing.
Remove cover.
The cover is grounded (earthed) with a ground (earth)
cable.
Only grip the operator at the positions indicated in
the illustration.
Unscrew the drive unit from the mounting plate.
Structural conditions
The following accessories are available to
accommodate special structural conditions:
Fixing the mounting plate.
Fixing dimensions
Fitting the spindle covers
Mounting the operator (drive unit)
·
·
·
·
The electrical supply installation (230 V AC ± 10%,
50/60 Hz) is to be provided by others.
The operator is supplied from the factory
with a two-pole-and-earth plug.
If the operator is to be xed to a metallic
door leaf, the door leaf must be properly
grounded/earthed.
This should supply a two-pole-and-earth socket
protected by a 10 A fuse.
If main closing edge safety relies on limitation of the
dynamic forces, these dynamic forces must be
adjusted and checked to ensure that they are within
the ranges specied in prEN 12650/DIN V 18650.
Guide values for the door speed settings:
Opening time = 6 s
Closing time = 6 s
Ready for connection with mains cable, white, min.
800 mm.
Models B and G (see table under
“General”: Applications – Method o nstallation)
suitable for LH and RH doors.
The door set should be inspected by an engineer prior
to the rst start-up and then checked and maintained
in accordance with requirements, with a minimum
inspection rhythm of once a year.
(Guidelines for powered doors, windows and gates,
German code BGR 232/DIN 18650.
Ensure that the unit is properly disconnected from the
power source when carrying out cleaning and
maintenance work.
The cover is latched and held by a screw fastener.
Undo the screw fastener.
Move the cover approx. 2 mm away from the
switch side to unlatch and remove.
Disconnect the ground cable.
- For standard (protruding) arms, various arm
variants for compensating of dierent frame reveal
depths.
For frame reveal depths from 30 to 90 mm or for
frame reveal depths from 90 to 200 mm.
Dierent arm variants available for RH and LH doors.
If the frame comprises steel proles, drill a pilot hole
(M5) and then tap to the required thread size.
In the case of aluminium/light alloy proles, use
riveted nuts (M5).
In the case of timber frames, use wood screws
(included in standard supply).
Please note the dierent weights governing the xing
modes.
Mark the holes (8) for installing the mounting plate in
accordance with the dimensional data, then drill and
tap threads as necessary. Mark the holes (2) for xing
the slide channel or the standard arm in accordance
with the dimensional data. Drill holes and tap threads
as necessary. Fix mounting plate.
Secure the spindle cover in position so that the hole
is centrally located over the spindle to which the arm
is tted.
Place the drive unit on the mounting pins and push in
the direction of the switch until latched in position.
Secure the drive unit using the captive screws and
the four additional screws (M 6x8).
- Slide channel arm with integrated axle extensions to
allow for height dierences (see detail).
- Top jamb xing on the pull side - .
- Top jamb xing on the push side -
- Door lea xing on the push side - .
- Door lea xing on the pull side - .
- Top jamb xing on the push side - .
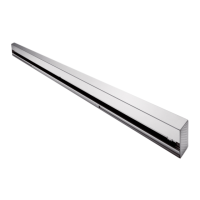
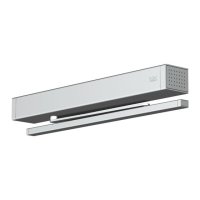
Slide channel operator for:
Operator with standard arm assembly for:
6
7
8
55
A
B
C
D
E
CD 80
Swing Door Operator
DORMA
7
DORMA AUTOMATICS, Inc. 924 Sherwood Drive Toll-Free: 877-367-6211 DL2862-010
Lake Bluff, IL 60044 Fax: 877-423-7999 Jan. 2007
E-mail: automatics@dorma-usa.com Subject to change without notice
For slide channel arm, proceed as per
gs.
Mounting the slide channel arm
The self-locking screw must only be used once! If
the screw has to be undone for repair or maintenance
work, it must be replaced by a new self-locking screw
(see spare parts list).
Mounting the slide channel
Adjusting the hydraulic settings
The CD 80 exhibits dierent operating
characteristics when used as a door closer (without
electronic control) or as an AUTOMATIC operator.
Close all valves (3) by turning clockwise.
Secure the slide channel arm with the self-locking
screw to the operator spindle
If necessary, turn the closer spindle using the slide
channel arm in order to enable it to be installed
with the correct preload.
Fix the slide channel to the door and t the slide
channel end covers.
Open the door slightly and t the slide channel arm
to the slide block in the slide channel.
9
9
10
10
11
11
12
For slide channel arm, proceed as per
gs.
Mounting the slide channel arm
The self-locking screw must only be used once! If
the screw has to be undone for repair or maintenance
work, it must be replaced by a new self-locking screw
(see spare parts list).
Mounting the slide channel
Adjusting the hydraulic settings
The CD 80 exhibits dierent operating
characteristics when used as a door closer (without
electronic control) or as an AUTOMATIC operator.
When used as an automatic operator, it requires
longer closing times. This must be taken into
account when adjusting the settings.
1. Closing speed for the sweep range from 110° to 0°
2. Closing speed for the sweep range from 110° to 25°
Close all valves (3) by turning clockwise.
Secure the slide channel arm with the self-locking
screw to the operator spindle (22 Nm).
If necessary, turn the closer spindle using the slide
channel arm in order to enable it to be installed
with the correct preload.
Fix the slide channel to the door and t the slide
channel end covers.
Open the door slightly and t the slide channel arm
to the slide block in the slide channel.
Open the door manually to its fully opening angle
(90° - 110°) and then release.
Slowly open valve 1 (110° - 0°) until the closing
cycle of the door takes place at the required speed.
If the door closing cycle needs to begin at a higher
speed, see 2.
Open the door manually to its fully opening angle
(90° - 110°) and then release.
This setting can be used for the full closing range
from 110° to 0°.
3. Installation instructions
9
9
10
10
11
11
12
 Loading...