EasyManua.ls Logo

Dormakaba Axessor CIT - User Manual

Dormakaba Axessor CIT
125 pages
Print Icon
To Next Page IconTo Next Page
Loading...
Electronic safe lock
Axessor CIT
V28 - 08/2019
EN
Technical Manual

Table of Contents

Questions and Answers

  • A
    Anthony AdamsAug 17, 2025
    What to do if Dormakaba Locks show 'LINE OFF'?
    • A
      amywebbAug 17, 2025
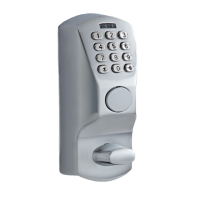
      If your Dormakaba lock displays 'LINE OFF', it means the connection between the lock and input unit is temporarily interrupted. First, wait for the lock to enter sleep mode, then wake it up using the info key. If the message persists, try removing and reinserting the batteries. If that doesn't work, disconnect and check the connecting cable for damage, replacing it if necessary. Reconnect the cable securely. Finally, ensure you're using new batteries. If the problem continues, call the vendor for technical support.
  • T
    Theodore JonesAug 20, 2025
    What to do if Dormakaba Locks show 'BAT-CMP OPEN'?
    • S
      Samantha HaneyAug 20, 2025
      If your Dormakaba lock displays 'BAT-CMP OPEN', it indicates the battery compartment was opened. Ensure the compartment is properly closed and that the input unit wasn't manipulated. To clear the message, enter the Master, any Manager, or a User Code with a special function (Battery Code).
  • R
    Richard LamAug 22, 2025
    What to do if Dormakaba Axessor CIT Locks show 'MOT FLT'?
    • B
      Brandon TurnerAug 22, 2025
      If your Dormakaba lock displays 'MOT FLT', it means a motion fault occurred during bolt movement. First, reboot the input unit by removing the batteries, wait one hour, and then insert new batteries. Ensure the bolt moves smoothly and isn't mechanically blocked. If the message persists, call the vendor for technical support.
  • V
    Victor HollandAug 25, 2025
    What to do if Dormakaba Locks show 'HDW FLT'?
    • T
      terryjamesAug 26, 2025
      If your Dormakaba lock displays 'HDW FLT', it indicates a hardware fault. Reboot the input unit by removing the batteries, wait one hour, and then insert new batteries. Ensure the bolt moves smoothly and isn't mechanically blocked. If the message persists, call the vendor for technical support.
  • A
    Amanda PhillipsAug 27, 2025
    What does 'REFUSED 32' mean on Dormakaba Axessor CIT Locks?
    • C
      Clarence WilliamsAug 27, 2025
      If your Dormakaba lock displays 'REFUSED 32', it means the memory is full. This can happen if you've defined and entered the maximum number of Weekly Locking Periods (35) or Holiday Locking Periods (22). To resolve this, ensure you do not exceed these limits.
  • M
    Michelle ReynoldsAug 30, 2025
    What does 'REFUSED 08' mean on Dormakaba Locks?
    • R
      Ryan WongAug 30, 2025
      If your Dormakaba lock displays 'REFUSED 08', it indicates an invalid date or time window. This could be due to entering a date outside the acceptable range (Jan. 31st 2000 until Dec. 31st 2099) or a time window exceeding the permitted range. Ensure you enter a valid date within the time limit and a shorter time window.
  • L
    Luis BrownSep 1, 2025
    What does 'REFUSED 16' mean on Dormakaba Axessor CIT?
    • J
      James RiversSep 1, 2025
      If your Dormakaba lock displays 'REFUSED 16', it means the minimum interval of all delays plus 1 minute was ignored before the next Weekly Locking Period had started, or the minimum period of time was ignored. Enter a valid date within the time limit, increase the interval duration, and enter a valid time period. The minimum period of time is calculated by adding the Confirmation Window and 1 additional minute to the higher value of 2 time delays (Time Delay or Duress Time Delay).
  • R
    Rebecca OrtizSep 4, 2025
    What does 'REFUSED 128' mean on Dormakaba Axessor CIT Locks?
    • R
      Richard GutierrezSep 4, 2025
      If your Dormakaba lock displays 'REFUSED 128', it means the lock is no longer in Programming Mode. This happens if you navigate in the menu for more than 5 minutes without configuring the lock. To fix this, leave the Programming Mode before 5 minutes have passed and enter the Programming Mode again.
  • N
    Nicholas WilsonSep 6, 2025
    What does 'REFUSED' mean on Dormakaba Axessor CIT?
    • M
      Mariah Miller DVMSep 6, 2025
      If your Dormakaba lock displays 'REFUSED', it indicates that during a code change, the entered code does not match the code entered before. Make sure to enter the same code twice.
  • J
    Joshua DoyleSep 9, 2025
    What does 'ID ERROR' mean on Dormakaba Axessor CIT?
    • B
      Bonnie PattonSep 9, 2025
      If your Dormakaba lock displays 'ID ERROR', it means that the ID for Master Code is not OO. Make sure that the first 2 digits of the code reflect the ID.

Summary

Electronic Safe Lock

Axessor CIT

Product name and model.

Technical Manual

Document title indicating manual type.

1 About this document

1.1 Purpose and objective

Describes the manual's goals and scope.

1.2 Target group

Identifies the intended audience for the manual.

1.3 Compliance with safety and standards

Outlines adherence to safety regulations.

2 Safety information

2.1 Intended use

Specifies the proper application of the safe lock.

2.2 Hazard category

Warns about potential risks and damage.

3 Norms, standards and regulations

4 Certificates

5 System overview

6 System description

6.1 The Axessor CIT electronic safe locks

Detailed description of the safe lock functionality.

6.2 Product variants

Outlines different configurations and models available.

6.2.1 Standalone variant with a single lock

Describes the basic single-lock setup.

6.2.2 Standalone variant with multiple locks

Details multi-lock standalone configurations.

6.2.3 Network variant with a single lock and an optional eBox

Explains network setup with one lock and eBox.

6.2.4 Network variant with multiple locks and an optional eBox

Describes network setup with multiple locks and eBox.

7 Software applications

8 Scope of application

9 Technical data

9.1 Hardware

Specifies hardware components and their properties.

9.2 Interfaces

Details input, output, and communication interfaces.

9.3 Mechanical components

Lists physical dimensions and component properties.

9.4 Conditions

Outlines operating and storage environmental requirements.

10 Factory settings

11 Functionality

11.1 Display elements of the input unit

Describes the functions of the input unit's display and keys.

11.2 Information menu

Explains how to access and navigate the information menu.

11.3 Immediate Time Lock

Details the function for immediate locking periods.

11.4 Time-Related Functions

Covers delay, dual mode, and code disabling features.

11.5 Beep signals

Explains the audible alerts and their causes.

11.6 Status messages

Lists and explains system status indicators and messages.

11.6.1 Bank Mode and One Time Mode

Differentiates between operating modes.

11.7 Access codes

Explains the structure and composition of access codes.

11.7.1 Code hierarchy and code formats

Explains the structure and composition of access codes.

11.7.2 Code types

Categorizes different types of access codes.

11.7.2.1 Master Code

Details the highest-level access code and its functions.

11.7.2.2 Manager Codes

Describes Manager Codes and their administrative roles.

11.7.2.3 User Codes with special functions

Explains User Codes with specific functionalities.

11.7.2.4 Courier Code

Describes the Courier Code for specific service personnel.

11.7.2.5 Duress Code

Explains the Duress Code for silent alarm activation.

11.7.2.5.1 Duress Code in Bank Mode

Details Duress Code activation in Bank Mode.

11.7.2.5.2 Duress Code in OTM

Details Duress Code activation in OTM.

11.7.2.6 Shelve Function

Explains the function to reset to factory defaults.

12 Access rights

13 Unpacking and checking delivery

13.1 Checks before installation

Lists items to verify upon receiving the product.

14 Installation

14.1 Drilling templates

Provides templates for drilling mounting holes.

14.2 Installing the input unit

Step-by-step guide for installing the input unit.

14.3 Installing the lock

Instructions for mounting the main lock mechanism.

14.4 External connections on the lock

Details wiring for external signals on the lock.

14.5 Installing the eBox

Guide for installing the optional eBox.

14.6 External connections on the eBox

Wiring instructions for the eBox.

14.7 eBox wiring diagram

Visual representation of eBox connections.

14.8 Wiring

General wiring procedures for the system.

14.8.1 Cold plugging

Describes initial system wiring without power.

14.8.2 Hot plugging

Explains system wiring with power applied.

14.8.3 Wiring options

Outlines various wiring configurations.

14.9 Wiring check of the lock

Procedure to verify lock wiring integrity.

14.10 Wiring check of the eBox

Procedure to verify eBox wiring.

15 Configuration

15.1 Programming Mode

Describes how to access and use the programming interface.

15.1.1 Menu overview of the master lock

Shows the structure and available functions in the menu.

15.1.2 Accessing the Programming Mode

Steps to enter the programming mode.

15.1.3 Changing and saving settings

How to modify and save configuration parameters.

15.1.4 Exiting the Programming Mode

Procedure for leaving the programming mode.

15.1.5 Menu TIME

Configuration options related to time settings.

15.1.5.1 Setting the time

How to set the current time.

15.1.5.2 Setting the date

How to set the current date.

15.1.5.3 Setting the time format AM;PM

How to configure the 12/24 hour time display.

15.1.5.4 Setting DST

How to enable or disable Daylight Saving Time.

15.1.6 Menu PROG

Configuration options for locking periods and related functions.

15.1.6.1 Activating the Immediate Time Lock

How to set an immediate locking period.

15.1.6.2 Configuring Weekly Locking Periods

How to define recurring weekly lock periods.

15.1.6.3 Configuring Holiday Locking Periods

How to define lock periods for holidays.

15.1.6.4 Configuring Time Locking Interruptions

How to define periods that override time locks.

15.1.6.5 Configuring Time-Related Functions

How to set up time-based functions for user groups.

15.1.7 Menu DELAY

Configuration options for time delays.

15.1.7.1 Setting and deactivating Time Delays

How to set and disable time delays for user groups.

15.1.7.2 Configuring the Confirmation Window

How to set the window for code confirmation.

15.1.7.3 Configuring NRTD

How to configure Non-Return Time Delay.

15.1.7.5 Configuring the window for a second code in Dual Mode

How to set the window for a second code in Dual Mode.

15.1.7.6 Configuring Bolt Open Time in Bank Mode

How to set bolt open time in Bank Mode.

15.1.7.7 Configuring Process Time Window in OTM

How to set process time window in OTM.

15.1.7.8 Setting Time Delay in OTM

How to set time delay specifically for OTM.

15.1.7.9 Configuring Opening Time Delay for duress alarm in OTM

How to set opening delay for duress alarms in OTM.

15.1.8 Menu CODE

Configuration options related to access codes.

15.1.8.1 Authorization of codes

Explains authorization levels for different code types.

15.1.8.2 Changing the Master Code

Steps to change the Master Code.

15.1.8.3 Setting Manager Codes

Steps to set Manager Codes.

15.1.8.4 Setting the Courier Code

Steps to set the Courier Code.

15.1.8.5 Changing codes

How to change existing codes.

15.1.8.6 Deleting a code

Steps to delete access codes.

15.1.8.7 Resetting the electronic safe lock

Procedure to reset the lock to factory settings.

15.1.9 Menu MISC

Configuration options for miscellaneous functions.

15.1.9.1 Setting the Display Language

How to change the display language.

15.1.9.2 Managing the safe lock system with the Device Manager

How to manage connected devices using the Device Manager.

15.1.9.2.1 Entering the lock parameters and testing the bus system

How to view lock parameters and test the bus system.

15.1.9.2.2 Moving the selected lock

How to change the position of a lock in the system.

15.1.9.3 Setting the Beeper Volume

How to adjust the beeper volume.

15.1.9.4 Activating or deactivating Open Beeper

How to enable/disable the beeper for open doors.

15.1.9.5 Activating or deactivating the Beeper for Confirmation Window

How to enable/disable beeper for confirmation windows.

15.1.9.6 Activating or deactivating the Beeper Time Delay

How to enable/disable beeper for time delays.

15.1.9.7 Activating or deactivating the Beeper for Door Opening Alarm

How to enable/disable beeper for door opening alarms.

15.1.9.8 Activating or deactivating Waiting Time

How to enable/disable waiting time indicators.

15.1.9.9 Activating or deactivating Language

How to enable/disable specific menu languages.

15.1.9.10 Setting the Lock Info

How to configure the display of lock information.

15.1.9.11 Activating or deactivating Code Denial

How to enable/disable code denial for users or groups.

15.1.9.12 Activating or deactivating the Duress Code Function

How to enable/disable the duress code function.

15.1.9.13 Activating or deactivating Dual Mode

How to enable/disable the dual code requirement.

15.1.9.14 Activating or deactivating One Shot Codes

How to enable/disable single-use codes.

15.1.9.15 Activating or deactivating the Time Lock in OTM

How to enable/disable time locks for OTM codes.

15.1.9.16 Activating or deactivating NRTD for OTC

How to enable/disable Non-Return Time Delay for OTC.

15.1.9.17 Displaying current Time

How to enable display of current time in OTM.

15.1.9.18 Setting the Wake Up Mode in Mixed Mode

How to set wake-up mode in mixed operations.

15.1.9.19 Setting the Freeze function

How to manage the freeze function.

15.1.9.19.1 Setting Freeze Off

Steps to deactivate the freeze function.

15.1.9.19.2 Setting Freeze On

Steps to activate the freeze function.

16 Operation

16.1 Operating modes

Explains the different modes of operation.

Bank Mode

Describes the standard electronic lock operation.

One Time Code

Explains single-use codes from a dispatch center.

ICS Mode

Describes mode ensuring user presence on-site.

Dual Mode

Explains the combination of OTC and ICS modes.

Mixed Mode

Describes the combined Bank Mode and OTM functionality.

16.2 Code entry

Explains the procedure for entering access codes.

16.3 Lock opening procedure

Steps to open the lock under various conditions.

16.3.1 Opening procedure in Bank Mode

Detailed steps for opening in Bank Mode.

16.3.2 Opening procedure in ICS Mode

Detailed steps for opening in ICS Mode.

16.3.3 Opening procedure in OTC Mode

Detailed steps for opening in OTC Mode.

16.4 Lock closing procedure

Steps for closing the lock.

16.4.1 Closing procedure in Bank Mode

Steps for closing in Bank Mode.

16.4.2 Closing procedure in OTM

Steps for closing in OTM.

17 Troubleshooting

17.1 Status messages on LCD

Lists and explains error and status messages on the display.

17.2 Identification of the lowest serial number

How to identify the master lock by serial number.

18 Service

18.1 Cleaning

Instructions for cleaning the input unit safely.

18.2 Replacing batteries

Guide for replacing the unit's batteries.

19 Maintenance

19.1 Replacing a defect lock

Procedure for replacing a faulty lock.

19.1.1 Removing the defect lock from the safe lock system

Steps to remove a defective lock from the system.

19.1.2 Adding a new lock to the safe lock system

Steps to add a new lock to the system.

19.1.2.1 Adding a new lock with Freeze OFF

Procedure to add a lock with Freeze function deactivated.

19.1.2.2 Adding a new lock with Freeze ON

Procedure to add a lock with Freeze function activated.

Changing the function Freeze to OFF

How to disable the freeze function.

Assigning the new lock to the vacant position

How to assign a new lock to its position.

Changing the function Freeze to ON

How to activate the freeze function.

Enabling the new lock for operation

Steps to make a new lock operational.

19.2 Removing the error message of lock position -16-

How to clear a specific error message.

20 Disposal

21 Spare parts and accessories

Dormakaba Axessor CIT Specifications

General IconGeneral
User IdentificationPIN code
Power SupplyBattery-powered
Audit TrailYes
ProgrammingVia Software or Mobile App
MaterialMetal
CommunicationRS485
TypeElectronic lock

Related product manuals