Do you have a question about the dosatron D14MZ10 and is the answer not in the manual?
Check and clean the unit's strainer to ensure proper suction.
Verify the suction hose is drawing liquid by checking for flow.
Place finger on hose to confirm suction is present.
Cut off damaged hose end or replace the entire hose if needed.
Confirm that the unit is now drawing concentrate after hose adjustment.
Press the air bleed button to safely release internal pressure.
Unscrew the nut or clamp connecting the suction hose.
Separate the suction hose from the injector body.
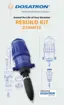
Loosen and remove the nut securing the injection stem.
Pull the injection stem straight out from the injector.
Examine the plunger seal for any nicks, scratches, or wear.
Twist the plunger counter-clockwise to detach it from the stem.
Use a screwdriver to carefully roll the old plunger seal out of its groove.
Insert the new plunger seal into the groove on the plunger.
Align the plunger's top with the retainer to reconnect it.
Twist the plunger clockwise to secure it in its position.
Align stem notches with body teeth and insert into the unit.
Hand-tighten the injection stem nut to secure it.
Set the dilution rate to the desired concentration level.
Verify that the injector is now drawing concentrate correctly.
Remove the hose nut or clamp and the suction hose.
Loosen and remove the nut that holds the check valve in place.
Pull the check valve assembly straight out from the unit.
Twist the top guide counter-clockwise to access internal check valve parts.
Detach the spring and cone from the check valve assembly.
Inspect, clean, or replace dirty or damaged components of the check valve.
Place the cone into the top of the check valve barb.
Slide the spring over the shaft of the check valve assembly.
Place the top guide over the shaft of the check valve assembly.
Align the guide and twist clockwise to lock it into position.
Tug the assembly to ensure all parts are correctly seated and secure.
Insert the reassembled check valve assembly back into the stem.
Screw the check valve nut back onto the assembly.
Screw the hose nut or clamp onto the suction hose.
Attach the hose to the barb and tighten the nut/clamp.
Turn off water and press air bleed button to release pressure.
Use a strap wrench to loosen the bell housing.
Unscrew and remove the bell housing from the unit.
Grasp and pull the piston straight out from the injector body.
Visually examine the piston's upper and lower flanges for damage.
Invert piston and insert into bell housing to check upper flange fit.
Twist plunger to remove and test the lower flange's fit.
Insert piston into body to ensure a snug fit.
Grasp and twist the upper flange counter-clockwise to remove it.
Remove the old upper flange by lifting it straight up.
Align new flange tooth with piston shell notch and press down.
Twist the new upper flange clockwise until it locks.
Grasp and twist the lower flange counter-clockwise to remove it.
Remove the old lower flange by lifting it straight up.
Align new flange tooth with piston shell notch to install.
Press the new lower flange down into its correct position.
Twist the new lower flange clockwise until it locks securely.
Align the plunger's top with the retainer to reconnect it.
Twist the plunger a quarter turn clockwise to lock it.
Place the piston back into the main body of the Dosatron unit.
Hand-tighten the blue bell housing to secure the reassembled unit.
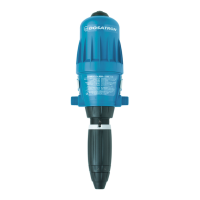
| Model | D14MZ10 |
|---|---|
| Category | Plumbing Product |
| Material | Polypropylene |
| Weight | 1.5 kg |
| Injection Range | 0.1-6% |
| Connection Size | 3/4" |
| Inlet/Outlet Connection | 3/4" |