CONTACT US AT www.DRpower.com 9
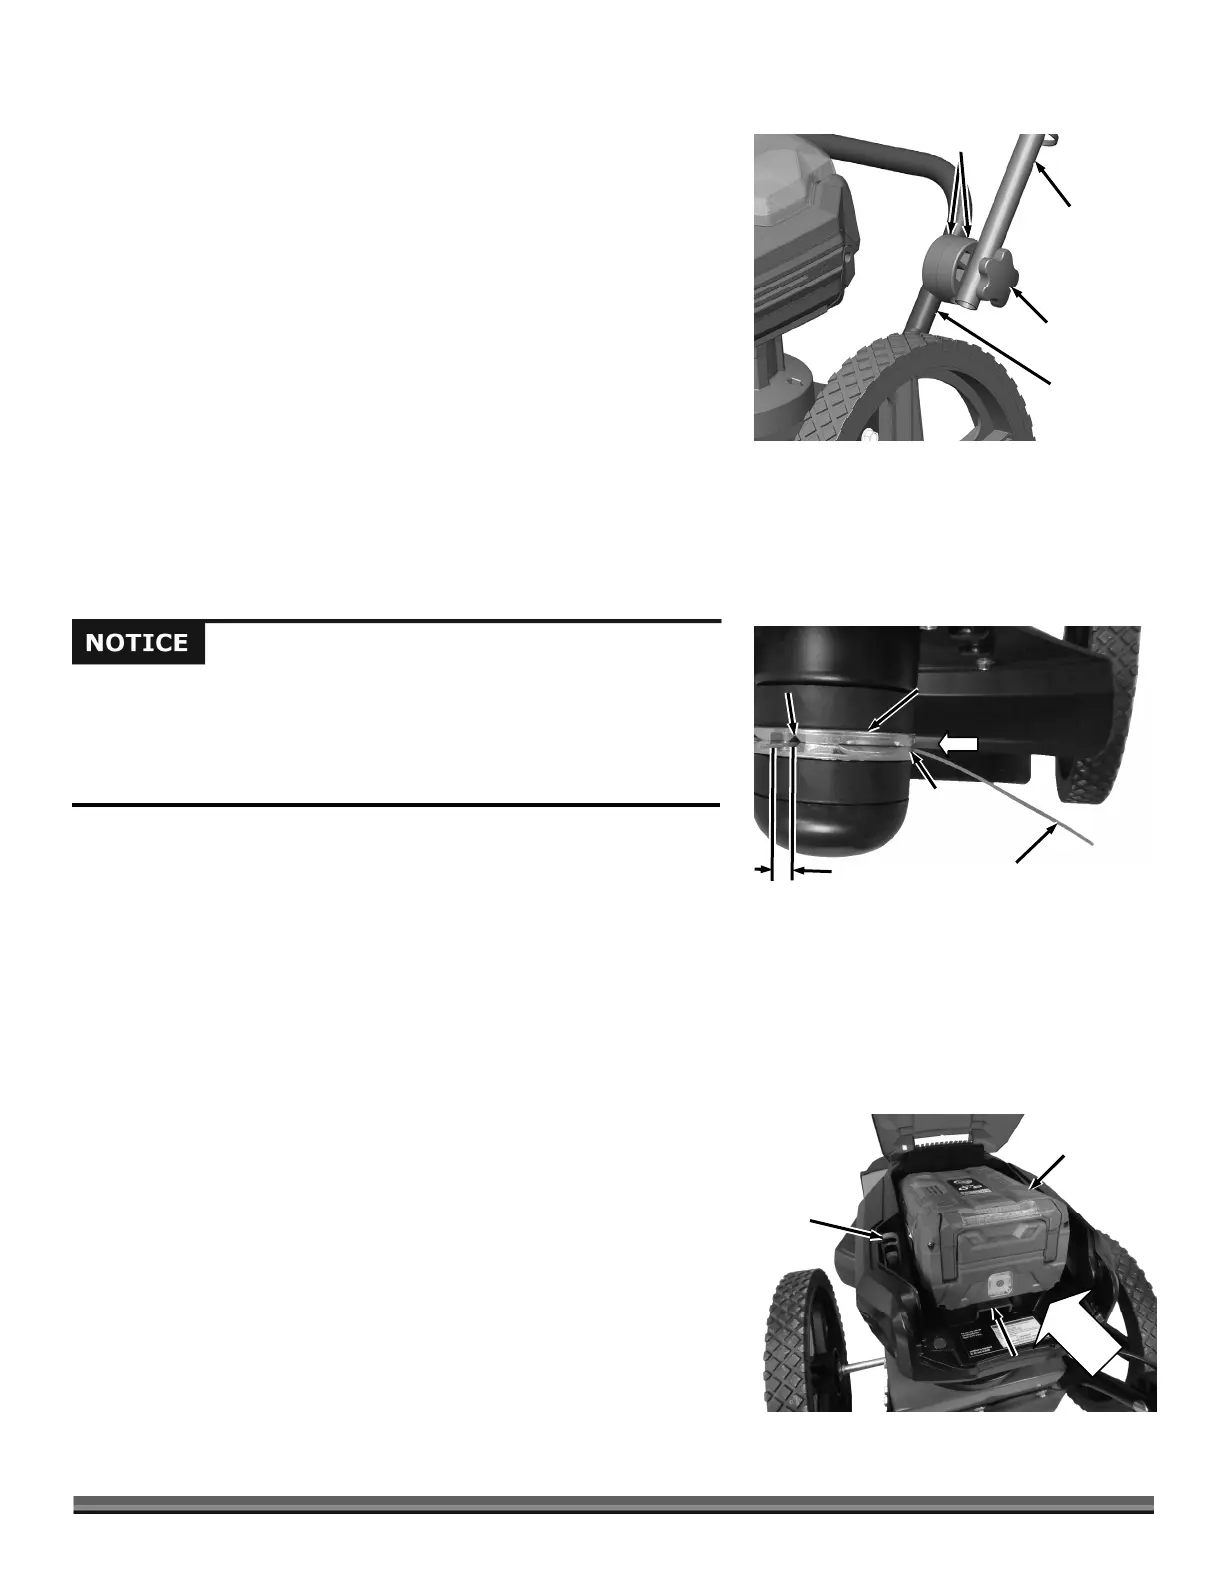
The Handlebar folds down for easy storage and the DR PULSE
TRIMMER/MOWER is shipped to you with them folded.
Note: Ensure that the teeth of the Handlebar Adjusters mesh correctly as you tighten
the Knobs in the following step.
1. Loosen both the Adjustment Knobs and move the Handlebar up or down
until the Notches on the Adjusters are aligned on both sides and tighten the
Knobs (Figure 4). This puts the Handlebar at a comfortable operating
position for many people.
Note: It is important to find a Handlebar height that allows the Mow-Ball
®
to
comfortably hover just above the ground when in use. Proper adjustment is
critical to best performance. You may find you like different Handlebar
heights for different mowing conditions.
2. For other Handlebar height settings, loosen the Knobs, move the Handlebar
up or down until you are comfortable, and then tighten the Adjustment
Knobs securely. Take note of how many teeth you have moved away from
the aligned notches to align both sides.
Installing Trimmer Cords
Always install both Trimmer Cords and ensure they are the same length. Not
having both Cords installed and/or at the same length will cause excessive
vibration and could damage the machine.
1. Insert the end of a Trimmer Cord into the inlet hole (larger slotted cutout)
push it in until the end protrudes out the other side approximately 1/2"
(Figure 5).
2. Turn the Quick Lock 180 degrees and repeat the installation for the other
side.
Note: The Cord can only move through the Quick Lock in one direction. To remove
it you must pull it from the other side of the Holder (where the 1/2" end is).
Extending Cutting Cord Life
STORE YOUR CORD OUT OF THE SUN. UV can damage your cord causing
premature wear.
KEEP YOUR CORD HYDRATED. It is best to soak your cord in water for at
least 3 days before using.
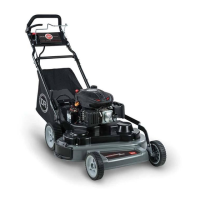
Installing the Battery
1. Open the Battery Cover and insert the Battery into the Mower (Figure 6).
Ensure the Battery is pushed in completely so the Latch locks it in place.
2. Ensure that the Safety Key is inserted into the Key Slot.
Trimmer
Cord
Figure 5
Quick Lock
Outlet
(Smaller
Opening)
pprox.
1
2"
Inlet
(Larger
Opening)
Battery
Figure 6
Safety
Key
Latch
Figure 4
Notches
Lined Up
djustment
Knob
Lower
Handlebar
Upper
Handlebar
We recommend using DR Power Equipment .095" Cord provided with
your Trimmer/Mower for best results. Use of larger Cord will shorten the
Battery run time.
If the tips of the cords are not even, it can cause vibration that could
damage the machine.