8 DR
®
PILOT TRIMMER/MOWER
Make sure the Charger Power Supply is plugged into a normal household voltage, 120volts, 60Hz, AC only.
You should operate the Battery Charger in a dry place with temperatures between 50ºF (10ºC) and +100ºF (+37.8ºC).
Operating above +100 ºF can cause Battery Pack leakage, rust, or degradation of the Battery Pack performance.
Do not charge appliance in rain or in wet locations.
Specifications
Moto
Brushless, 850 W, 62V DC
Batter
Part Number 41424
5 Ah
Included
Char
e
Part Number 41422
5 Ah
included
Moto
S
eed
3500 r
m
Cuttin
Width
18"
Cuttin
Hei
ht
3 Hei
hts, 2" - 4"
Cuttin
S
eed
3800 RPM
Cord Size
Gra
.095", 11" Lon
recommended
other thicknesses can be used but will shorten Batter
run time.
Belt
V-Belt, 3L440R
Wheels
14" x 1.75" Wide, Resin, Steel Bearin
s
Frame
14 Ga
e Steel
Mow-Ball
4" Diameter, Su
e
-Tou
h N
lon
Machine Dimensions
50.2" L x 21.5" W x 49" H
Trimmer Wei
ht
Without Batter
: 40 Lbs, With Batter
: 45 Lbs
Charge the Battery Pack before your first use
The DR PULSE Trimmer/Mower uses a sealed, Lithium-Ion Battery Pack. You MUST charge the Battery Pack for at least 90
minutes before you use the Mower for the first time. If you do not charge it before using the Mower, the Battery Pack’s charging
capacity may decrease.
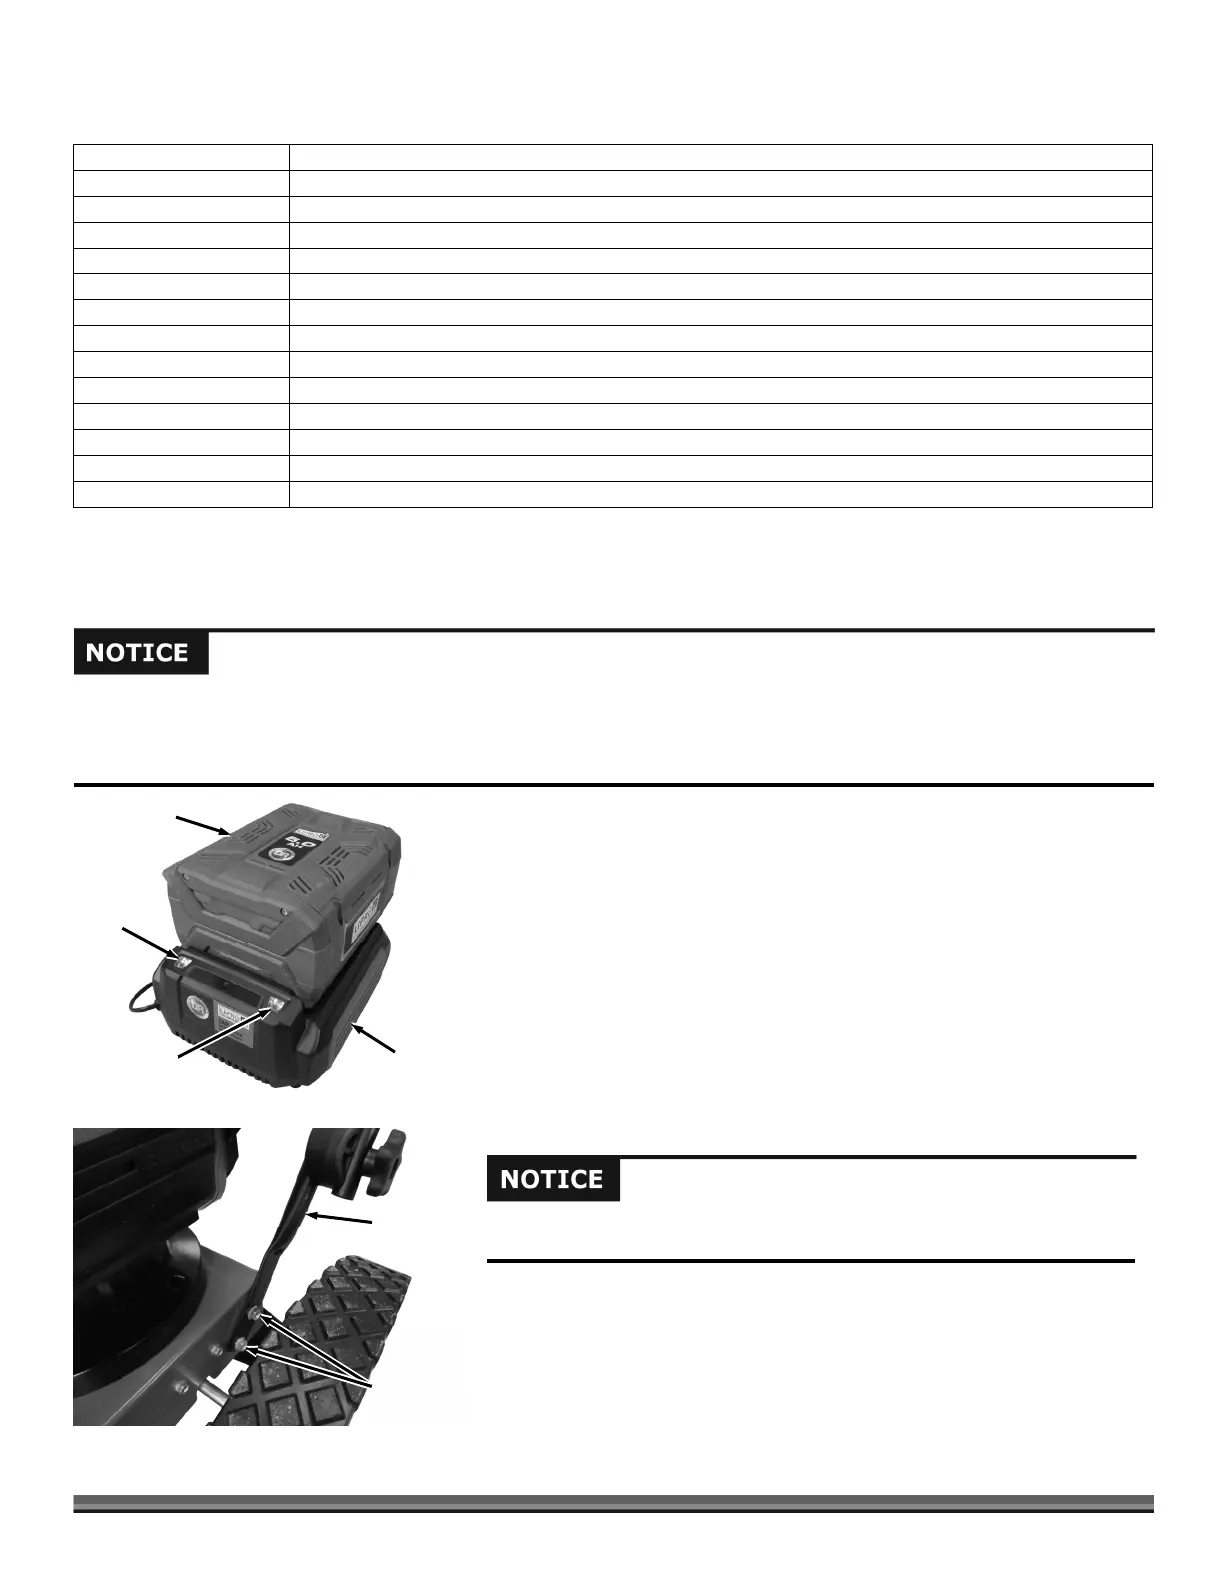
1. Connect the Charger to a 120VAC outlet. When the Battery is not installed
(no load condition): The Red LED will be lit.
2. Insert the Battery into the Charger (Figure 2). Under normal charging the
Green LED will Blink.
3. When the Battery is fully charged, the Green LED will remain light,
indicating that charging is complete.
4. Unplug the Charger from the Outlet and remove the Battery.
Adjusting the DR PULSE TRIMMER/MOWER Handlebar
Tools needed:
1/2" Wrench
1. Check the tightness of the four Bolts that secure the Lower Handlebar to the
Frame using a 1/2" Wrench (Figure 3).
Lower
Handlebar
Figure 3
Handlebar
Hardware
The Lower Handlebar Bolts may have been loosened during shipping. Make
sure that the Bolts attaching the Lower Handlebar to the Frame are tight.
Figure 2
Charger
Battery
Red LED
Green
LED