14 DR
®
PILOT TRIMMER/MOWER
Use DR Power Equipment .095" Cord provided with your DR Pulse Trimmer/Mower for best results. Use of larger Cord or
different materials will reduce Battery run time.
Always make sure to install both Trimmer Cords and ensure they are the same length. Not having both Cords installed
and/or at the same length will cause excessive vibration and could damage the machine.
If you have purchased Trimmer Cord in a roll, ensure that you cut it in lengths of 11". This will give you the correct cutting
width of 18" when two Cords are installed. Longer or shorter Cord length could damage the machine.
Chapter 4: Maintaining The DR PULSE TRIMMER/MOWER
Regular Maintenance Checklist
Note: Consider that the service intervals shown are the maximum under normal operating conditions. Increase frequencies under
extremely dirty or dusty conditions.
P
ROCEDURE BEFORE EACH
USE
EVERY 25
HOUR
EVERY 50
HOUR
EVERY 100
HOUR
Check Battery power
Clean Motor vents and remove collected grass trimmings*
Check General Equipment Condition, e.g. Nuts, Bolts, Welds, etc.
Replace broken or frayed Cutting Cords
Check the Mow-Ball
®
Line Plates for excessive wear
Check the Trimmer Belt for wear, damage and stretching
Lubricate Motor to Bail Bar Cable with SAE 30 Oil
Remove the Trimmer Guard and clean out any collected debris
Replace the Trimmer Belt
* Cleaning the top of the Motor during use is critical for proper air flow. Keeping the Motor clear of debris is necessary for optimum performance.
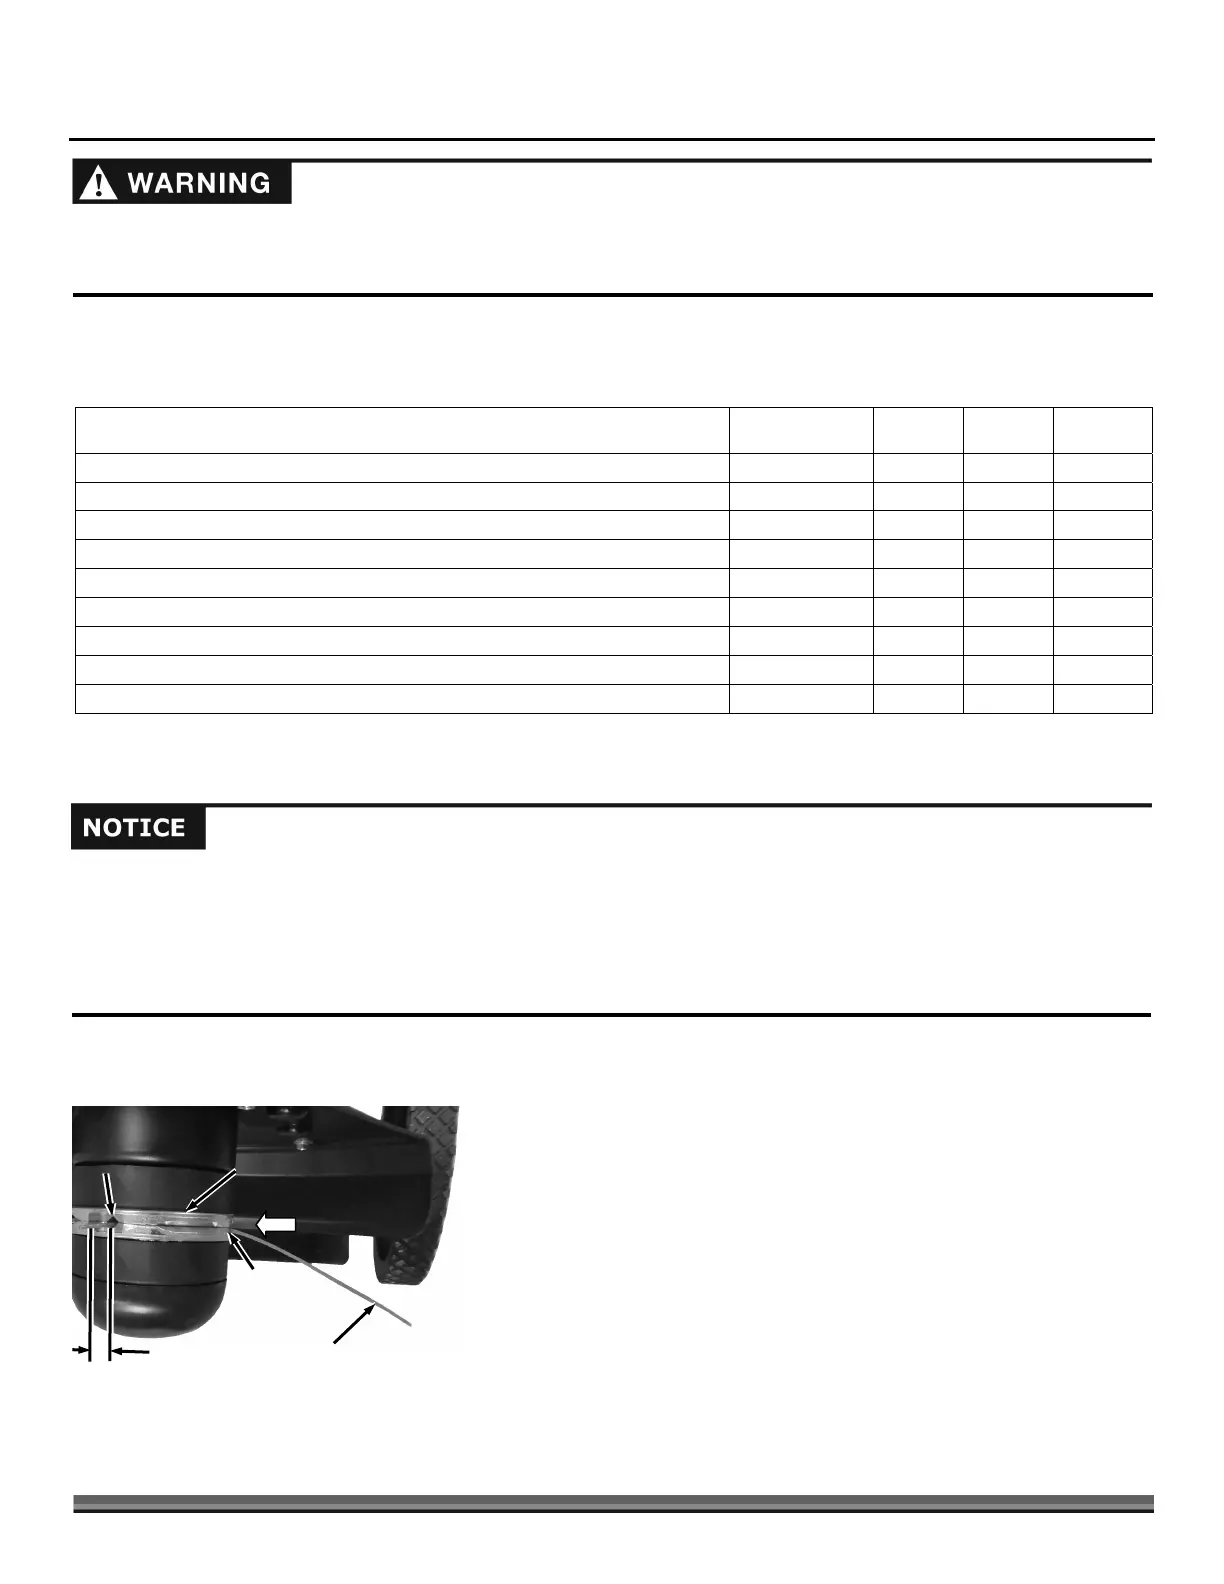
Replacing Trimmer Cords
Note: The Cord can only move through the Quick Lock in one direction (Figure 12). To remove it you must pull it from the other side of
the Holder (where the 1/2" end is).
1. Pull the remaining portion of the Trimmer Cord from the Quick Lock.
2. Insert the end of a Trimmer Cord into the inlet hole (larger slotted cutout)
push it in until the end protrudes out the other side approximately 1/2".
3. Turn the Quick Lock 180 degrees and repeat the installation for the other
side.
Before performing any maintenance procedure or inspection, release the bail bar to stop the motor and remove the battery
and safety key to prevent accidental starting.
Any maintenance or repairs not listed in this section should be performed by an authorized service representative.
Trimmer
Cord
Figure 12
Quick Lock
Outlet
(Smaller
Opening)
pprox.
1
2"
Inlet
(Larger
Opening)