14 DR
®
WIDE-CUT LAWN MOWER
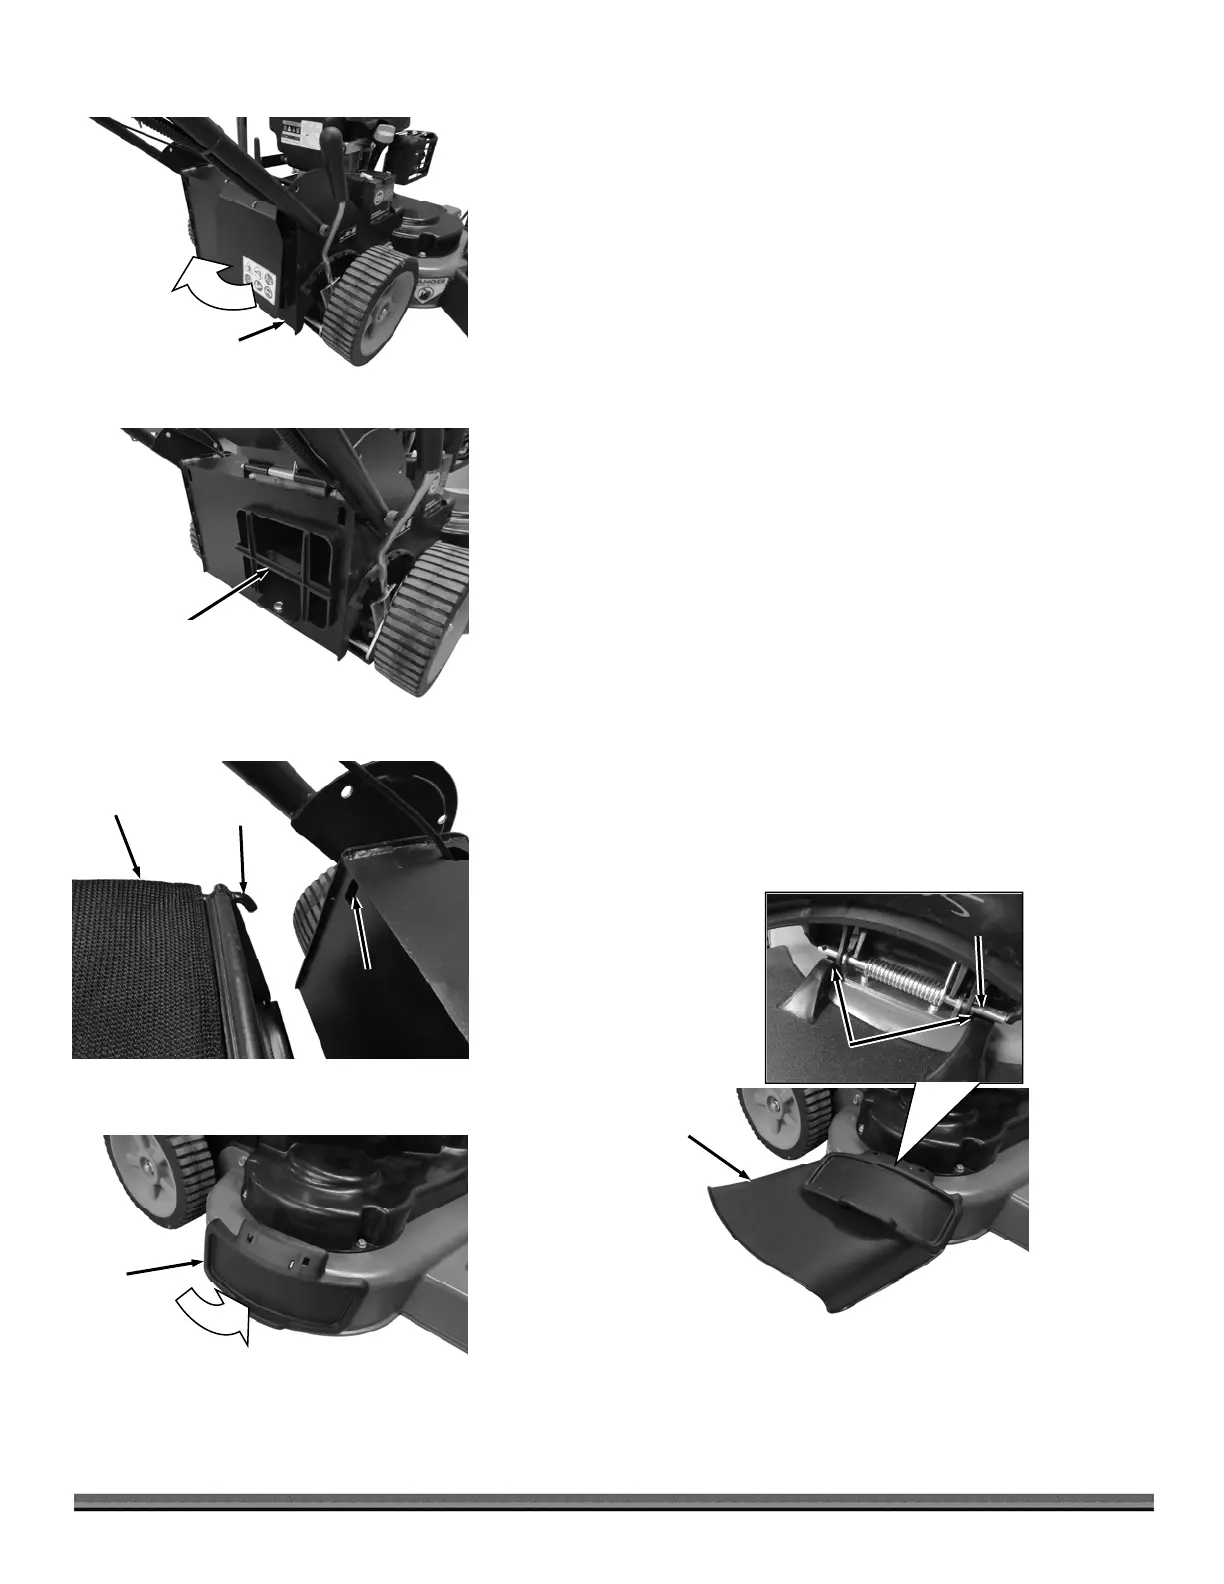
Figure 17
Side
Discharge
Guar
Setting up for rear Bagger discharge
1. Lift the Rear Flap Guard (Figure 14).
1. Remove the Mulching Plug (Figure 15).
1. Hold the Discharge Guard in the upright position as you place the tabs of
the Bagger Assembly into the slots in the rear Frame on both sides (Figure
16).
2. Lower the Rear Flap Guard onto the Bagger Assembly.
3. Ensure the Discharge Deflector is removed and the Side Discharge Guard is
down (Figure 17).
Setting up for Mulching
1. Ensure the Discharge Deflector is removed and the Side Discharge Guard is
down (Figure 17).
2. Install the Mulching Plug (Figure 15).
Setting up for side discharge
1. Install the Mulching Plug (Figure 15).
2. Lift the Side Discharge Guard (Figure 17) to access to the Pivot Rod (Figure
18).
3. Insert the Discharge Deflector tabs under the Pivot Rod.
4. Lower the Side Discharge Guard onto the Discharge Deflector.
Rear Flap
Guar
Figure 14
Figure 15
Mulching
Plug
Bagger
ssembly
Figure 16
Tab
Slot
Discharge
Deflector
Figure 18
Tabs
Pivot Rod