INSTRUCTIONS FOR ADJUSTING OR REPLACING BELT
BELT ADJUSTMENT
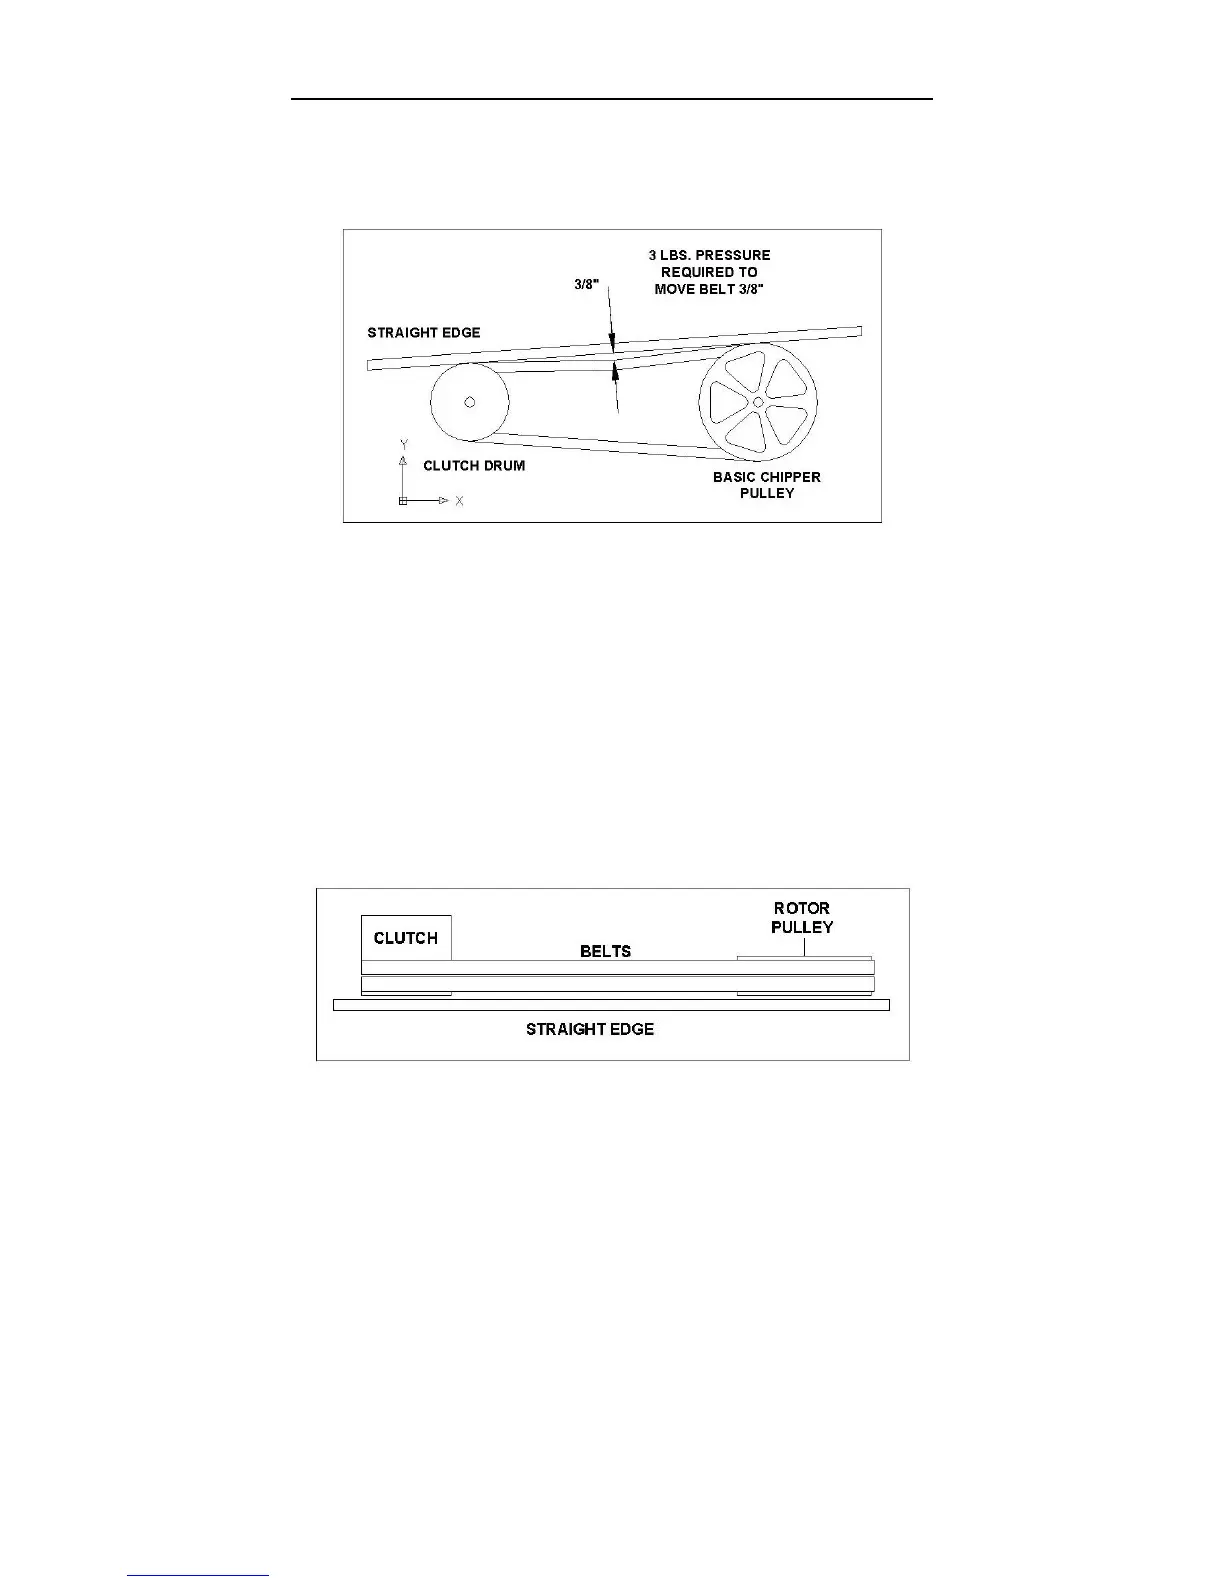
The belt on your chipper should deflect 3/8” under three pounds of pressure as shown in figure
1 below. If it doesn’t, adjust per the following directions.
Figure 1
• Remove belt guard.
• Loosen engine bolts.
• Tighten or loosen the nut on the belt tensioner until you have the correct tension as
shown in figure 1.
• Retighten engine bolts.
• Check alignment of the clutch (item #27, pg 29) with the drive pulley (item #21, pg 29) by
placing a straightedge across both faces as shown in figure 2. If adjustment is
necessary, correct alignment by moving rotor pulley in or out on the rotor shaft. Do not
make adjustment by moving the clutch on the engine shaft.
• Replace belt guard.
Figure 2
BELT REPLACEMENT
• To replace the belt, follow the above belt adjustment directions.
• After you have loosened the engine bolts, remove the old belt and replace it with a new
one. Always replace both belts as they come in a matched set. This is required for
proper operation.
• Set belt tension and alignment per above directions.
NOTE: Check and re-tighten belt after initial break-in period, one hour of use.
25