6
7.1 Handling of exhausted batteries
Usable life alarm (only valid for Pac 3500)
– Before the end of the device’s usable life, a warning period begins. During
this period the remaining life time flashes just after turning the device on, e.
g. "30" / "d".
– To acknowledge this message
[OK]
must be pressed. After that, the device
can be used normally.
– After the usable life has expired the text "0" / "d" will alternate in the display
and cannot be acknowledged. Dräger Pac 3500 will not longer measure and
may be returned to Dräger for recycling or disposal.
7.2 Device alarm
– The alarm and LED will be activated three times, periodically.
– The
[X]
icon is flashing, a 3 digit error code will be shown in the display.
– If an error appears in the display see section 9 and if necessary please con-
tact Dräger.
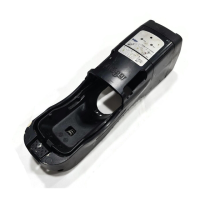
8 Changing the sensor
– Turn the instrument off.
– Unscrew the 4 screws from the back case.
– Open the front case and remove the battery.
– Remove the sensor.
– Insert the new sensor.
WARNING
Danger of explosion!
Do not throw used batteries into fire or try to open them by force.
Dispose of the batteries in accordance with local regulations.
Spent batteries may be returned to Dräger for disposal.
WARNING
Danger of explosion! Do not change the sensor in explosion-hazard areas.
Substitution of components may impair intrinsic safety!
To prevent ignition of flammable or combustible atmospheres, and to avoid
compromising intrinsic safety of the equipment, read, understand, and
adhere to the maintenance procedures below.
Take care when changing the sensors not to damage or short out compo-
nents, and do not use sharp tools to remove the sensors.
Notice
Replace sensor when instrument can no longer be calibrated!
Notice
Use only the DrägerSensor XXS of the same gas type!
– Insert the battery according to specified polarity (+/–).
– Place front case back and fasten it by tightening the 4 screws of the back
case.
– After inserting the battery a sensor warm up time of around 15 minutes is
needed.
– Countdown in seconds is shown until warmup time has passed.
– After changing the sensor and after the warm up time is finished the
instrument must be calibrated.
9 Trouble shooting warnings/errors
Error
code
Cause Remedies
010 "Horn alarm elements" X-dock
test failed
Repair if necessary and test again
with X-dock
011 "LED alarm elements" X-dock test
failed
Repair if necessary and test again
with X-dock
012 "Vibration alarm elements" X-dock
test failed
Repair if necessary and test again
with X-dock
013 Parameter check failed Correct parameters and test again
with X-dock
014 Instrument locked by X-dock Cancel X-dock lock
100 Flash/EEprom write failed Contact Service
104 Flash check sum wrong Contact Service
105 Broken or missing O
2
sensor Replace O
2
sensor
106 Most recent settings restored Check settings and recalibrate
instrument
107 Self test failed Contact Service
108 Configuration not up-to-date Reconfigure with the latest Dräger
CC-Vision software version
109 Configuration error Reconfigure instrument
161 Set operating time of the instru-
ment expired
Set new operating time of the
instrument
210 Zero-point/fresh air calibration
failed
Perform zero-point/fresh air cali-
bration
220 Span calibration failed Perform span calibration
221 Calibration interval expired Calibrate instrument
240 Bump test failed Perform bump test or calibration
241 Bump test interval expired Perform bump test or calibration