ASSEMBLY
- 8 -
WARNING: Before carrying out any assembly,
adjustment or replacement procedures ensure that
the power is switch off and the machine is
unplugged.
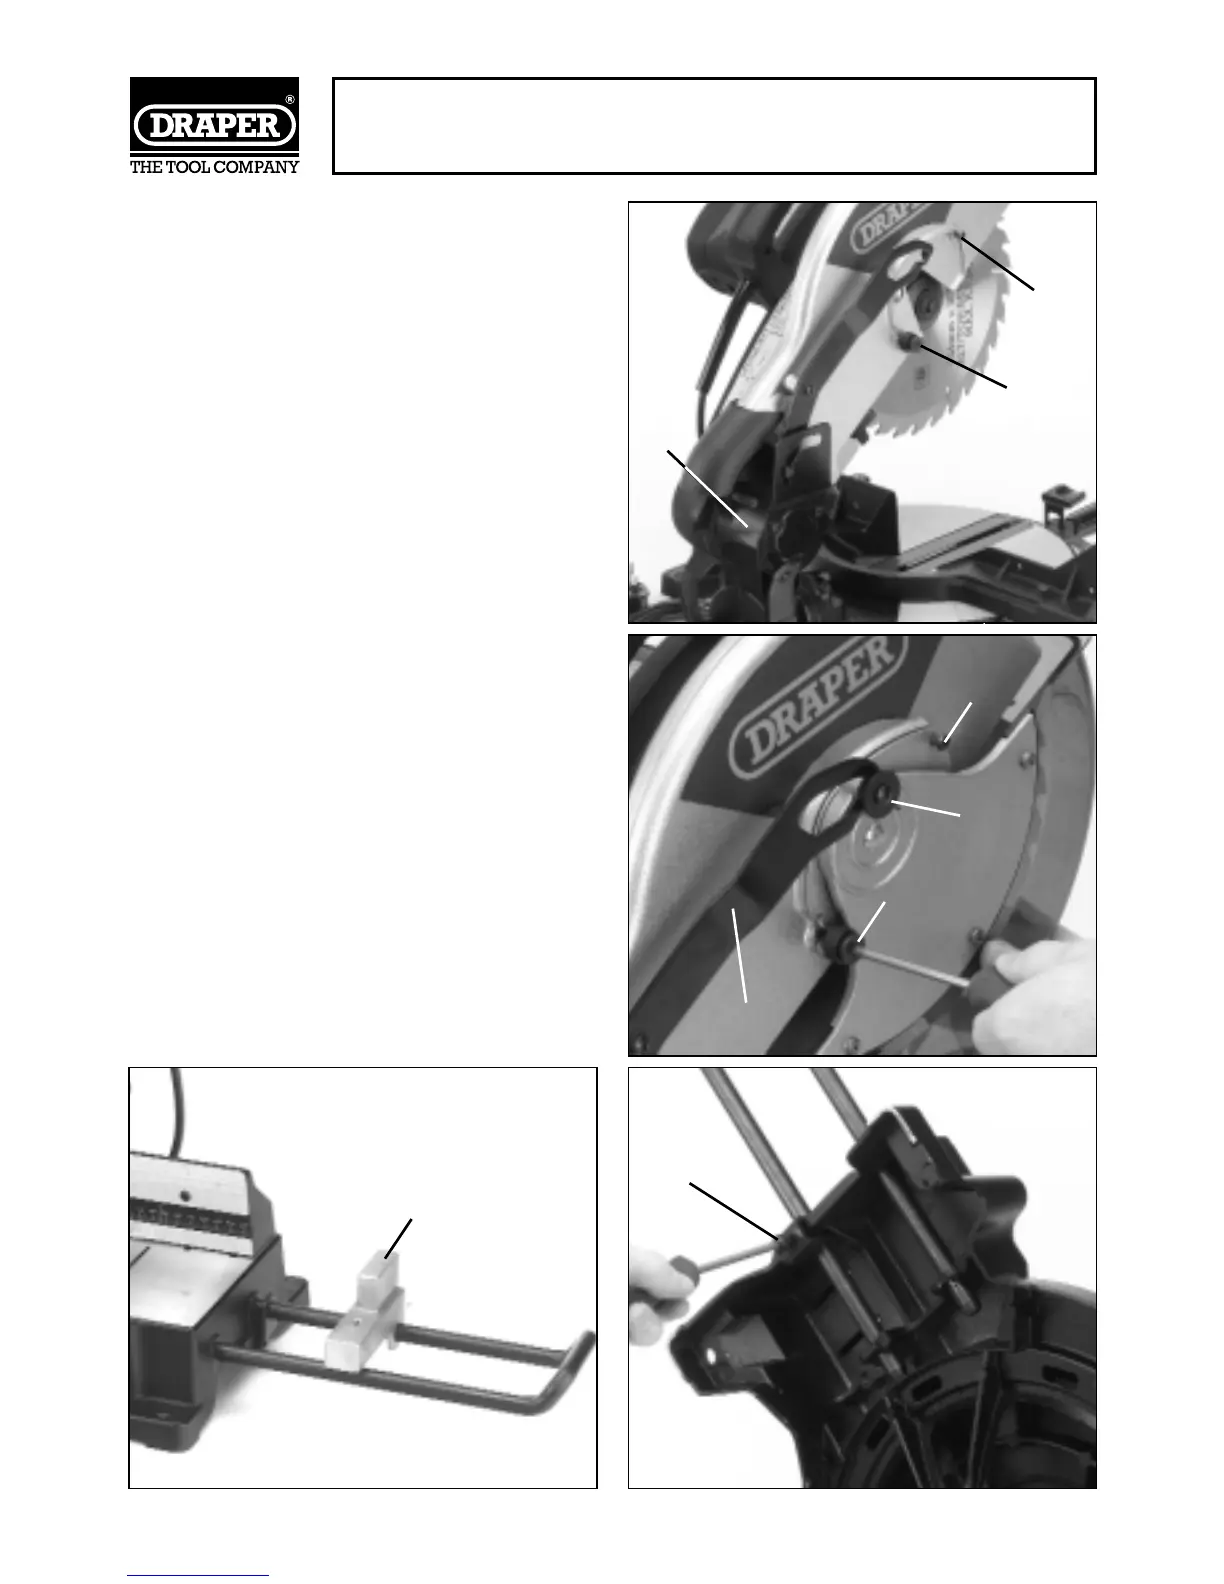
ASSEMBLING THE LOWER BLADE GUARD
(Fig.3 & 4)
The mitre saw is equipped with a handle latch ✪✌
which is used to lock the mitre saw in the lower
position. To release, push the handle down slightly
and pull the pin back. The saw head can now be
raised to it’s up position.
Remove screw ✫✌ and loosen screw ✬✌. Remove
screw, shim and washer ✭✌ on the lower blade guard.
Slide the lower guard assembly into position under
screw ✮✌ then rotate the lower guard assembly until
the hole in the bracket lines up with the threaded hole
✰✌.
Replace the screw in hole ✰✌, tighten screw ✮✌ and
replace screw, shim and washer ✭✌. Ensure this is
located through the blade guard link ✯✌.
Note:With the blade guard link attached the guard
should raise as the head is lowered towards the table
and drop to cover the blade as the saw head is raised
up. Ensure this is fitted correctly.
ASSEMBLING THE WORKPIECE SUPPORT
(Fig.5 & 6):
Carefully rest the saw on a stable surface so that the
underside is easily accessible.
Fit the ‘U’ bracket ✱✌ over the rear of the two outer
holes and pass the extension arm through the outer
set and the inner set of holes making sure they pass
through the second set fully. Tighten the screw in the
‘U’ bracket to secure the arm in place.
For the right side extension arm follow the steps listed
above, fitting the end stop ✲✌ prior. It should be
inserted on to the rear bar and fixed using the winged
bolt supplied.
Fig.3.
Fig.4.
✯✌
✫✌
✬✌
✪✌
✭✌
✰✌
✮✌
Fig.5.
✱✌
Fig.6.
✲✌