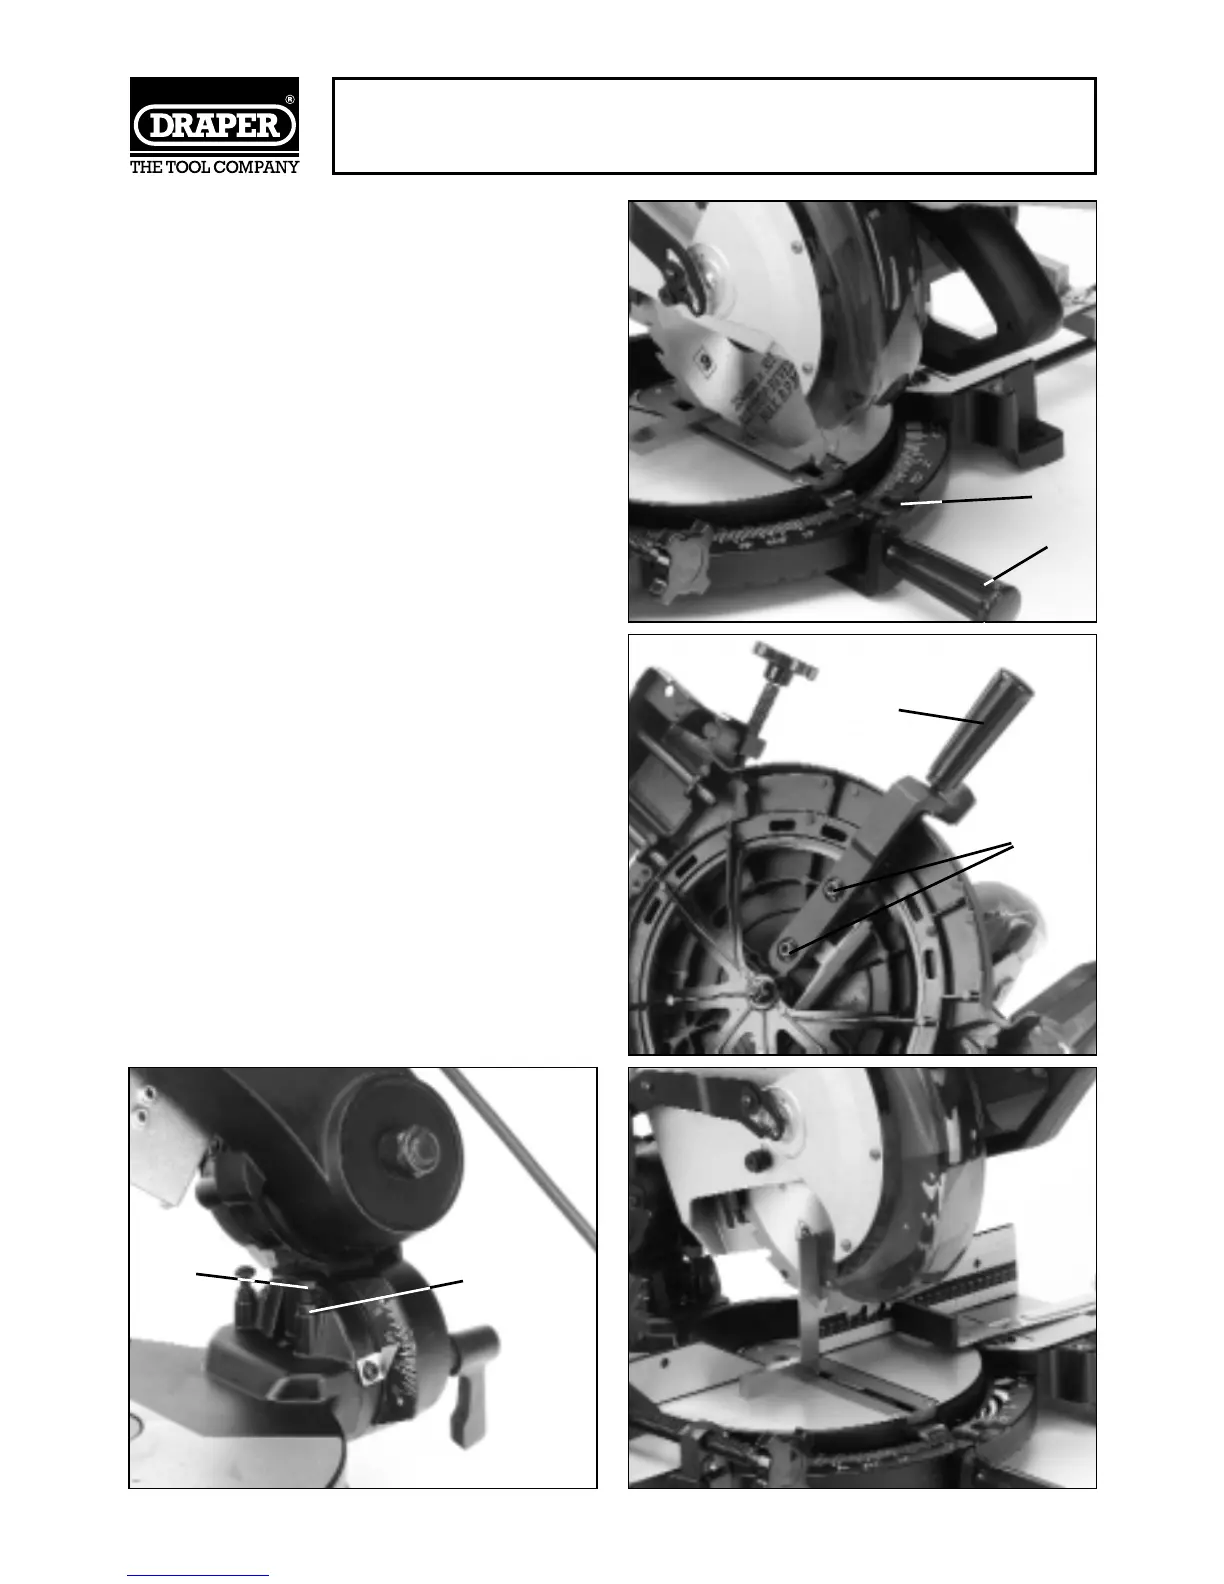
ALIGNING THE BLADE (Fig.11 - 14):
The mitre saw was assembled, aligned and inspected
before shipment. Alignment should be checked and
any adjustments made to ensure a more accurate cut.
Loosen handle ✶✌ and press down lever ✷✌ to move
the table round to 0°. Release lever ✷✌ and the table
should click into place. Retighten the handle. Lock the
saw head in the down position.
Lay an engineering square (Stock No.34049) flat on
the table butting up against the fence and surface of
the blade (Fig.11). Avoid the teeth on the blade to
give a true reading. If no gap is present the table does
not require adjustment.
If adjustments are required, rest the saw so the
underside is accessible and loosen both the mitre
arm bolts ✸✌. Return the saw to it’s upright position
and loosen handle ✹✌.With out using the lever turn
the saw and table with the handle until the blade and
fence fully touch the length of the square.When set
secure the mitre bolts on the underside.
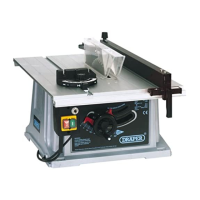
Hold the saw head in the half way position with the
blade guard raised up out of the way. Stand the
engineers square on the table and rest it against the
blade (Fig.13). Avoid the teeth for a true reading. If
the square lays flat against both surfaces, no
adjustment is required. If adjustment is required
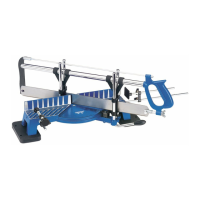
loosen bolt ✺✌(Fig.14) and locking nut ✻✌. Either
screw the bolt in to have the sawhead tilt more to the
right or unscrew to adjust to the left.When the blade
is true, using two 10mm spanners lock the bolt with
the nut.
Check and adjust the sawhead in the same manner
when set at 45° using a protractor instead of the
engineers square. If the head need adjusting use the
second locking bolt to make the fine adjustments
again locking it when set.
The depth stop limits the blades downward travel. It
allows the blade to go below the work table enough to
maintain full cutting capacities. The depth stop is set
and cannot be adjusted.
- 10 -
OPERATION & USE
Fig.11.
✷✌
✶✌
Fig.12.
✹✌
✸✌
✺✌
✻✌
Fig.13.Fig.14.