07-01480C 2010-01 5 Dri-Eaz Products, Inc.
Monthly
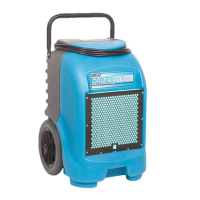
Check coils. Dirty coils can cause the unit to overheat.
Clean when visibly dirty. See Fig. E.
1. Unplug unit
2. Remove housing, locate coils
and allow coils to dry if wet.
3. Vacuum coils surfaces until
clean, being careful not to let the
nozzle touch the fins, as that may
cause damage by bending them.
Check catch basin tray, and
clean when dirt and debris are
present.
1. Wipe clean with a rag.
Check drain hose.
1. Look for obstructions.
Disconnect and clear any debris
present.
2. Reattach gravity drain
hose.
Inspect filter cover
1. Remove the filter cover
(this can be done without
removing the housing).
2. Vacuum off any visible dirt,
or wash with mild soap and
water.
3. Allow to dry thoroughly
before replacing.
Annually
Have the pump system
inspected by the Dri-Eaz
Service Department (800-932-3030) or by a qualified
service center.
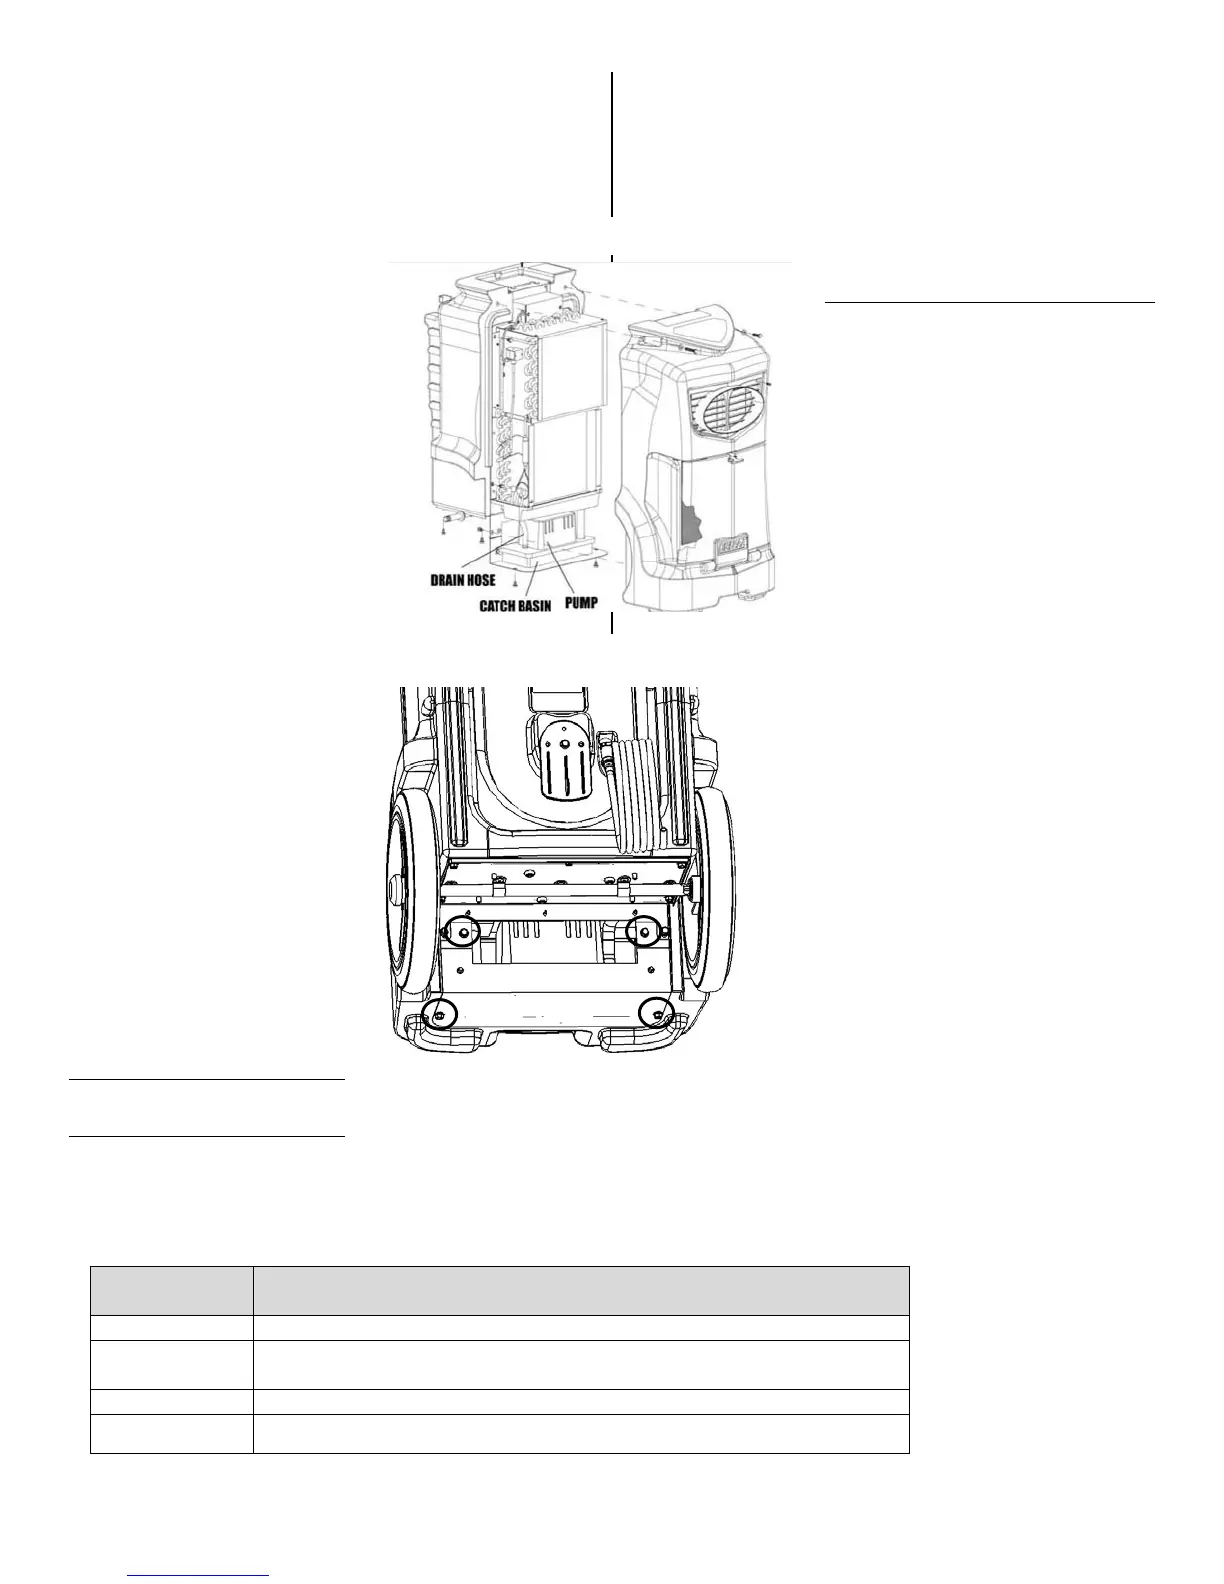
To access the Evolution LGR pump, remove the four
bolts located at the bottom of the unit (Fig. F). Use a ⅜-
in. nut driver or socket.
TRANSPORT AND
STORAGE
NOTICE: Handle the unit carefully.
Do not drop, throw, or place the unit
where it could fall. Rough treatment
can damage this equipment and
may create a hazardous condition or
void warranty.
IMPORTANT: Be sure to purge the
water from the pump reservoir
before moving the unit. See the
PURGE function under “How to use
the control panel” on page 4. Note
that the unit must be
plugged in for the Purge
function to operate.
1. Do not expose the
control panel to moisture,
snow or rain when
transporting in uncovered
vehicles.
2. Store and transport
securely to avoid any
damaging impact to
internal parts.
READ AND SAVE
THESE INSTR
ERROR MESSAGES
The table below shows error message that the system may detect. If the display shows an “ER” message, first unplug the
unit and then plug it back in. This may re-set the electronics, and if so, no further action is required. If the error message
reappears, try the solution under “Explanation.” If this still does not fix the problem, contact your local authorized service
center or the Dri-Eaz Service Department at 800-932-3030.
ERROR
EXPLANATION
Problem with electronic control panel. Contact Dri-Eaz Service.
ER 4 Check the temperature or sensor cable. Contact Dri-Eaz Service for
Check the touchpad key. Press and release each key several times.
ER 9 Check for obstructions or kinks in the drain hose.
FIG. F: PUMP ACCESS PANEL
To access the
pump, remove
the four bolts
(circled) on the
lower panel.